
Hardware
LoDi-WiB-EWIII
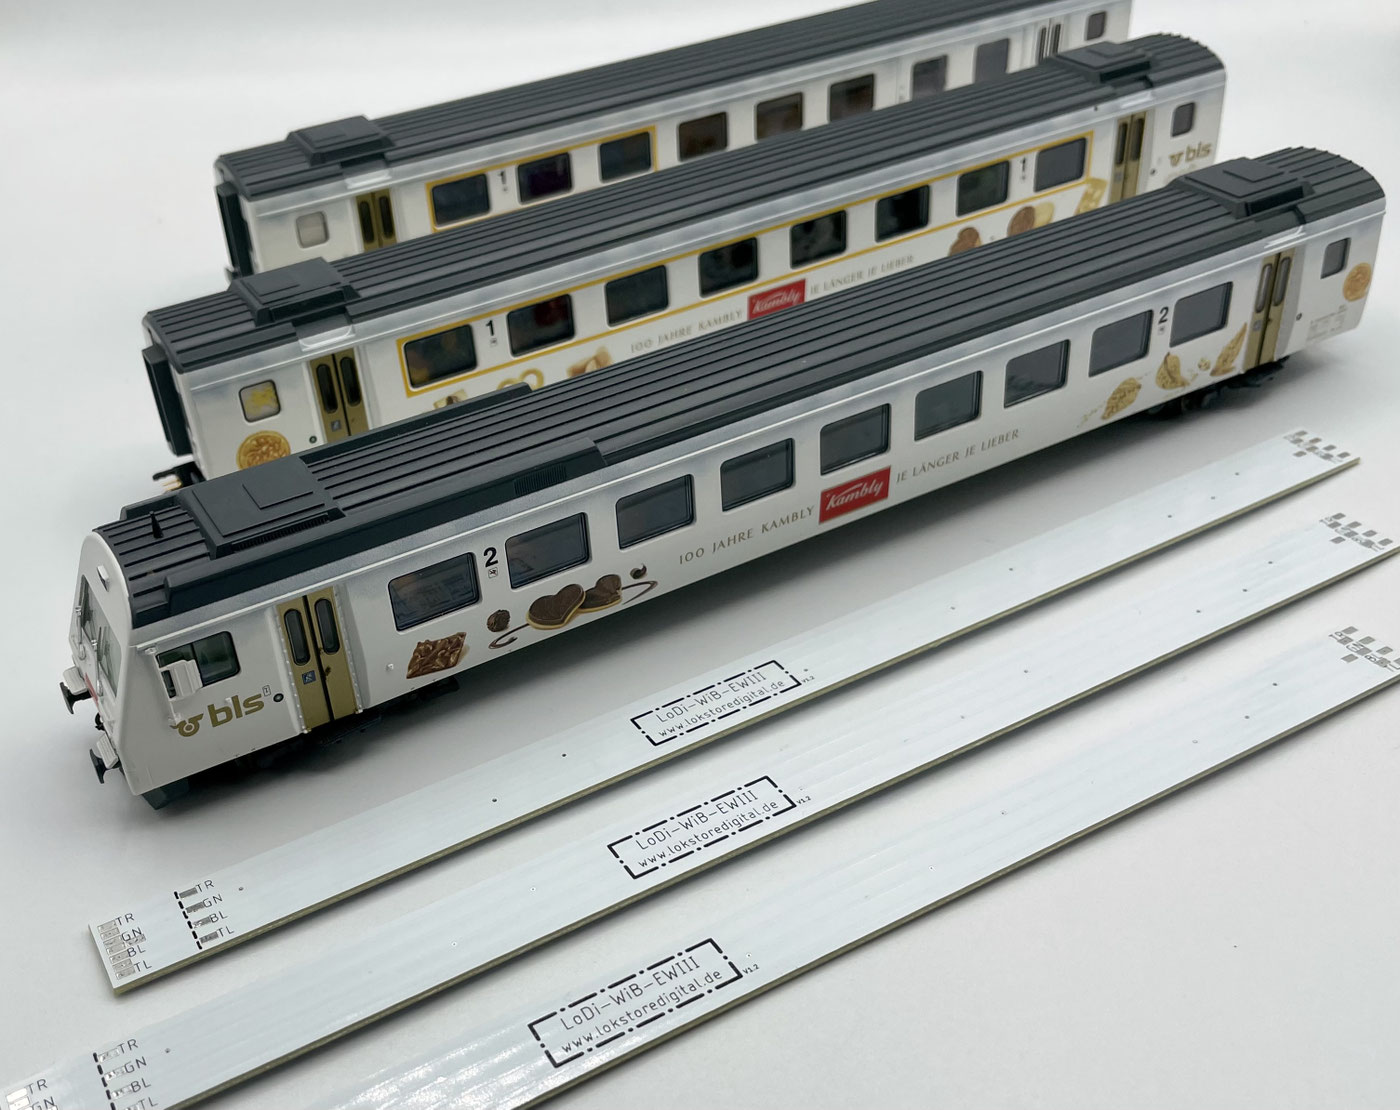
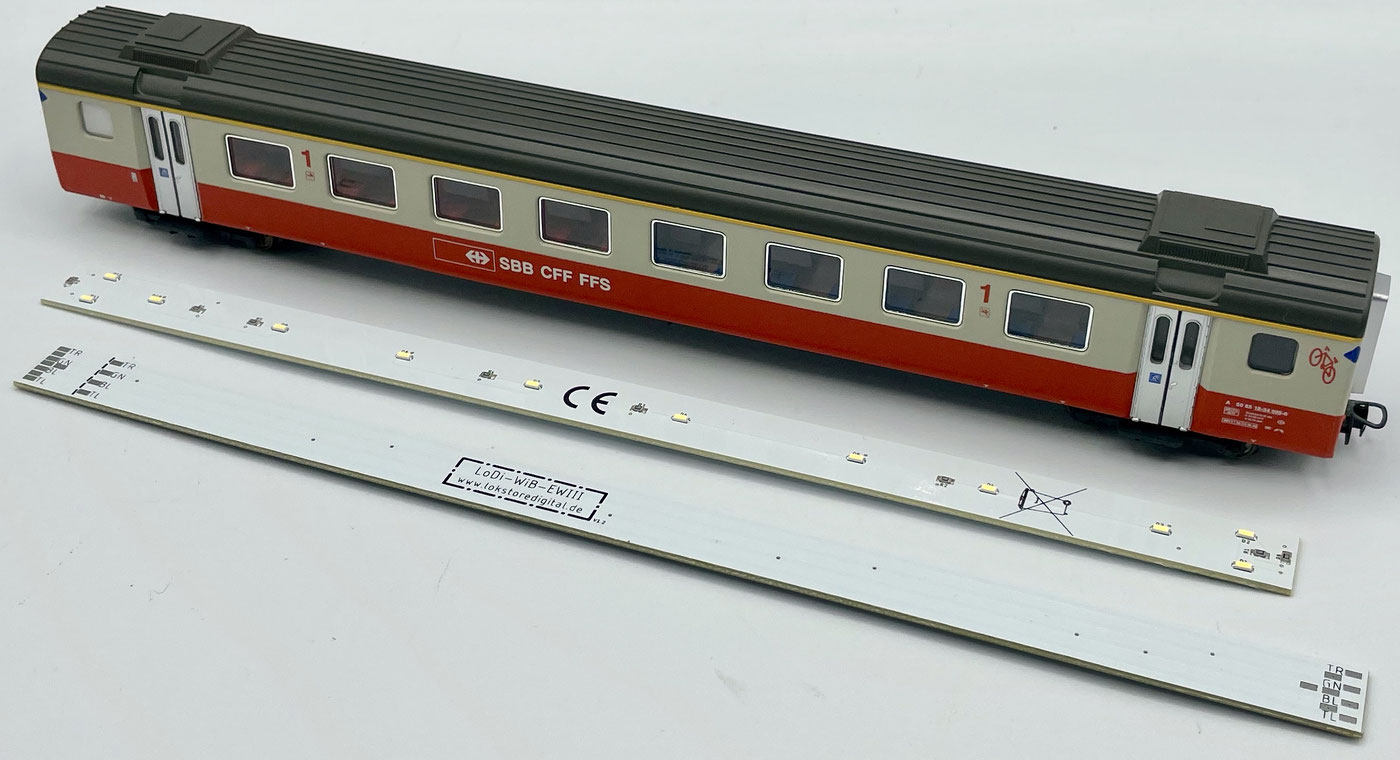
The LoDi-WiB-EWIII is a high-quality, precisely fitting lighting board for digital operation.
Matched to the coach's compartments, it lights them all correctly, right through to the toilet and the vestibule.
Features of the LoDi-WiB-EWIII
Simple installation, optimised for vehicles with full RailCom capability.
- A lighting board for all Liliput EWIII series, or coaches up to 24 centimetres long
- The board can be separated for the driving trailer
- The brightness can be set from the main decoder
- Very low current draw, <15 mA
- Power transfer across the board (up to 4 poles)
1. Connections on the LoDi-WiB-EWIII
Several solder points are shown on the LoDi-WiB-EWIII, which we explain here:
- Red arrow = track right, abbreviated to TR
- Green arrow = AUX (decoder switching channel)
- Blue arrow = U+ from the decoder
- Black arrow = track left, abbreviated to TL



2. Installing the LoDi-WiB-EWIII
If you can solder and have already lit one coach or another, the conversion should come easily to you. If you are a beginner, however, or do not feel up to a conversion, get in touch with our partners; they will be glad to make you an individual offer.
You can carry out the conversion yourself?
Then let us begin.
You will need:
- A soldering iron with a fine tip, and solder.
- A cross-head screwdriver and a pair of tweezers.
- A small, fine pair of side cutters as well as, if available, a wire stripper for fine strands.
- Superglue, to fix the boards or wires lightly in place.
- A small 1.5 mm drill bit.
In this example we are converting the AC version with a centre pickup; it differs only slightly from the DC version.
The driving trailer, the pilot coach, is converted first. In our example a LokPilot FX is fitted; you can use any function decoder with a 21-pin interface, and in most cases the decoder is already fitted.
Always keep this in mind when converting!
If you are also gluing figures in and/or working with superglue to fix things, do not fit the coach roofs onto the coaches straight away.
Superglue needs at least 1–2 hours to outgas completely.
If you fit the roof too soon, it could lead to milky or tarnished glazing.
3. The driving trailer / pilot coach
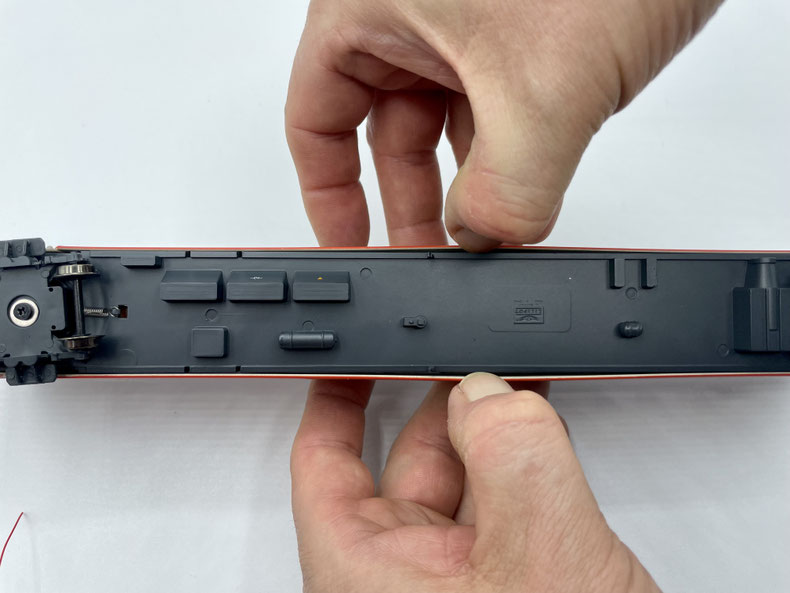
First the coach has to be opened.
To do that, turn it upside down and spread it apart slightly in the middle. Now try to pull the lower chassis out a little. A bit of shaking and wiggling can help release the coach roof.
The driving trailer/pilot coach has to be pulled out towards the rear. Do watch out for the front steps, as they can break off very easily.
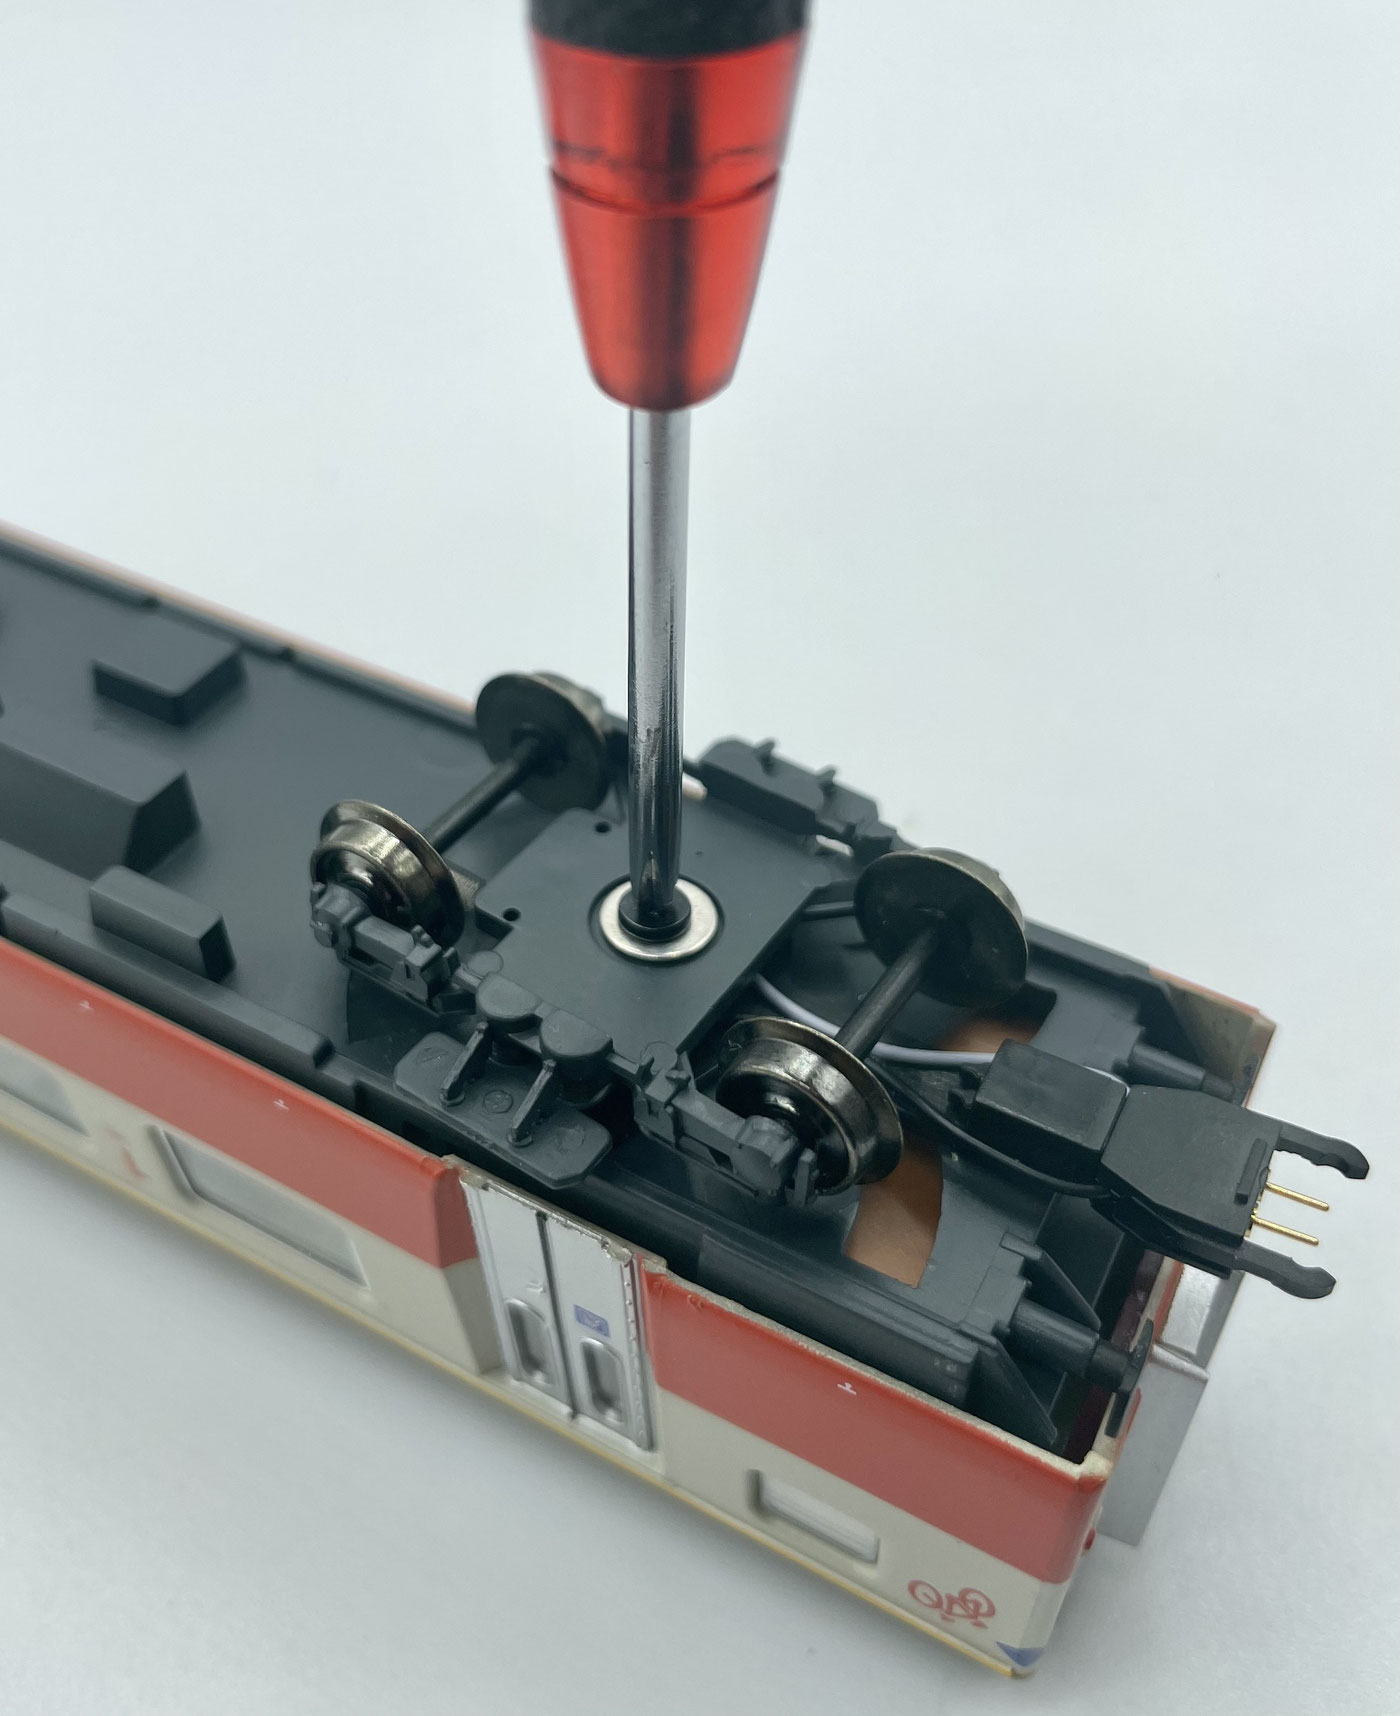
Now first remove the old coupling and unscrew the cross-head screw from the bogie. Note that the bogie can only be refitted one way round.
As the next step you should make a way through for the current-carrying coupling.
In the picture here we have marked with green arrows where it is best to drill through on the compartment coach.
The cable can be fixed to the drawbar with a little superglue.
Take care that the cables can still move; they should on no account be too taut.
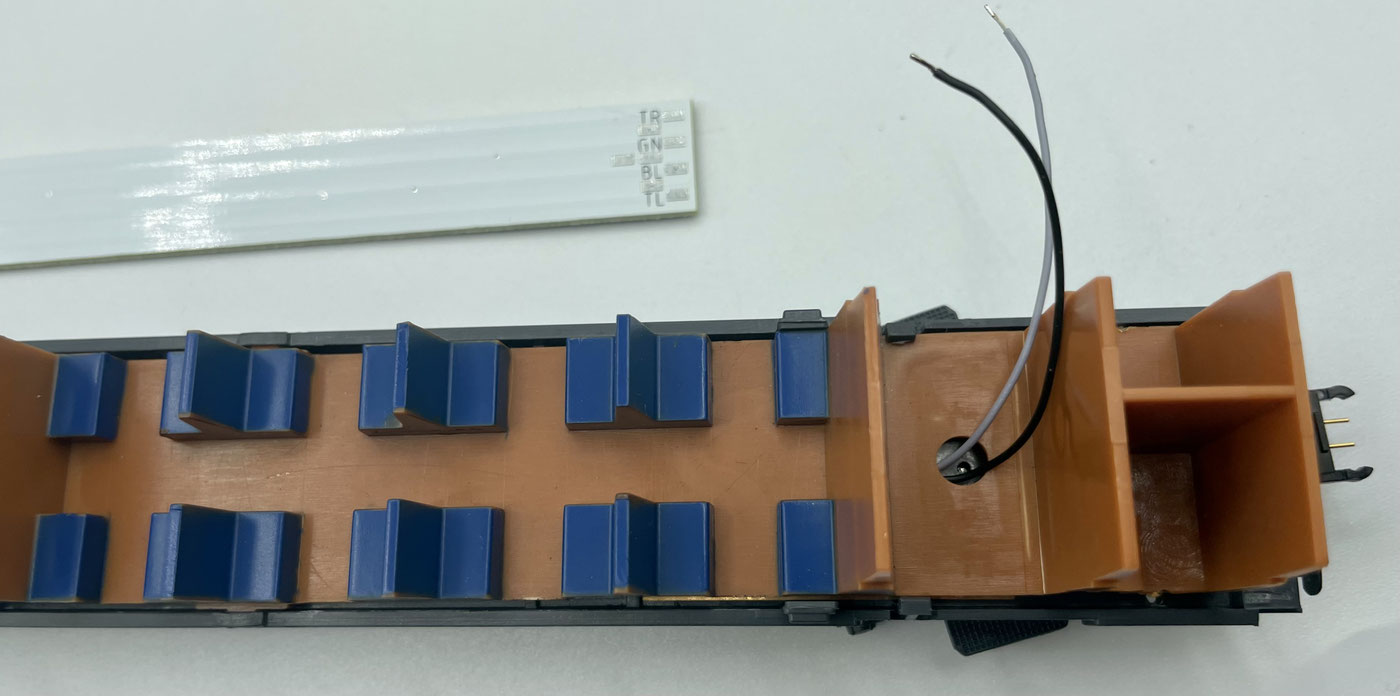
In our example we have now removed the interior fittings, but that is not strictly necessary and only served for a better view here.
Now that the current-carrying coupling is installed, the cables come out at the top right next to the mounting for the bogie; nothing further has to be drilled here.
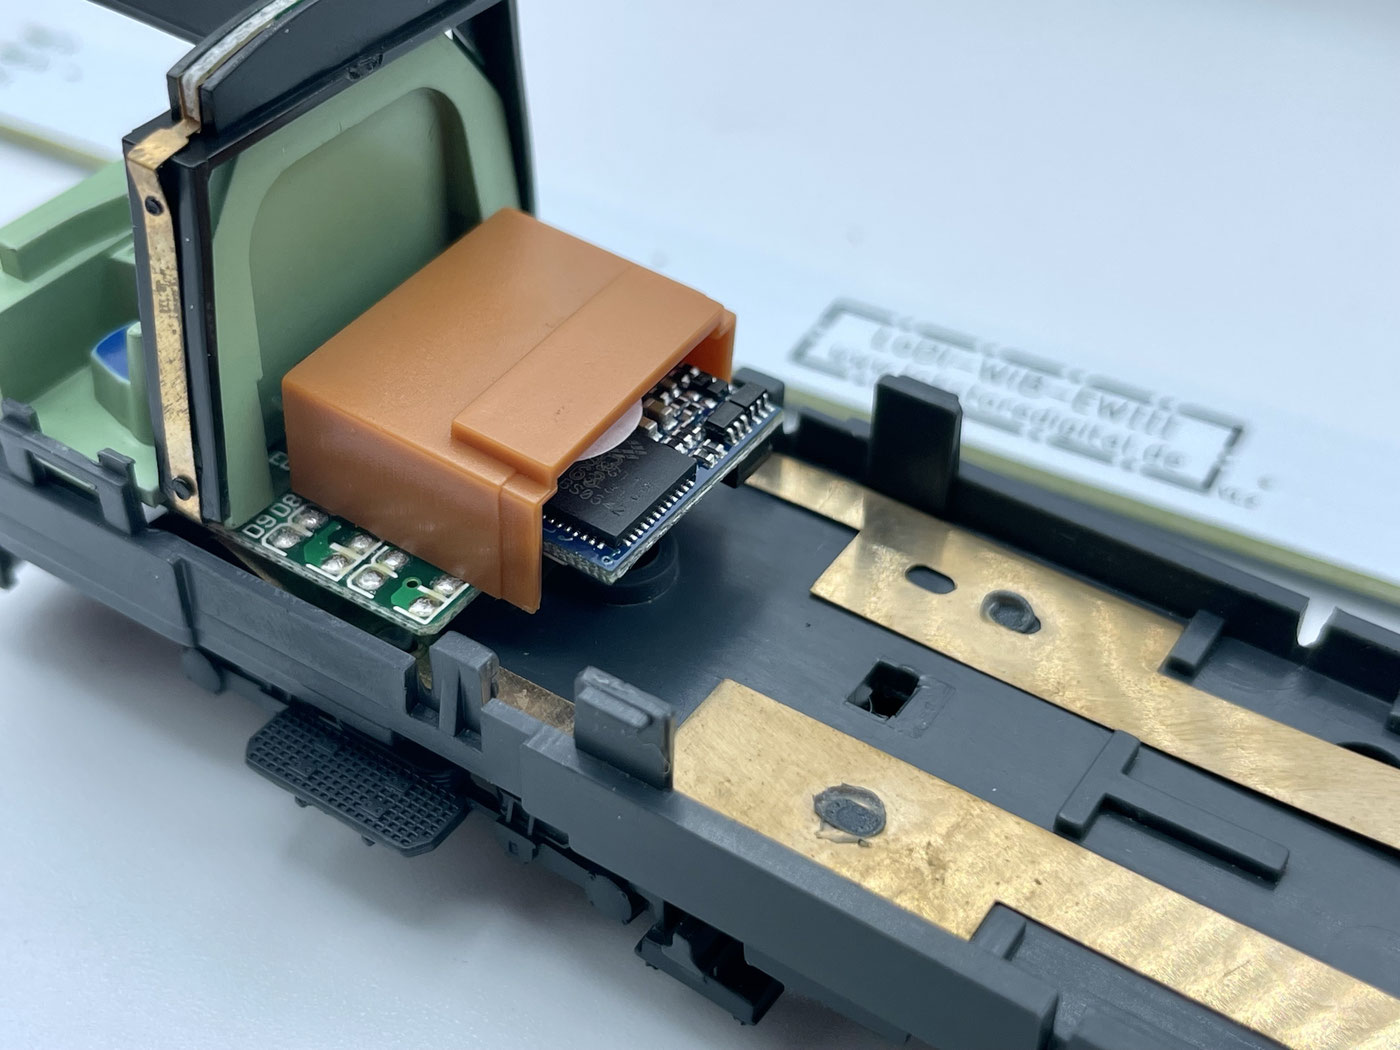
In the next step the connections for the LoDi-WiB-EWIII have to be made on the carrier board. Unfortunately no solder pads are provided here, so we take the voltage partly straight from the 21-pin interface.
First remove the plastic cover over the decoder.
Now carefully pull the decoder off.
We now use the DCC colours for connecting to the LoDi-WiB-EWIII, as described above as well: first we connect the green wire to AUX 1 of the 21-pin interface. That is pin 4 from the left, as can be seen in the picture.
Next we need U+, which can be taken directly from the resistor.
If you now fit the rake with a 4-pole current-carrying coupling, you can take the track voltage on the right-hand side with a red and a black wire and run it to the LoDi-WiB-EWIII.
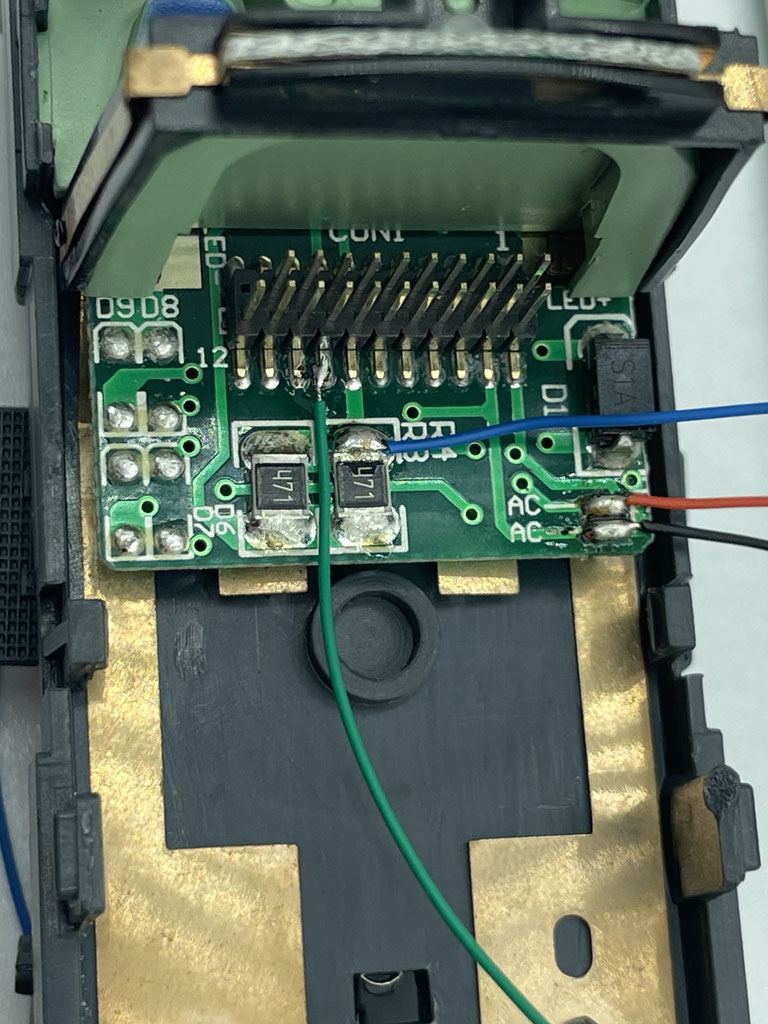
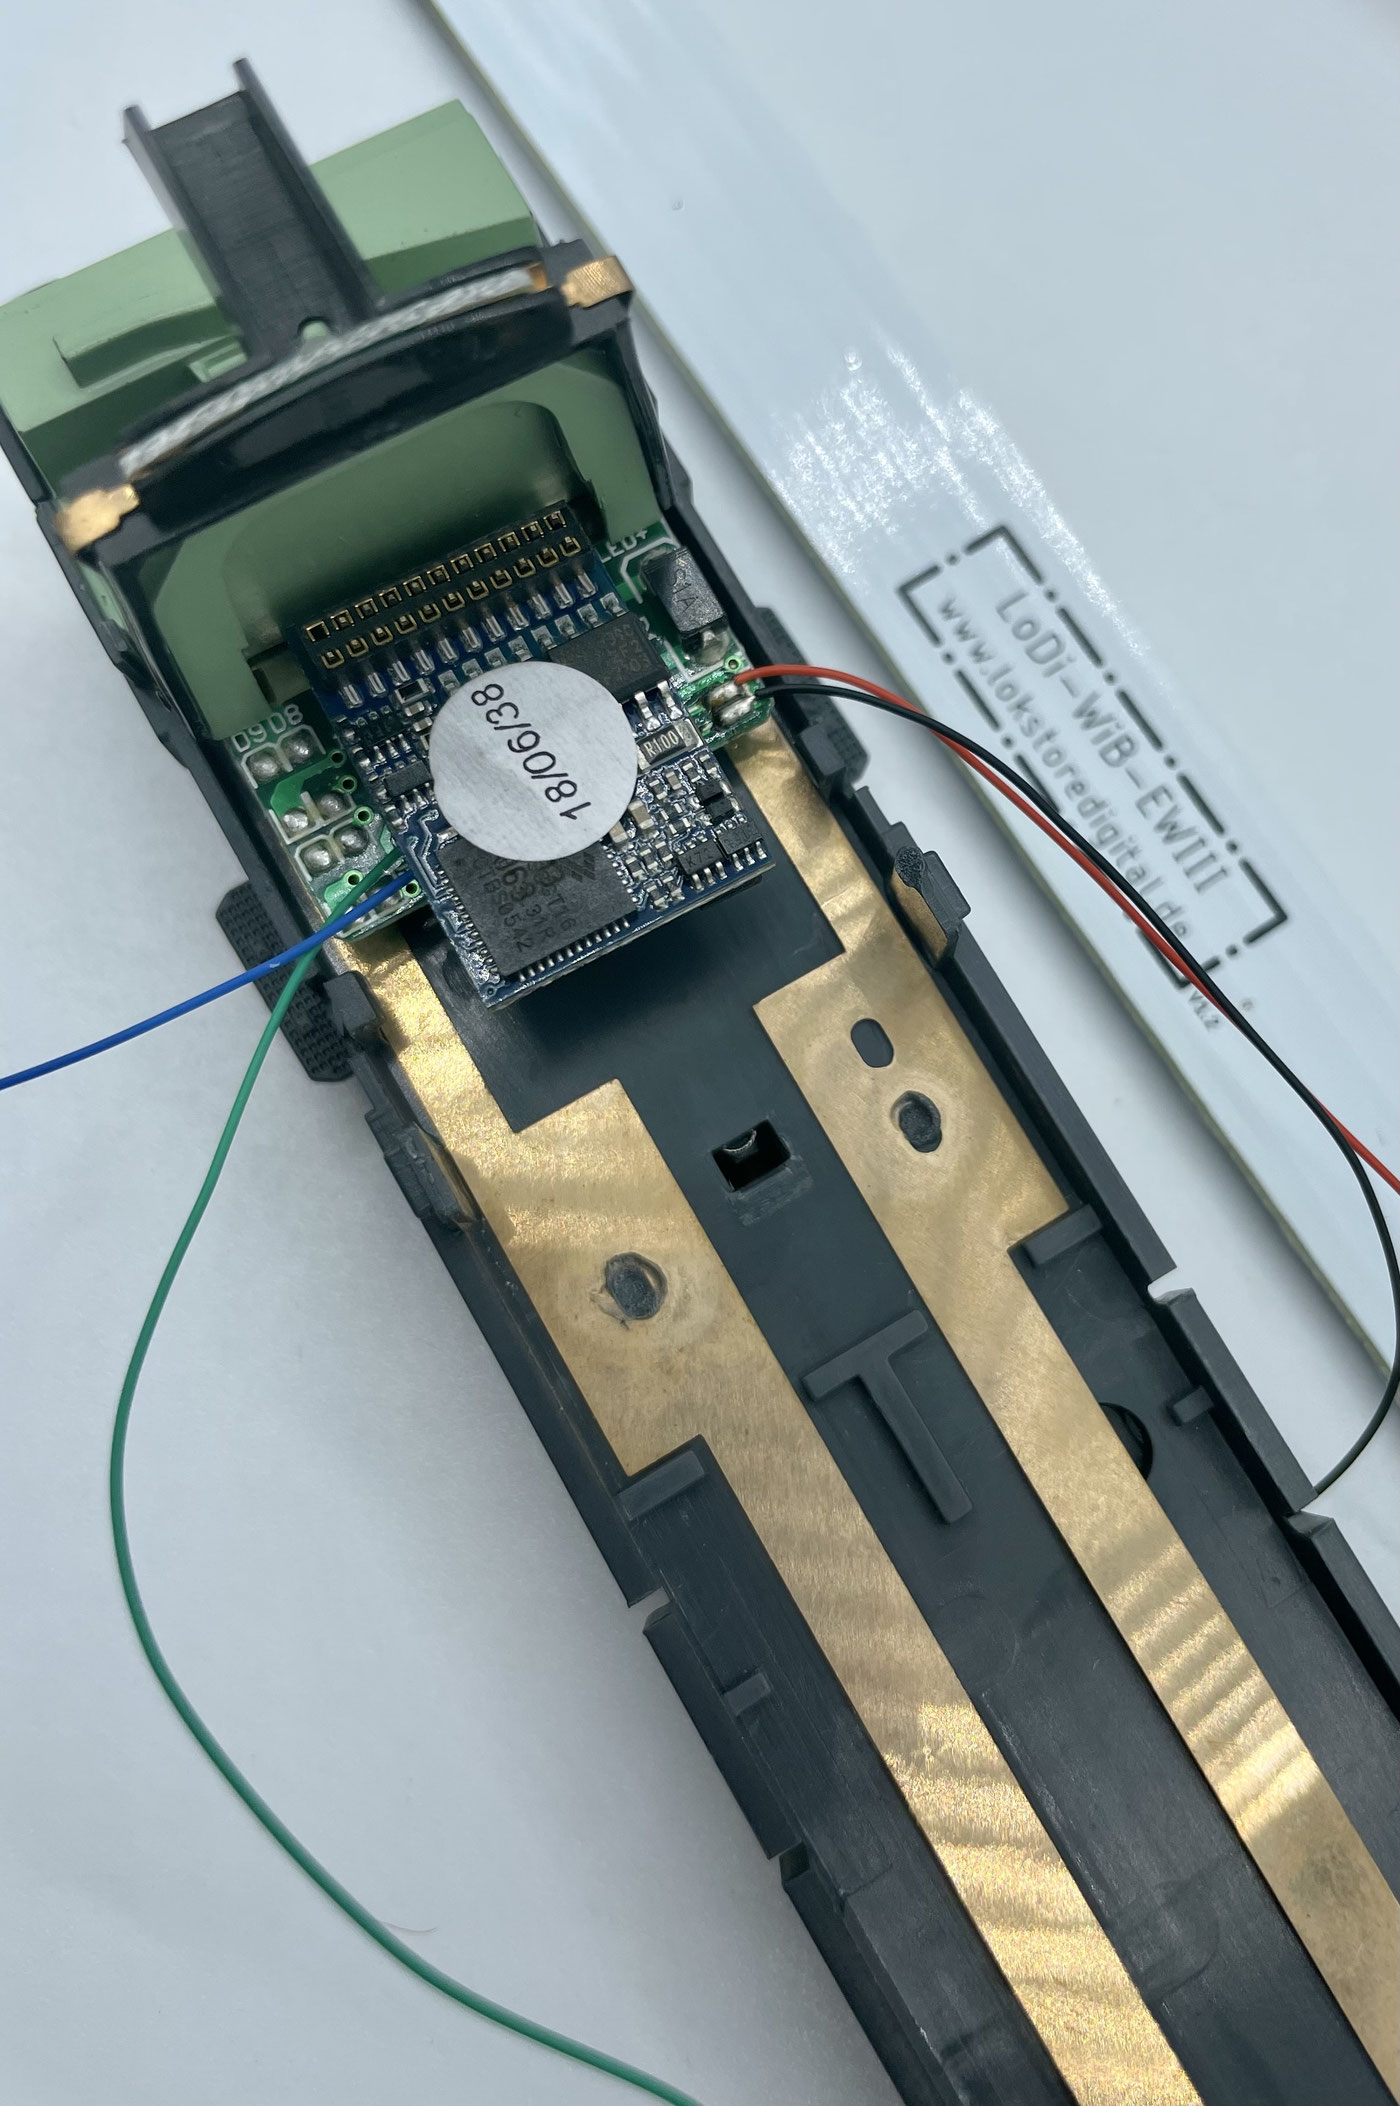
Now plug the decoder back in and reassemble the coach interior.
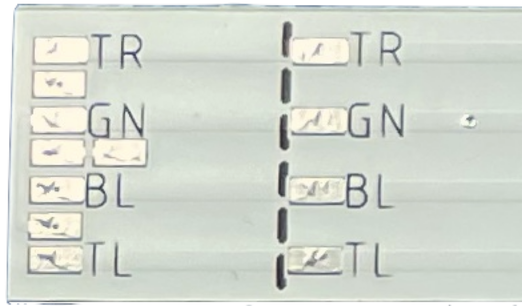
The LoDi-WiB-EWIII is built for use in driving trailers and pilot coaches as well as in compartment coaches. For the pilot coach it is a little too long, which is why we separate the board at the cut lines marked on the WiB. You can see these clearly at the dividing line. Easiest is to cut through with larger side cutters or a small saw.

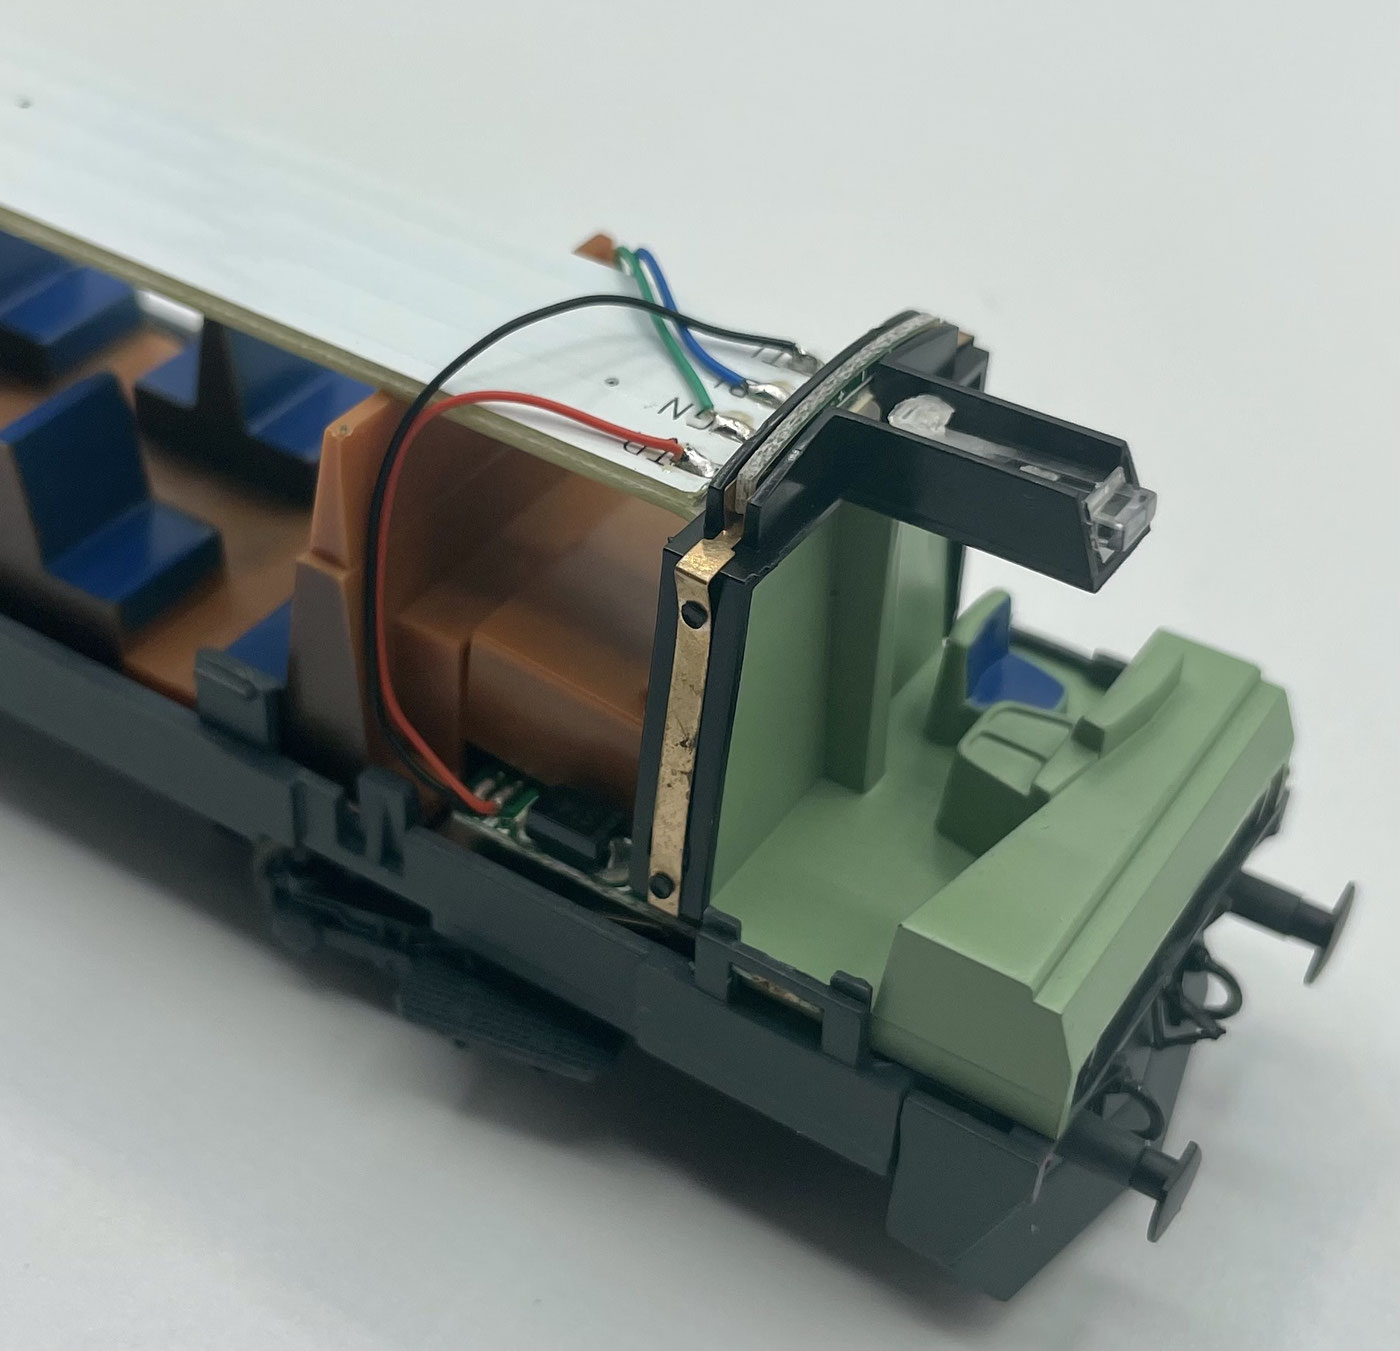
Now lay the board in with the cut side towards the end of the pilot coach.
You can fix the board in the coach with a small drop of superglue.
Now solder the wires on as described above.
Red = TR
Black = TL
Green = GN
Blue = BL
On the opposite side we connect the current-carrying coupling. Since we are using a 2-pole coupling here, we only use GN for AUX and BL for U+.
Take care to connect the wires to the right places; reversing the polarity could otherwise destroy the decoder.
Now reassemble the coach body.
4. Converting the compartment coach
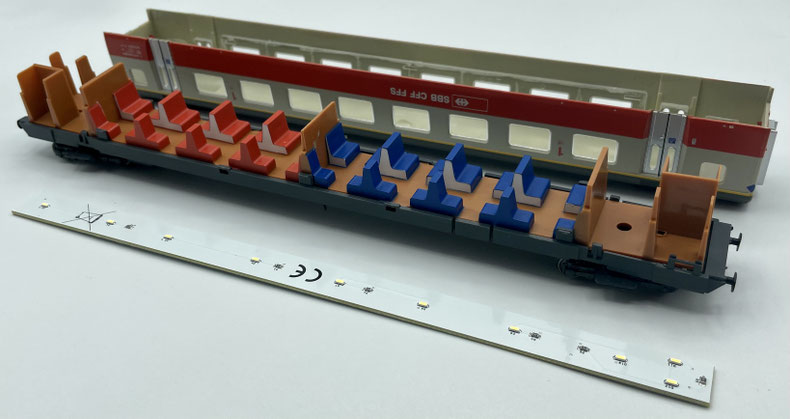
Open the roof as with the driving trailer/pilot coach.
Next you now have to fit the current-carrying couplings into the coach. At least 2 poles have to be carried; a coupling with 4 poles would be ideal to ensure current pickup across the whole train, but that is not a must.
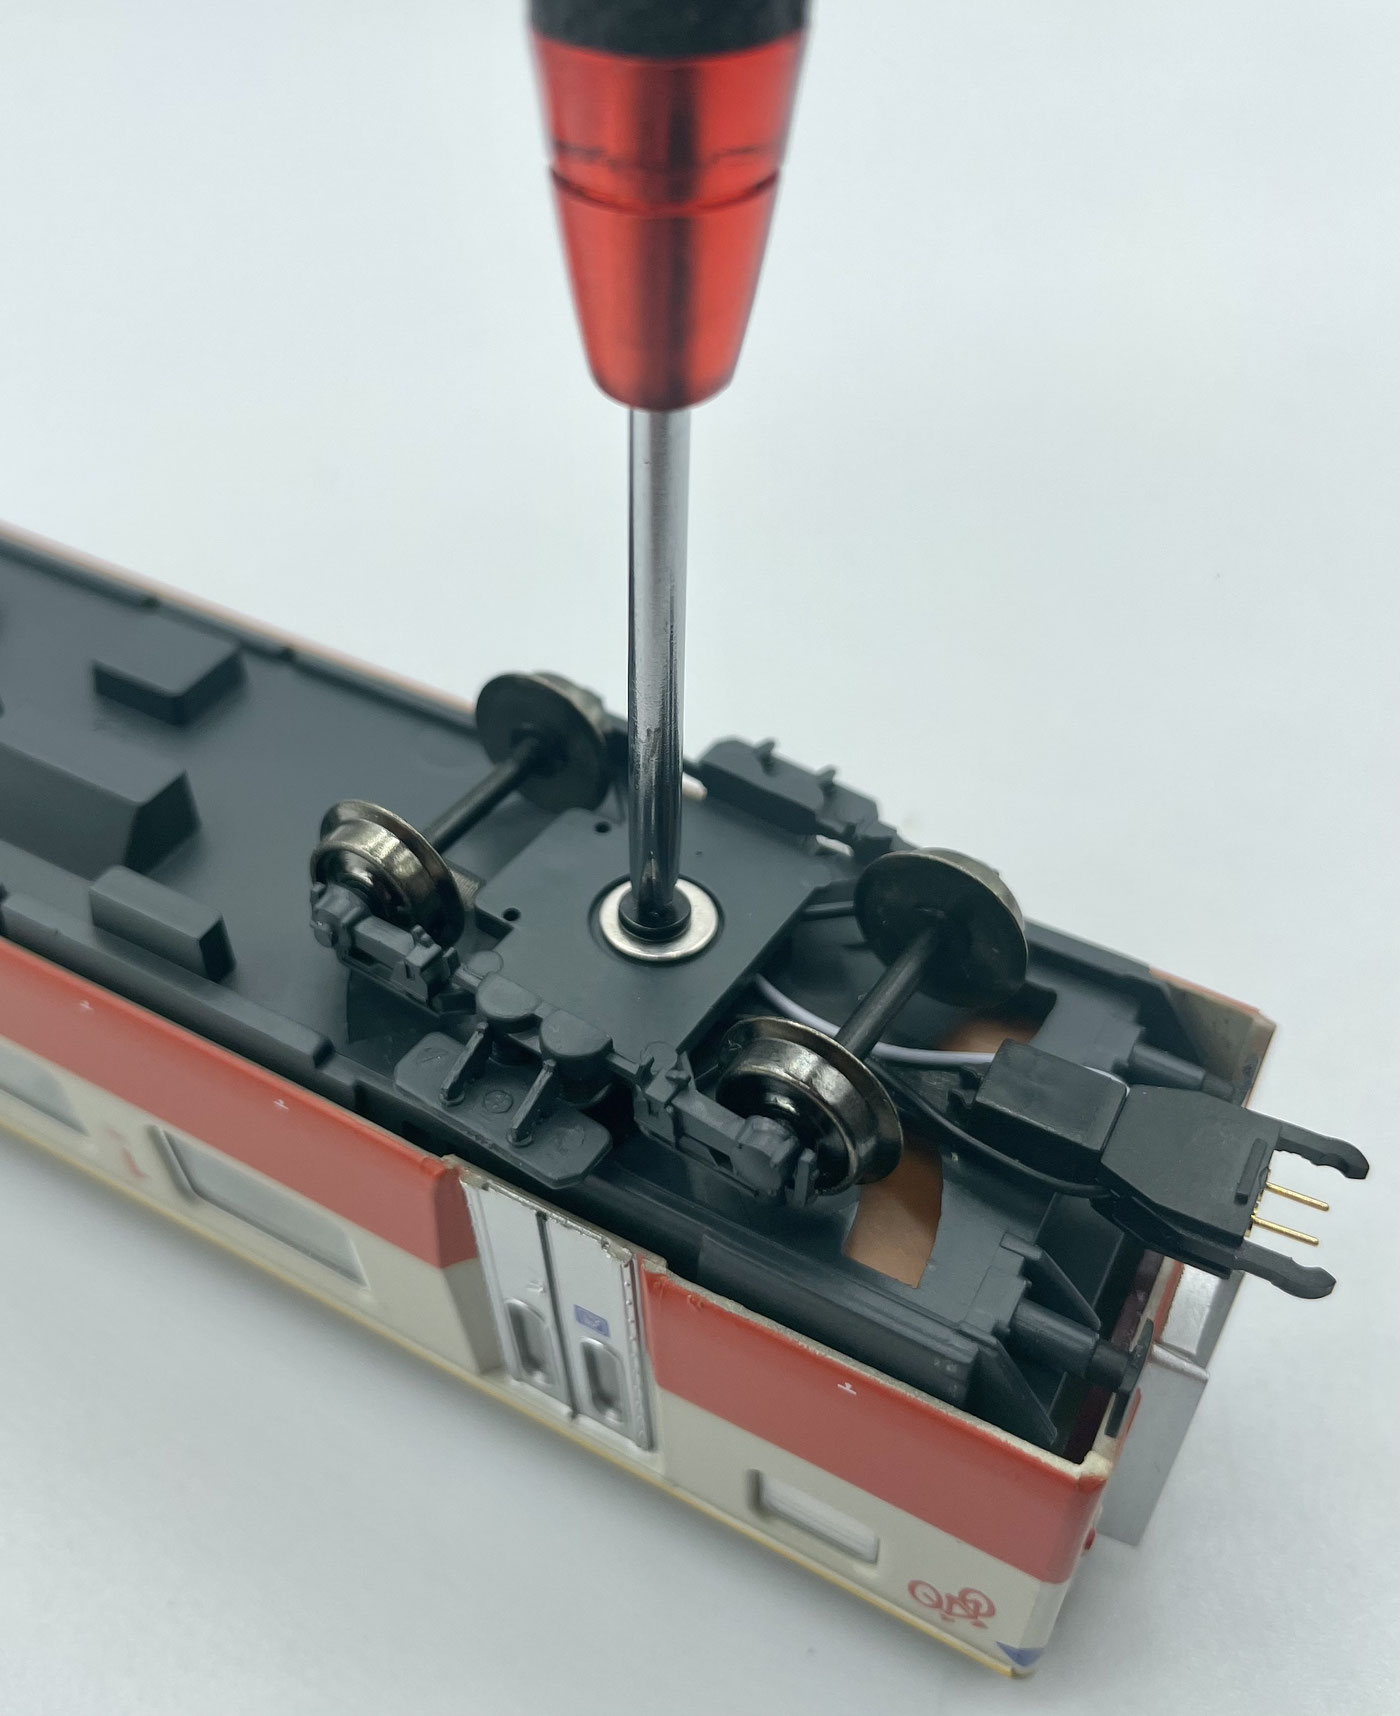
Now first remove the old couplings and then unscrew the cross-head screw for the bogie. Note that the bogie can only be fitted one way round.
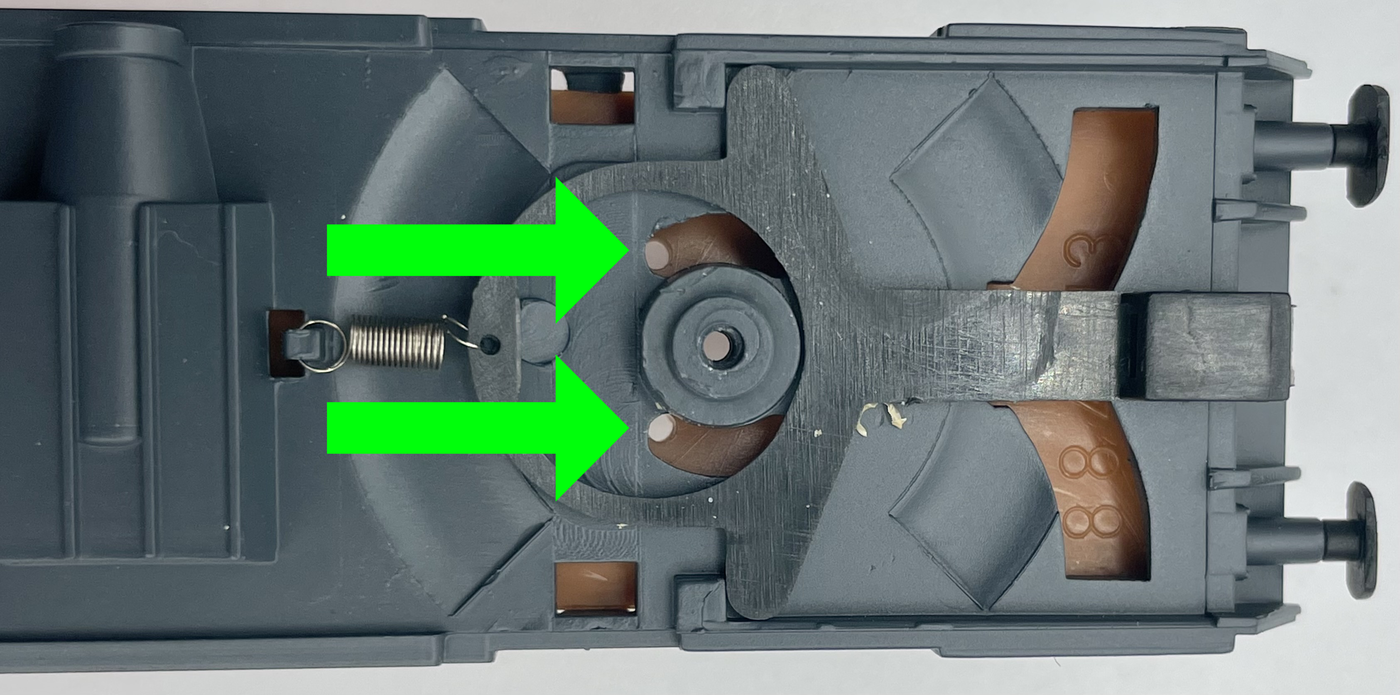
As the next step you should make a way through for the current-carrying coupling.
In the picture here we have marked with green arrows where it is best to come through on the compartment coach.
You are welcome to fix the cable to the drawbar with a little superglue.
Take care that the cables can still move; they must on no account be too taut.
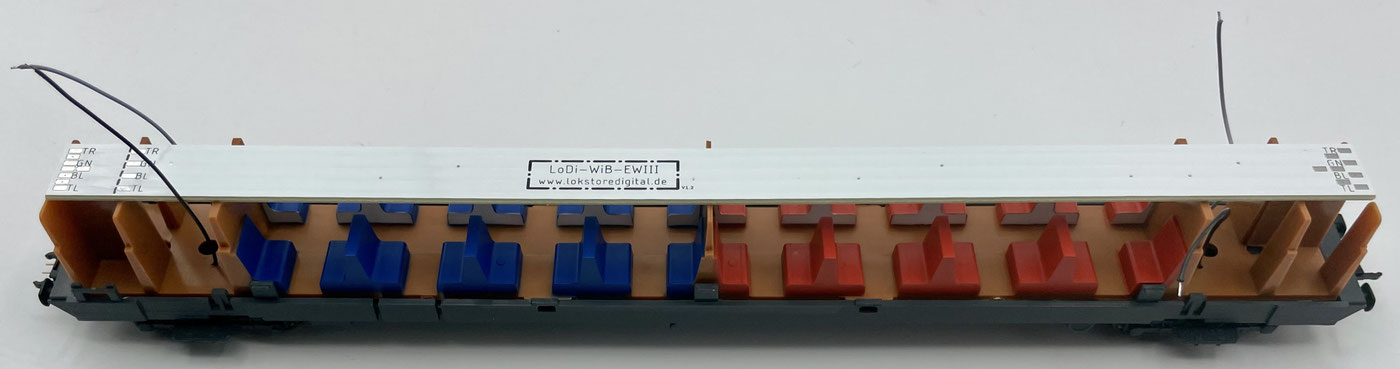
The board is now laid onto the coach roof. It can be fixed with a little superglue.
Now solder the coupling to the board; we follow the driving trailer here, where we soldered the first board to the decoder with blue and green. All other compartment coaches have to be connected in exactly the same way.
In this example we solder GN to the grey wire for AUX and BL to the black one for U+.
Once both wires are soldered on, you can first test the coach, and then fit the roof onto it.
5. Technical data
| Property | Value |
|---|---|
| Dimensions | of the LoDi-WiB-EWIII |
| Length | 26.9 mm |
| Width | 11 mm |
Board thickness: 1.55 mm. Overall height: 3 mm. Weight: 16 grams. The LoDi-WiB-EWIII is built for digital operation; a decoder is needed in the driving trailer.
Can be run from 7 to 25 volts DC.

Visit our forum, where experienced users are glad to help.