
Software
LoDi-Con
The LoDi-Con in the LoDi-ProgrammerFX
The LoDi-ProgrammerFX lets you transfer your own pictures into the LoDi-Con as well as create a backup of the
LoDi-Con and load it back in later. The Programmer can copy locomotives to other command stations or take a screenshot of the LoDi-Con. We show you how that works in the text below.
!!! Careful: this function is only available in "expert mode" and will be dropped with the online database. You can enable expert mode in the toolbar at the top of the LoDi-ProgrammerFX. !!!
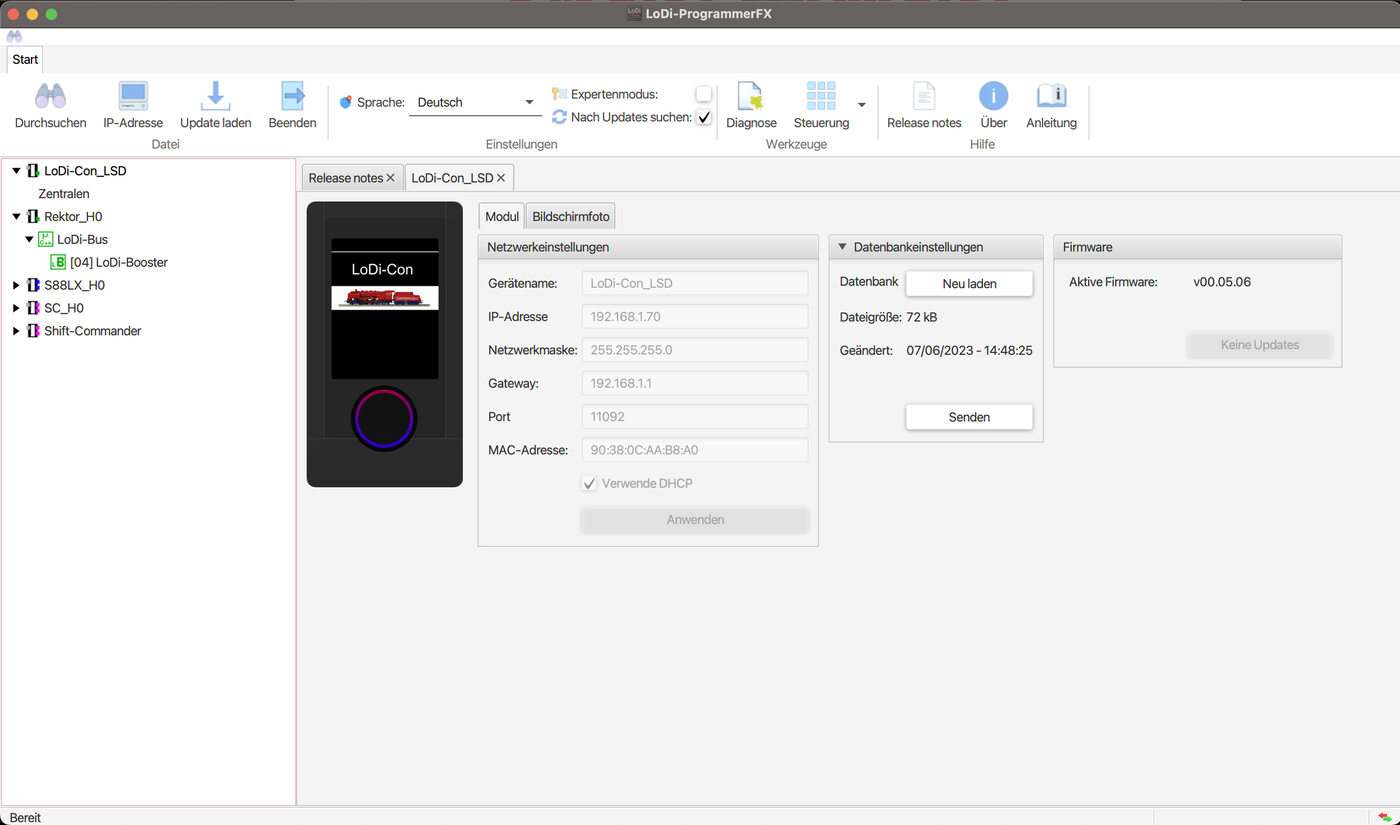
1. The overview
Once you have integrated the LoDi-Con into your network, you can display the LoDi-Con through the LoDi-ProgrammerFX from version 2022.12 onwards. Download and install the LoDi-ProgrammerFX for that.
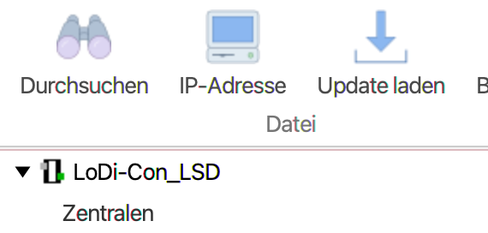
When you now open the LoDi-ProgrammerFX, it will automatically search the network for compatible LoDi devices.
If you have other LoDi components, they are shown in the tree on the left.
In this example, though, we are working with a single LoDi-Con. Several LoDi-Cons can be shown as well.
Clicking the binoculars searches the network again.
(The LoDi-Con has to be on the same network as the computer running the LoDi-ProgrammerFX.)
Clicking the "LoDi-Con" icon now opens the overview in the right-hand part of the Programmer.
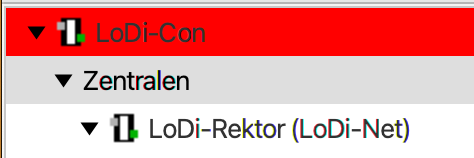
If the LoDi-Con is switched off and no longer reachable on the network, the device "LoDi-Con" is shown highlighted in red in the LoDi-ProgrammerFX. In that case you can keep editing the database. Once you have finished editing the database, switch the LoDi-Con back on and the background turns white again. The LoDi-Con is now connected to the LoDi-ProgrammerFX again.
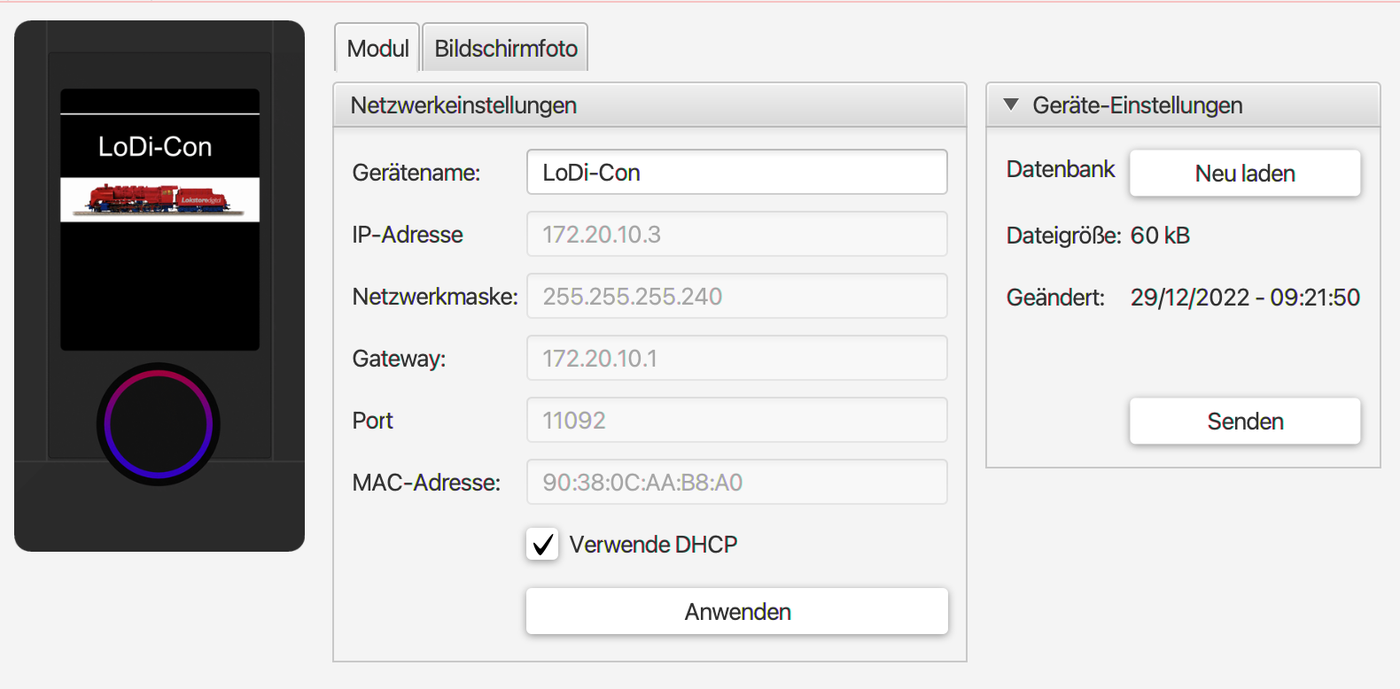
- Module. In this overview you can see the network settings. They cannot however be changed from the LoDi-ProgrammerFX, only on the LoDi-Con itself. You can view the settings here, though.
- Device database. Here the LoDi-Con's current database first has to be read in. On every "Neu laden", the LoDi-ProgrammerFX will create a backup with the date.
- Screenshot. In this menu item you can take a screenshot of the LoDi-Con and save it wherever you like.
2. Reading out the database and selecting a command station
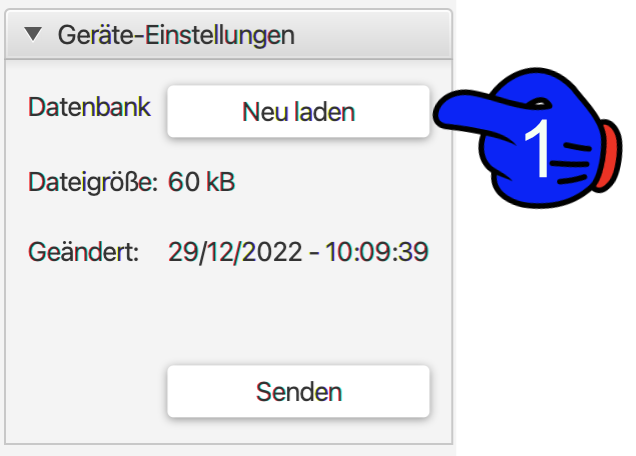
As mentioned above, the LoDi-Con's database first has to be transferred into the LoDi-ProgrammerFX.
To do that, click "Neu laden" (1)
The LoDi-ProgrammerFX creates a backup on every "Neu laden", so no data is lost if you should click the wrong thing.
Once the database has been transferred successfully, the current date and time are shown at "Geändert".
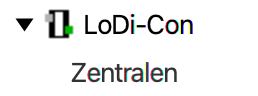
From now on the command stations stored in the LoDi-Con are available in the tree on the left under "Zentralen".
A note for ESU ECoS users: locomotives loaded into the LoDi-Con through the ECoS are only shown temporarily; the locomotive list is not shown in the LoDi-Con's database, so locomotives have to be edited on the command station directly.
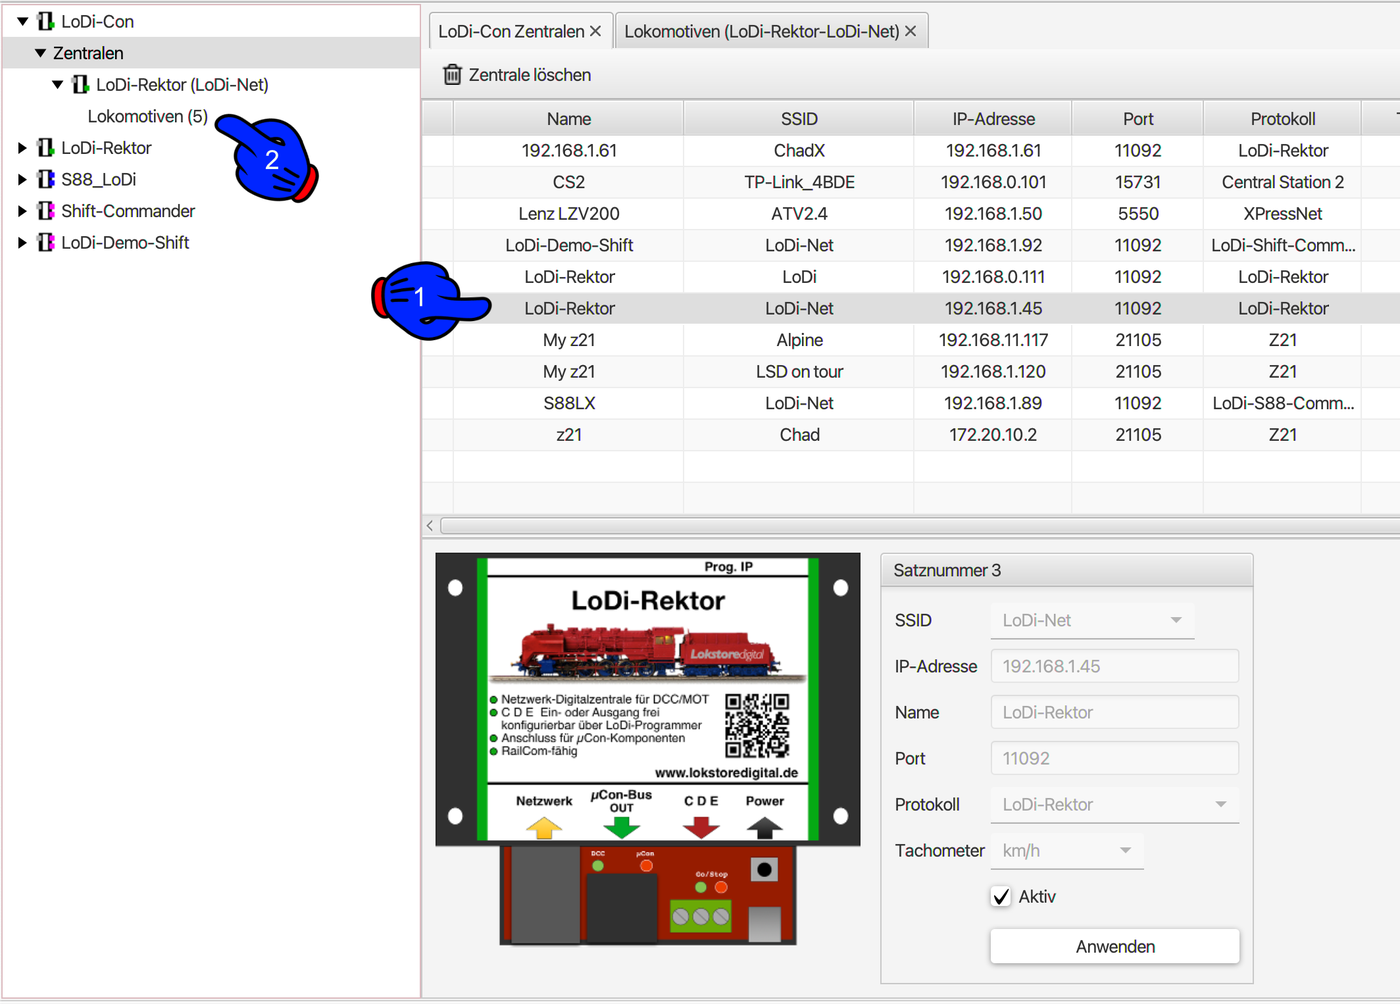
Now click "Zentralen" (1) on the left under "LoDi-Con". A list of all the command stations created in the LoDi-Con now opens on the right-hand side. (The locomotives are stored in the command stations.)

Command stations are already set up in the LoDi-Con by default. Even if you have several layouts, or take the LoDi-Con along to your club or to friends, all objects are always stored in the command station in question. That way locomotives of different gauges do not get in each other's way, for instance. Every command station is to be seen as a "universe" of its own. It is of course possible to copy locomotives from one command station to another.
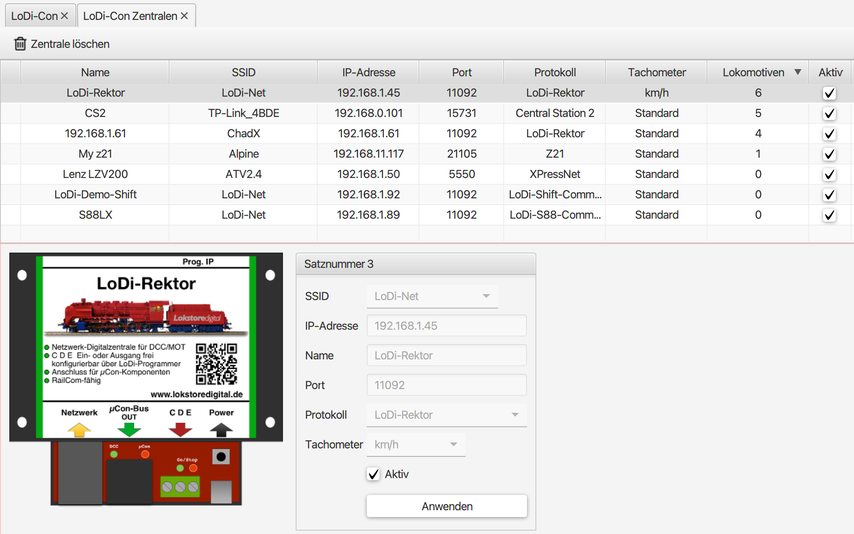
In our example we now see a LoDi-Con with various command stations.
Clicking an entry opens the connection window below, in which the stored IP address can be checked and changed if need be.
The "Lokomotiven" tab shows you straight away whether there are locomotives stored in the command station.
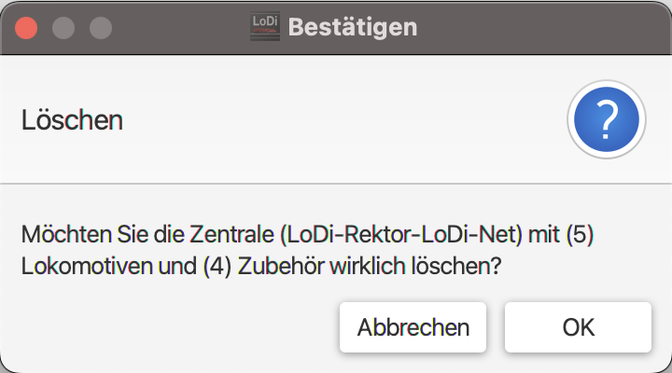
Have command stations in the list you no longer need? No problem — delete the command station higher up in the menu under "Zentrale löschen" or by right-clicking.
Careful! All objects such as locomotives and accessories in the command station are deleted by this action. But do not worry: if a loaded backup is available, objects can be restored from the backup.
3. Editing and creating locomotives
!!! Editing locomotives is only possible in expert mode, since it is still in beta !!!
To be able to edit locomotives now, double-click the command station (1) whose locomotives are to be shown. The locomotives stored in it are then listed in the tree (2) under the "Zentrale".
Clicking the list of locomotives on the left-hand side in the tree opens a new tab in which the locomotives are now shown.
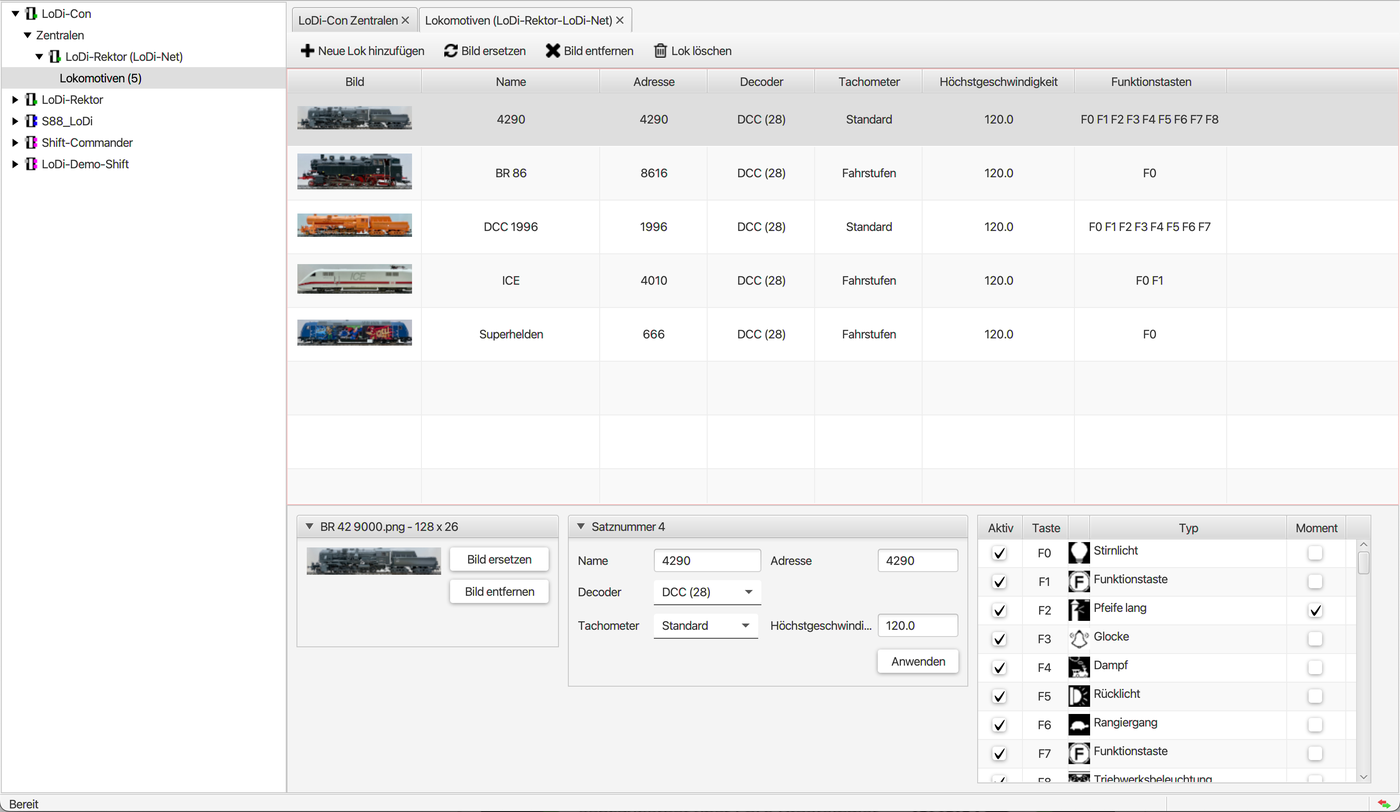
Now click a locomotive to be edited, or add a new locomotive with the "+ Neue Lok hinzufügen" button at the top. An input area for a new locomotive opens in the lower part.
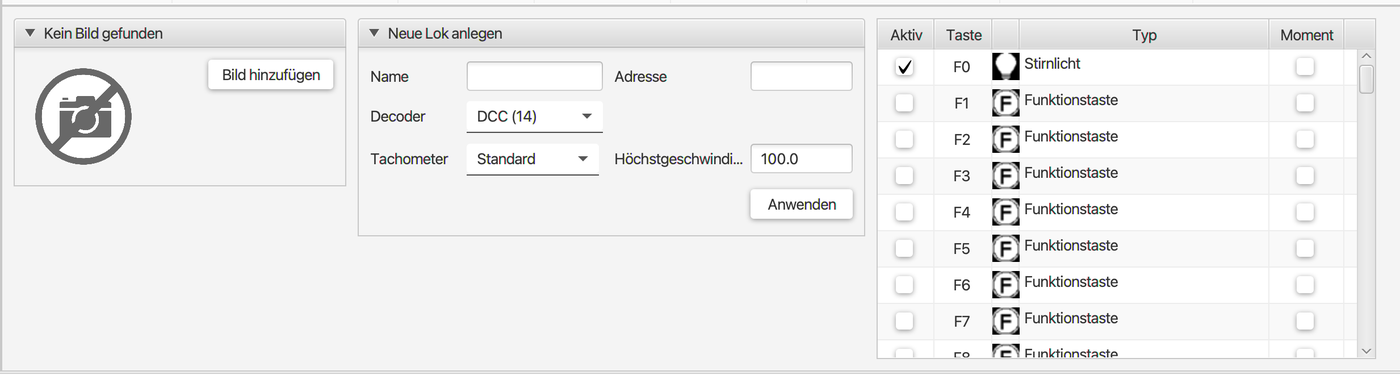
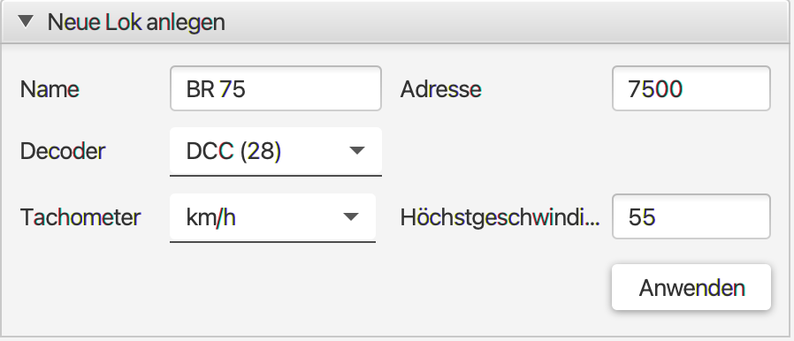
First we give the locomotive a new name and enter the parameters such as address, data format,
speedometer and top speed.
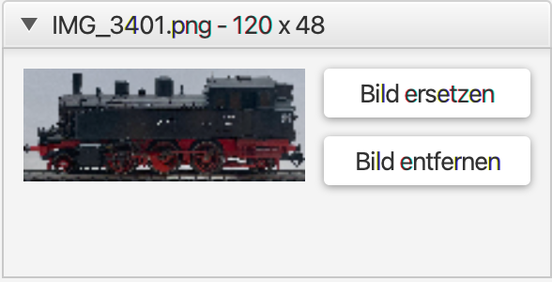
The LoDi-ProgrammerFX makes it very easy to assign locomotive pictures or upload them to the device.
The LoDi-Con can handle .png and .jpeg.
Now click "Bild hinzufügen" below
The file picker opens. Now select the picture you want to use.
Please also take care that the picture's file name is no longer than 16 characters.
A picture size of up to 190 × 48 pixels is possible.
If you choose a larger picture, the ProgrammerFX will adapt it as best it can; of course it is better to stay in the right format from the start.
We offer a short description here of how to prepare locomotive pictures correctly for the LoDi-Con.
Go here for: creating your own pictures
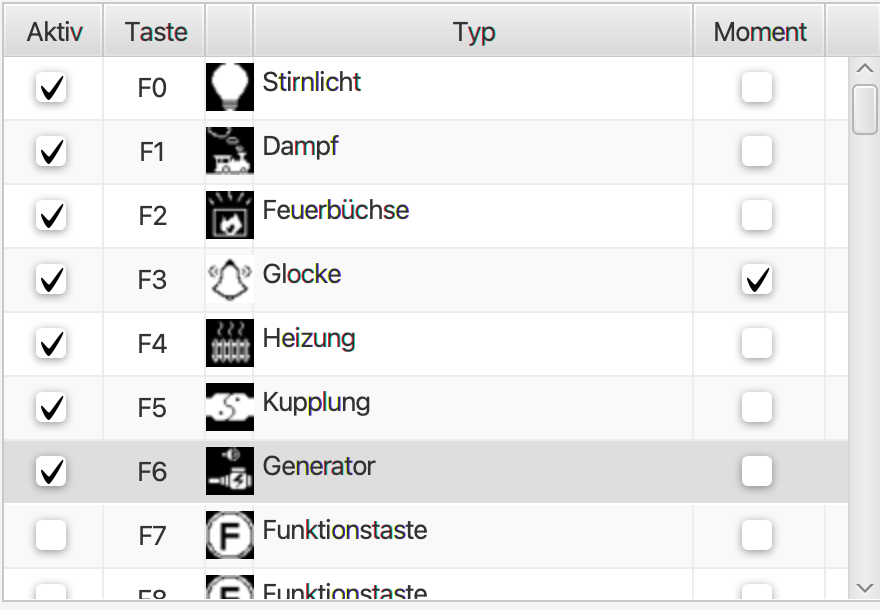
The F keys can now be assigned directly from the LoDi-ProgrammerFX as well. Click the F key "Aktiv" that is to be used. Double-clicking the type opens a drop-down field with all the possible function keys available. (This list is being extended continuously — an icon missing? Let us know.)
Clicking "Anwenden" enters the locomotive into the database,
but it still has to be transferred back to the LoDi-Con.
Scroll to point 6 for that.
5. Copying locomotives and command stations
The function for copying locomotives and command stations is still in progress.
From version 2.2023 onwards, locomotives can already be copied to another command station in the LoDi-Con; that function is also available on the LoDi-Con itself.
6. Loading the database back onto the LoDi-Con after editing
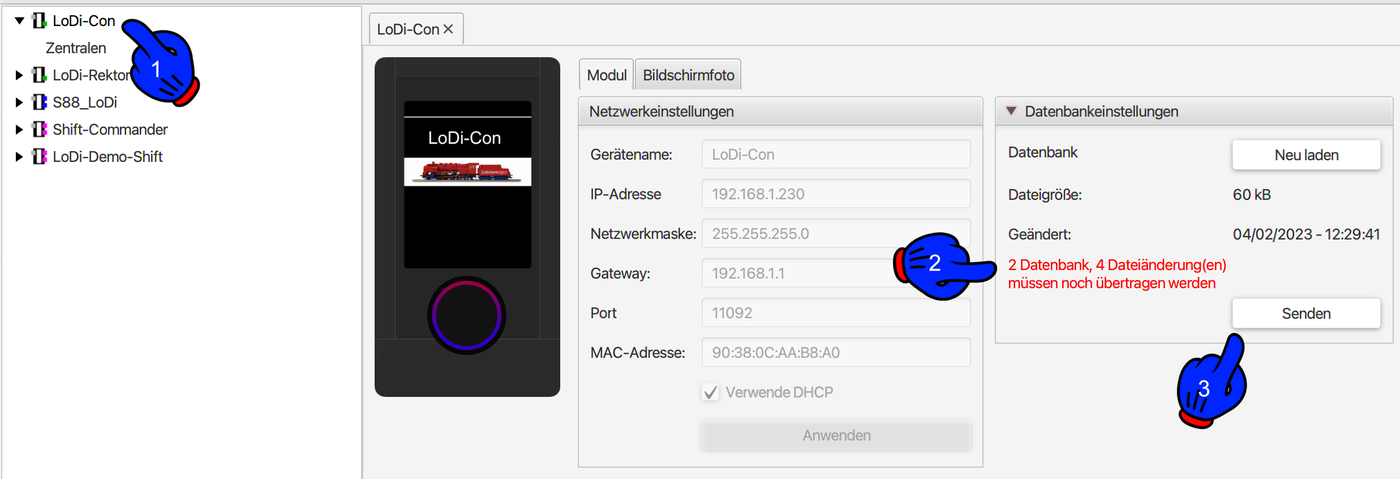
Once you have changed data in the database, it has to be transferred back to the LoDi-Con. First click the LoDi-Con at the top left (1). You now see the database changes marked in red. Clicking "Senden" (3) now sends the database to the LoDi-Con. As a rule that only takes a few seconds.
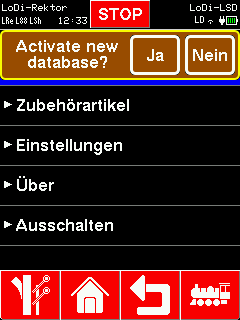
The LoDi-Con now shows that a new database is to be written. You still have to confirm that with "Ja". The LoDi-Con now restarts.
If you click "Nein", the database is discarded and you then have to repeat the process in the LoDi-ProgrammerFX.
7. Backup from the database
In progress . . .
8. Overview of the LoDi-Con description
1. Switching on for the first time / connecting to Wi-Fi
2. Setting up command stations
3. Setting up and driving a locomotive
4. Multiple traction
5. Switching turnouts and signals
6. Creating routes
7. Showing feedback modules
8. Device settings
9. CV programming
10. Club mode
11. Firmware update
12. Properties in the LoDi-ProgrammerFX
13. Creating your own locomotive pictures
14. Technical data
9. Download the LoDi-Con in the ProgrammerFX as a PDF
Here you can download the summary of "The LoDi-Con in the ProgrammerFX" as a PDF.

Any questions still open?
Would you simply like to ask us in person?
Or go to our forum, where experienced users are glad to help you further.