
Hardware
LoDi-WiB ICE-M
LoDi-(Motor) WiB ICE-M
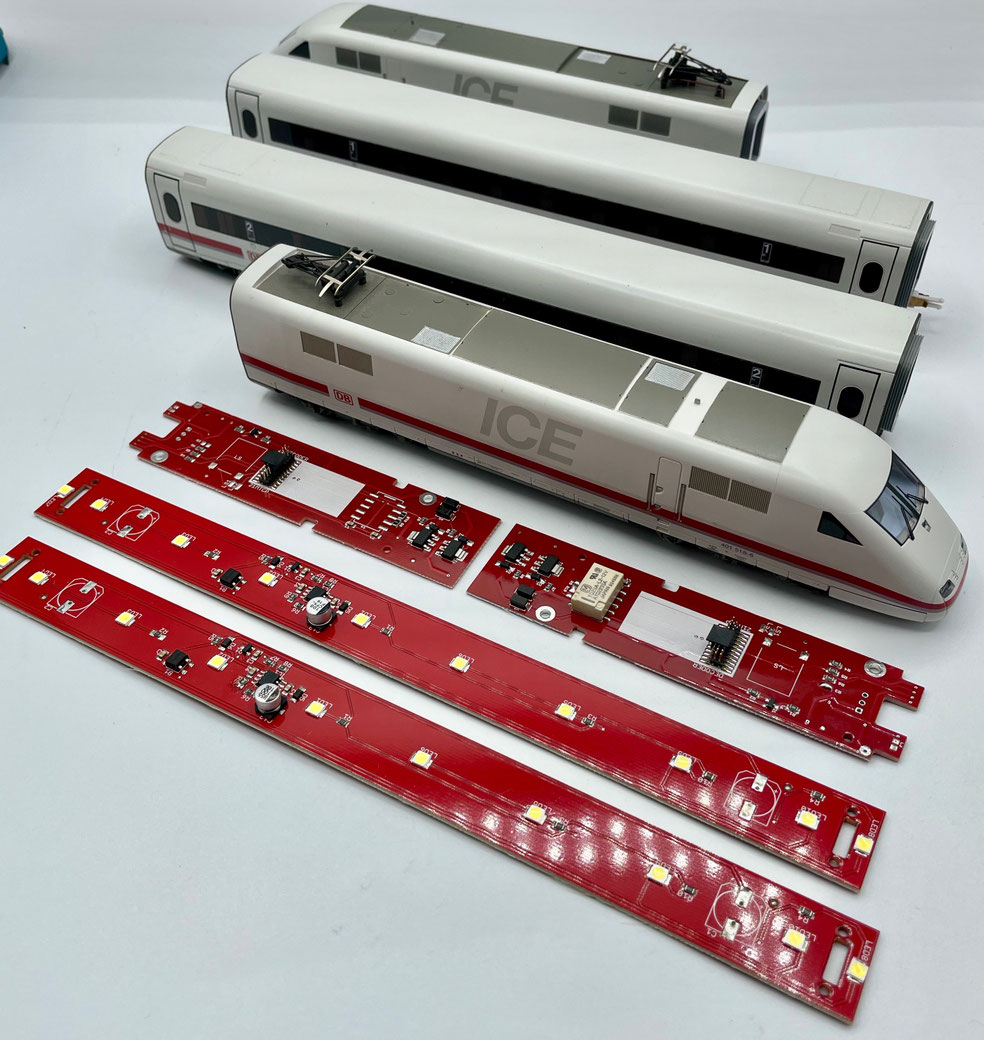
Every model railwayer should know the ICE 1 and 2 from Märklin® and Trix®. The younger generation in particular enjoys running it on the layout.
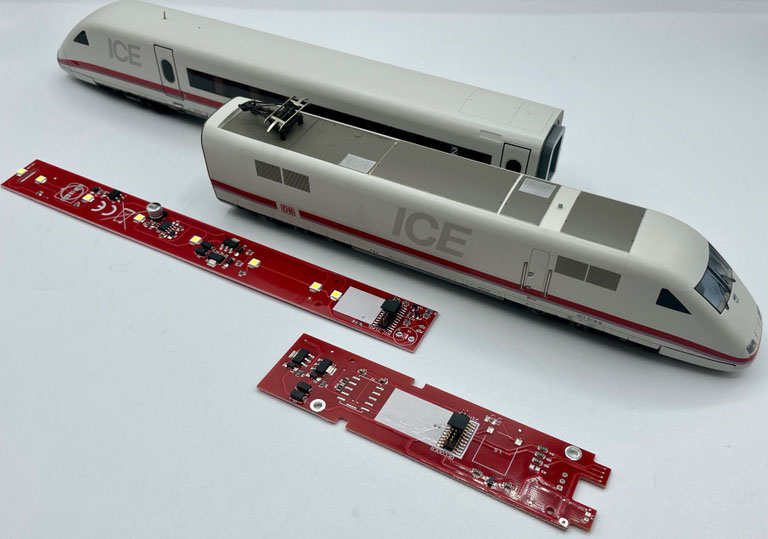
That is why we have developed a LoDi-WiB set for the ICE as a retrofit, with a high-quality LED board that can simply be swapped in and can also light the vestibule area, otherwise unlit, through a jumper bridge.
The power car can be fitted with a 21-pin decoder.
The power car board comes in a version with a loudspeaker fitted for sound and/or a pickup changeover that can be controlled from the decoder.
Features of the LoDi-WiB ICE-M(-R) as well as the LoDi-Motor WiB ICE-M and -S
- Simple installation, optimised for vehicles with full RailCom capability.
- A precisely fitting design.
- Adjustable brightness through a potentiometer.
- The 21-pin MTC standard for connecting any decoder.
- Economical LED technology with ideal illumination and additional corridor lighting.
- Prepared for cab lighting on the LoDi-Motor WiB ICE-M(-S)
An installation video from moba-tech
1. The LoDi-(Motor) WiB ICE-M (-S) boards and the LoDi-WiB ICE2 St
In our shop you can choose between individual LoDi-WiB ICE-M boards for the compartment coaches or the power car board LoDi-Motor WiB ICE-M (-S) on its own.
Compartment coach boards for the coaches as well as for the on-board restaurant.
Here you see a front and a rear view.
You can enlarge the pictures by clicking.
New version, mid-2025: from May 2025 we have revised the boards for the coaches and the on-board restaurant. They are now white, so as to reflect the light inside the coach better. The board layout has also been simplified and slightly reduced in size. The connections remain unchanged, which is why a complete revision of the manual was not necessary. SJ1 is dropped in the new version.


The previous version, from 2020 to early 2025


The LoDi-WiB ICE-M fits the following Märklin® coaches:
- ICE 1: 3370, 33701, 3770, 37701, 37702, 37703, 39711, 39712.
- ICE 2: 36711, 36712, 37712, 29786, 29790, 29791, 29792, 29794, 29795, 33712.
The LoDi-WiB ICE-M fits the following Trix® coaches:
- ICE: 21506, 22096.
If no current-carrying coupling is fitted to your coaches and power cars, you first have to retrofit one.
Looking for the right couplings? Get in touch with us or with our service partners.
Your train's article number not listed here? Do get in touch with us.
A power car board for power cars with and without a motor.
The LoDi-Motor WiB-ICE-M(-S) fits all common ICE 1 and 2 with a high-performance motor or a 3-pole drum commutator motor. If you still have a 3-pole drum commutator motor fitted in your ICE, you should convert it to a 5-pole motor, or at least replace the field coil with a permanent magnet.
From board version 1.50 onwards, the motor board has outputs for LEDs that can be switched positive, as well as the decoder's standard outputs, which are switched negative against U+.
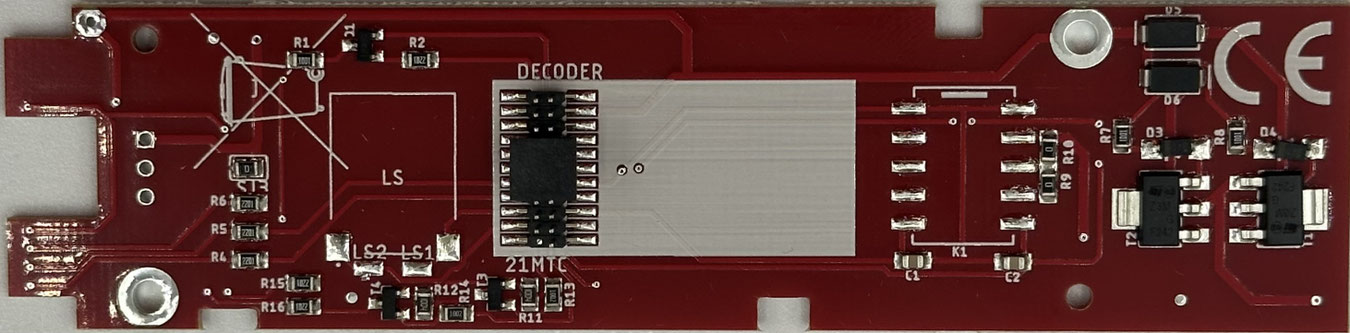
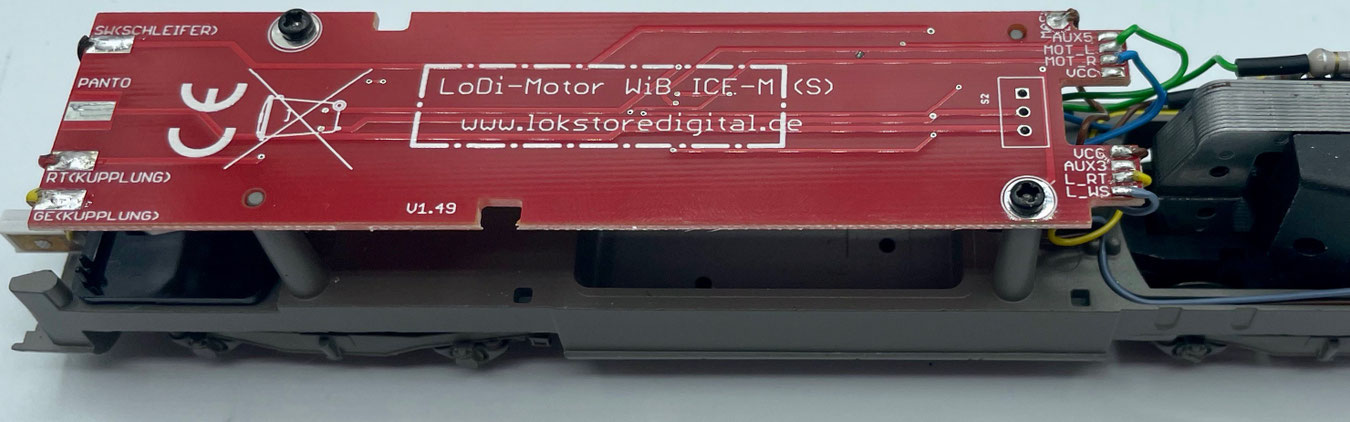
The ICE 2 driving trailer. The LoDi-WiB ICE2-St was developed specifically for the driving trailer. It fits the driving trailer exactly and can be converted in a few steps. It has a 21-pin MTC interface and can be fitted with all common 21-pin function decoders.


2. Installing the LoDi-WiB ICE-M(-R)
If you can solder and have already lit one coach or another, the conversion should come easily to you. If you are a beginner, however, or do not feel up to a conversion, do get in touch with our partners and have them draw up an individual offer for you.
You can carry out the conversion yourself?
Then start with these instructions.
You will need:
- a soldering iron with a fine tip, and solder,
- a cross-head screwdriver and a pair of tweezers,
- a small, fine pair of side cutters as well as, if available, a wire stripper for fine cores,
- superglue, to fix the boards or the cable holder lightly in place.
You can start the pictures as a small slideshow and enlarge them for a detailed view.
We will guide you step by step through a successful coach conversion with this description. If you notice while converting that steps or information are missing, do get in touch with us or visit our forum.
The compartment coaches. We now start with the compartment coach.
For practised hands these should be converted in less than 10 minutes.
You need the LoDi-WiB ICE-M for the conversion.
Always keep this in mind when converting!
If you are also gluing figures in and/or working with superglue to fix things, do not fit the coach roofs back onto the coaches straight away.
Superglue needs at least 1–2 hours to outgas completely.
Otherwise this could lead to milky or tarnished glazing.
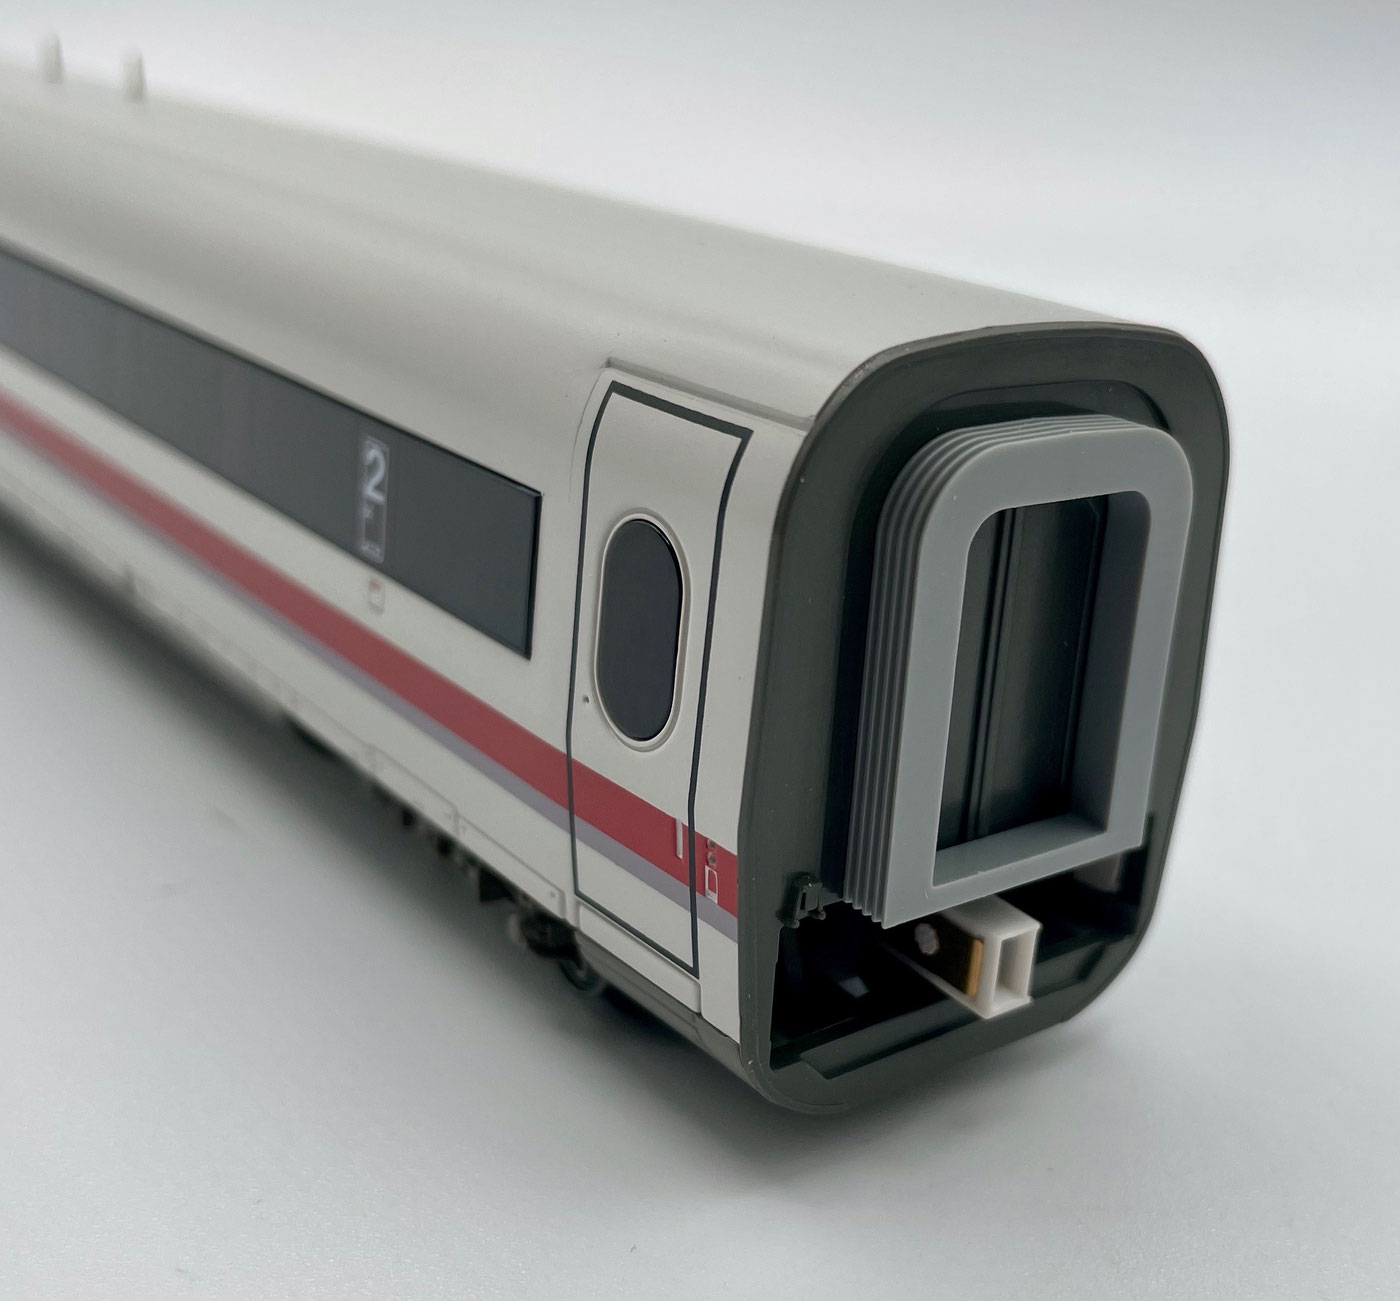
First you have to pull off the coach covers at both ends of the coach.
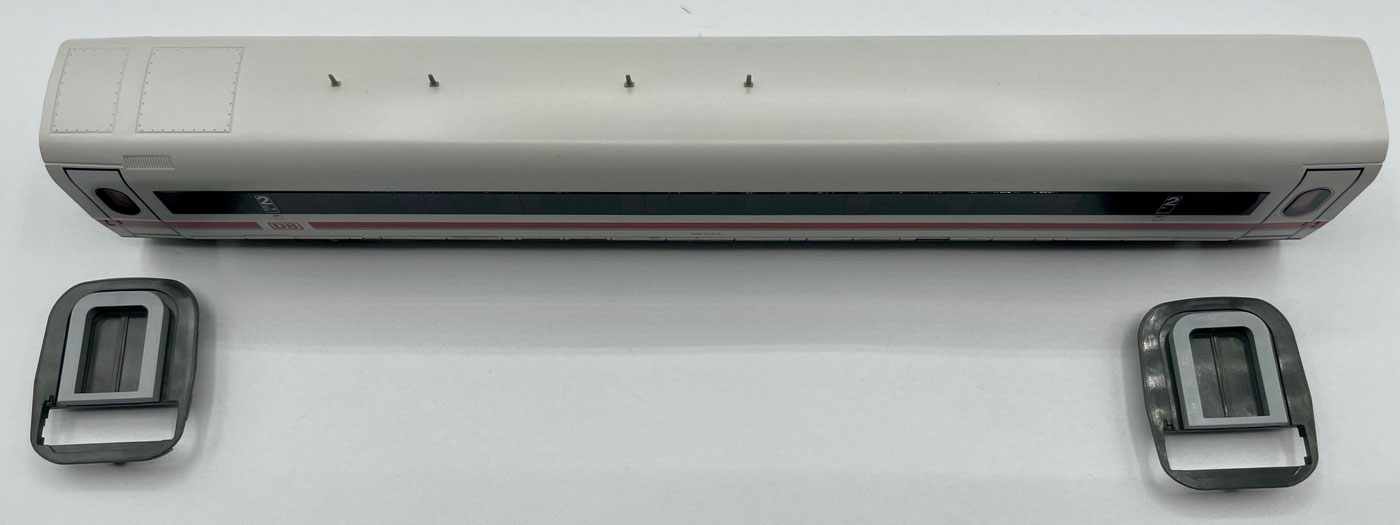
Once both side jaws have been pulled off, you can release the upper part of the coach from the lower part. To do that you have to unclip the upper part a little from the coach floor.
After that the coach roof can simply be lifted off.
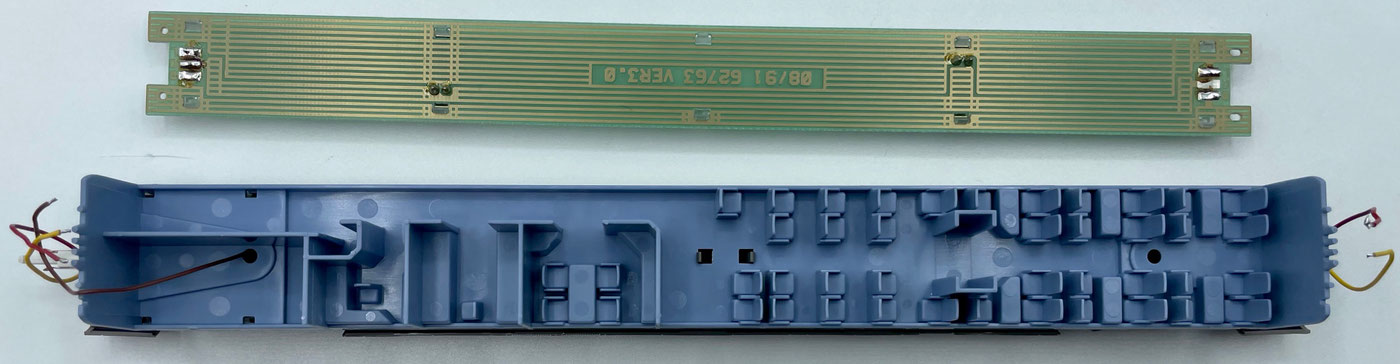
Now first unsolder the wires from the original board and remove it from the coach's holder.
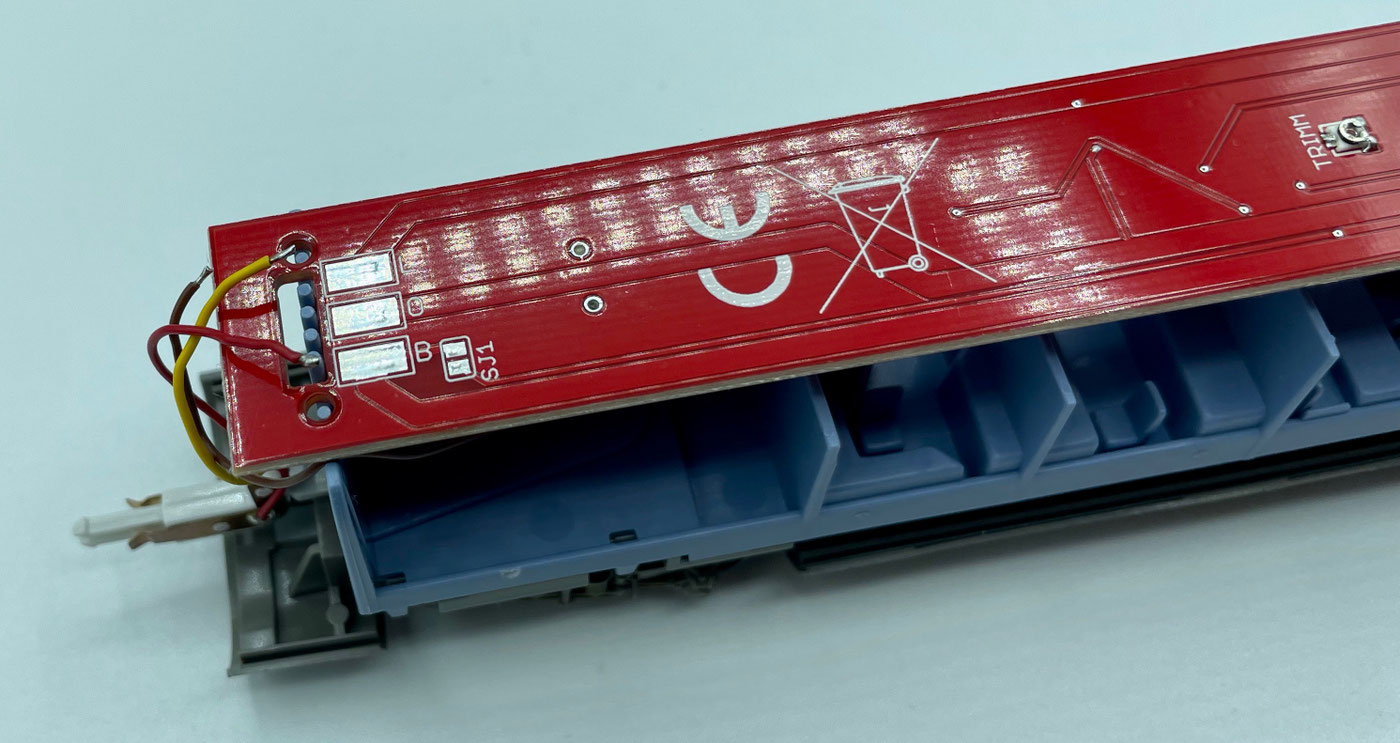
Now lay the LoDi-WiB ICE-M into the coach. Next, solder the wires.
L = yellow (switching the light)
O = brown (ground, wheel pickup)
B = red (centre rail)
(The wire colours can differ.)
=================================== When using the LoDi-Motor WiB ICE-M(-S) the wiring changes, and is connected as follows: L = yellow (switching the light)
O = red (centre rail)
B = brown (ground, wheel pickup) (can also be omitted; more information further down under: Removing the ground spring.)
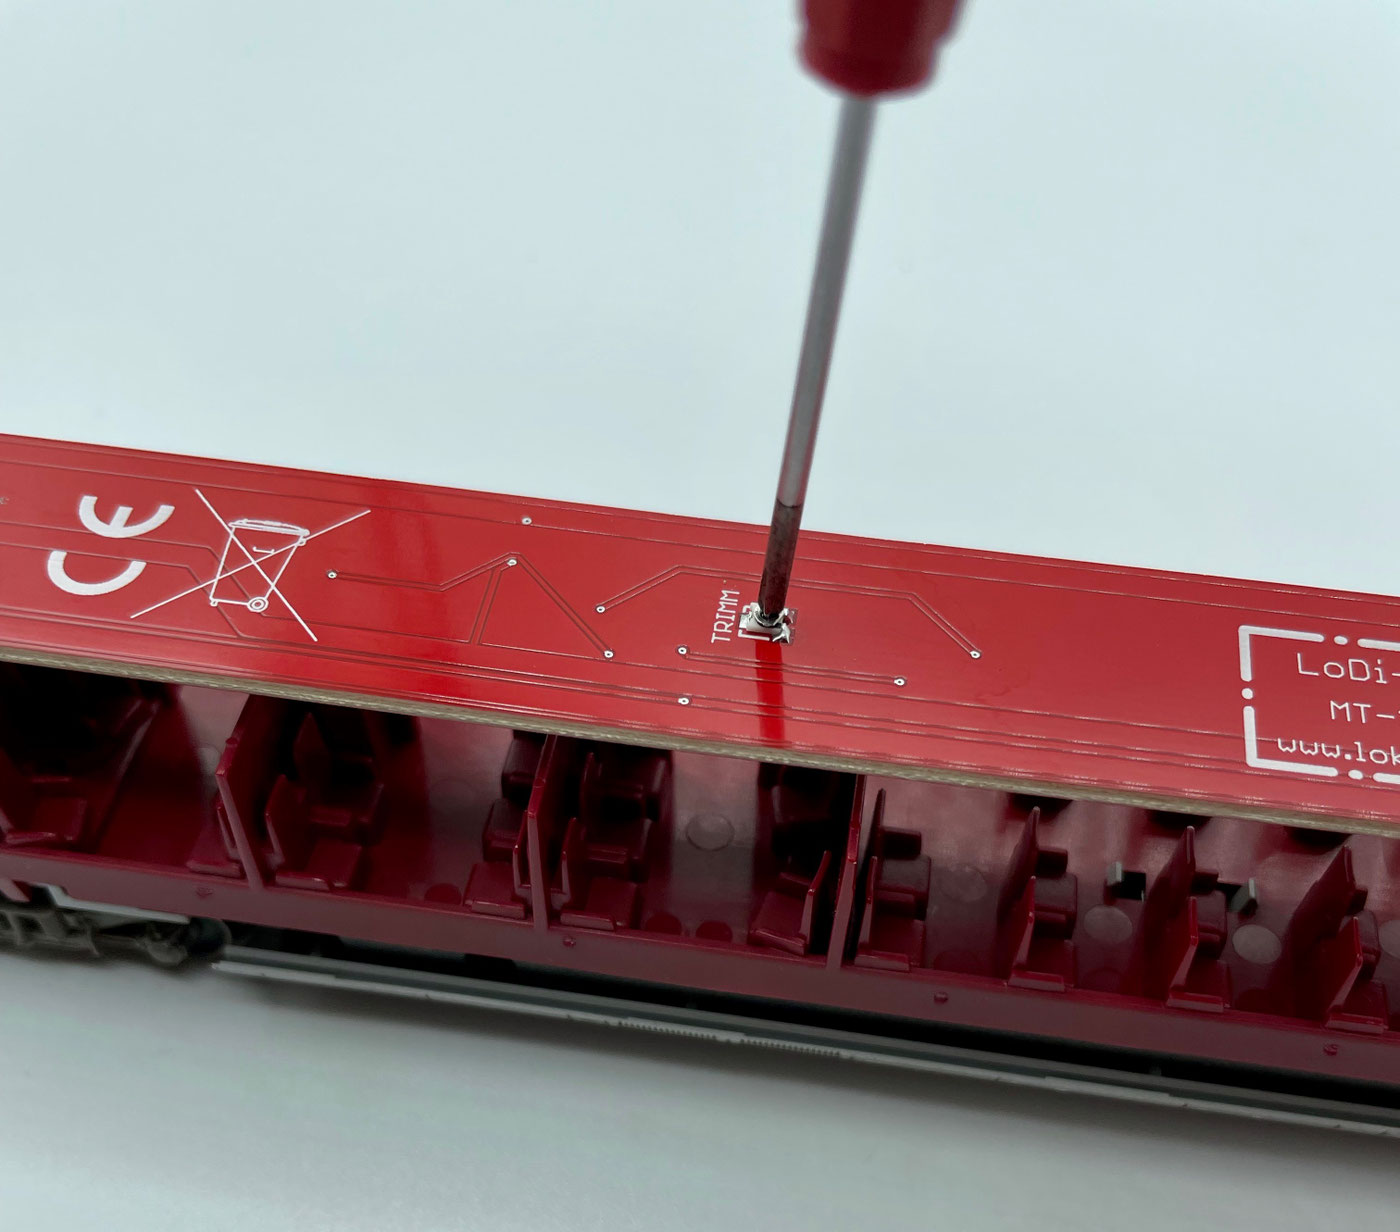
On the board there is a small potentiometer with which you can set the brightness using a small cross-head screwdriver.
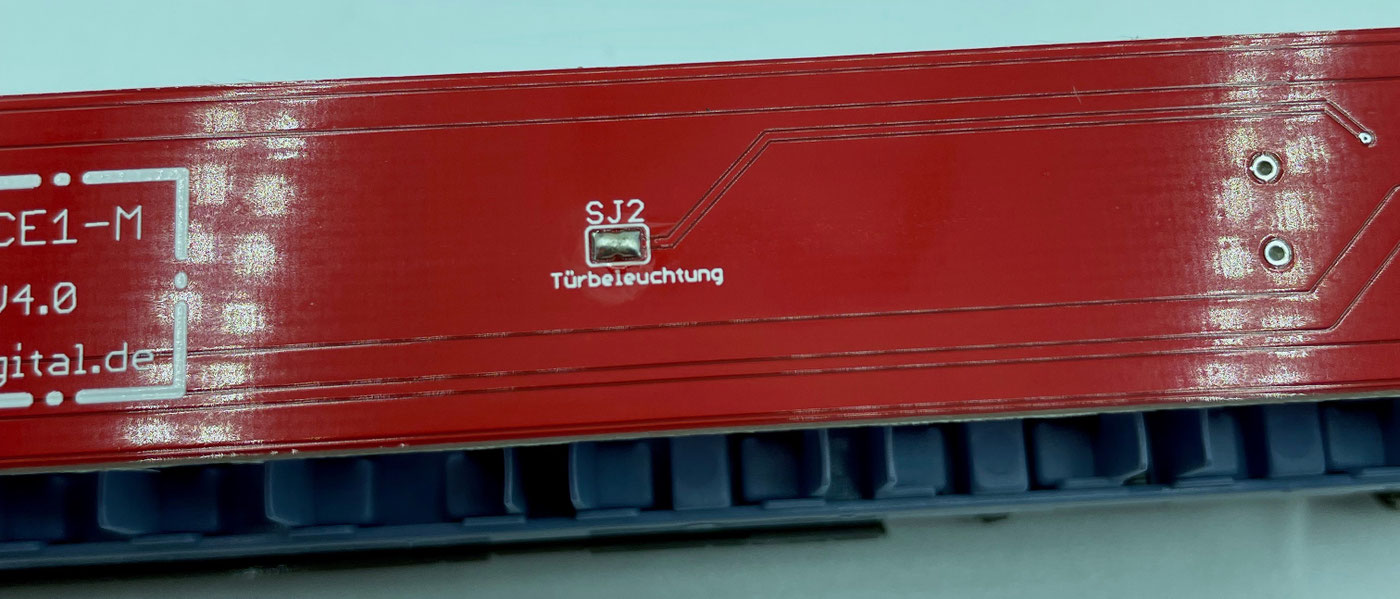
As mentioned above, we have fitted two further LEDs on the board in the door vestibules, which are otherwise dark on the original.
These LEDs are off from the factory, not active, and have to be activated with a solder bridge.
To do that, take your soldering iron and a little solder and bridge the contact, as seen in the photo.
Now reassemble the coach in the reverse order to the way you took it apart.
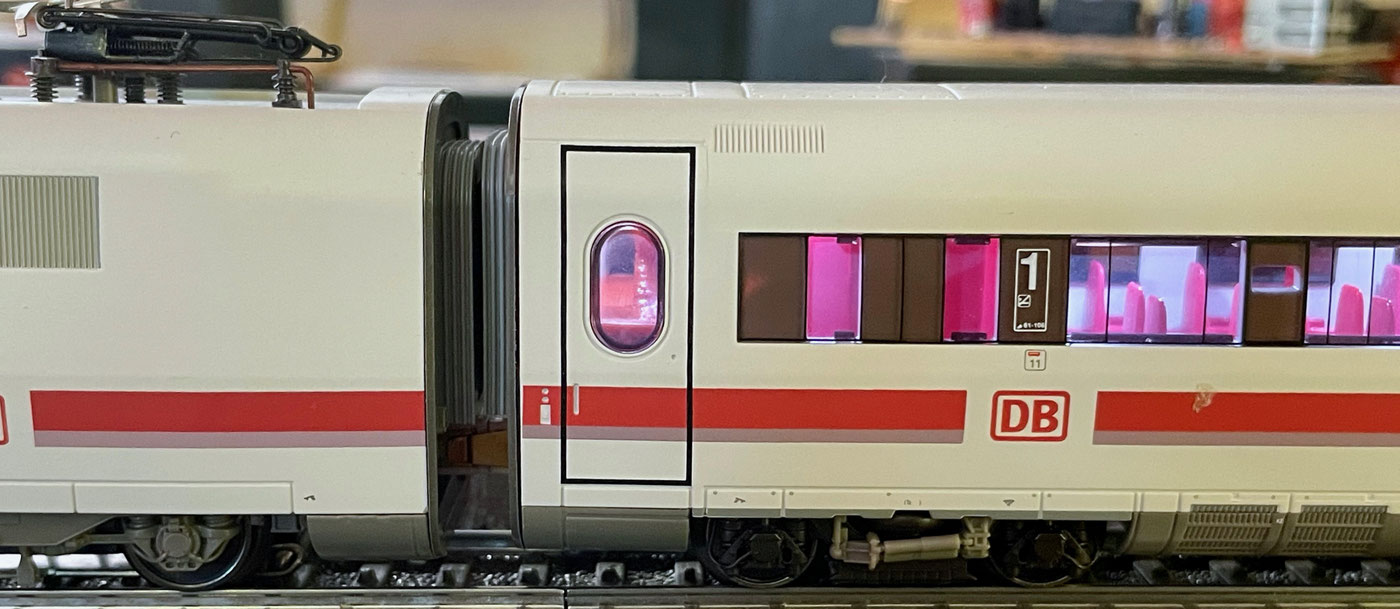
Because the doors of the ICE coaches can be lit, you naturally then see the wires right inside the coach. As a rule that does not stand out on a passing train, but it can be done more neatly. That is why we designed this cable duct. It is simply attached directly to the edge with superglue.
When gluing, take care that the cable is not lying in the channel; thread it through afterwards.
You may have to replace the wires if they are too stiff. The wires should also be laid in a counter-loop at the bottom, as shown in the picture. That offers two advantages: the coupling stays fully movable, and there is less movement at the solder joint.
The on-board restaurant. Since the new version 4.3 of the LoDi-ICE-M coach boards there is an additional version, the LoDi-ICE-M-R. As described above, LEDs have been added on the top of the board in the area of the on-board restaurant. These now light the upper part of the coach. Installation is as usual — you only have to watch the correct orientation of the roof, since this coach has both a short and a long window cut-out.
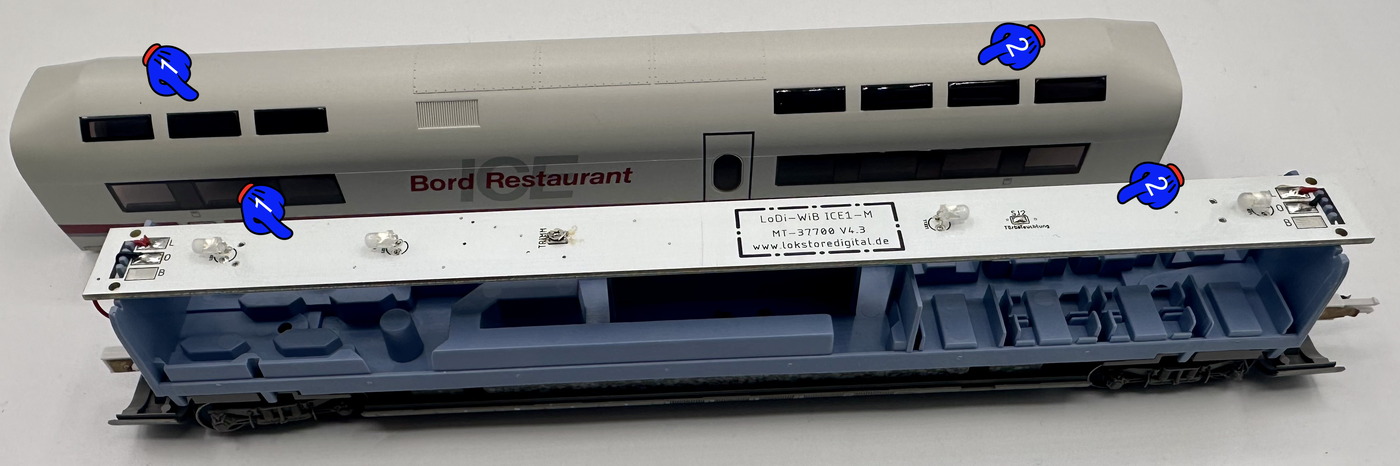
On the version for the on-board restaurant there are four additional 3 mm LEDs on the top, arranged so that they light the upper part of the coach. As marked here, at (1) you see the short window section and at (2) the long window section.
Please take care that the roof and the board are correctly aligned. If you have swapped them — that is, (1) in place of (2) and vice versa — the roof may not fit properly. In that case please take the roof off again and check the alignment.
Fitting a buffer capacitor
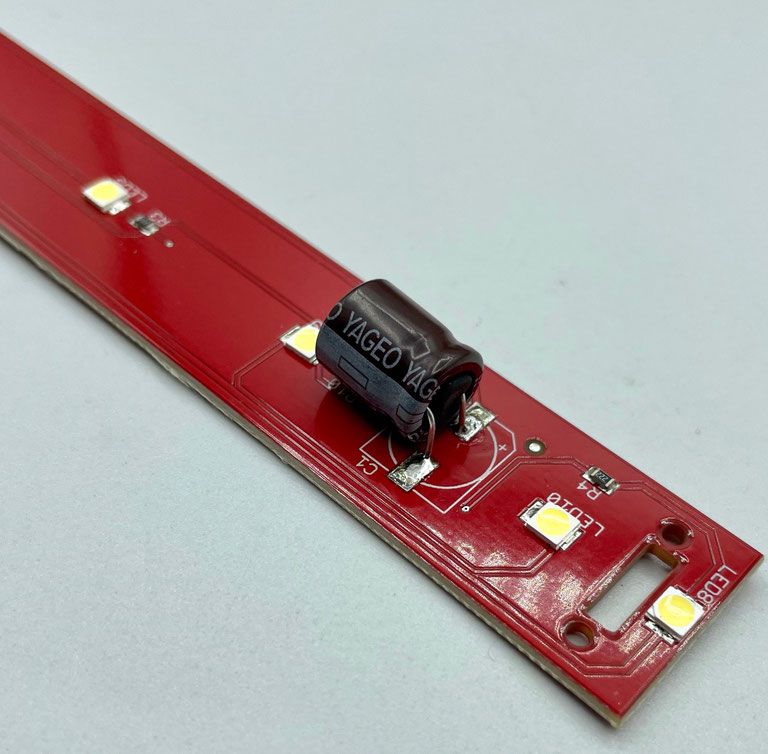
On the LoDi-WiB ICE-M(-R) there are two connections for a buffer capacitor, C1 and C2.
There you can connect a buffer capacitor from 100 µF at 25 or 35 volts. You will get the best result with a 330 µF 25-volt capacitor.
The LoDi-WiB ICE-M has a charging circuit for gentle charging. That way your booster does not go straight into a short circuit when switched on.
Removing the ground spring for the ICE coach. The conversion above is shown and connected like the original. If you fit our LoDi-Motor WiB ICE-M in the power cars/driving trailers, you can do without all the ground springs in the coaches. That reduces the rolling resistance enormously, so train lengths of 12 coaches are no problem even for a single power car.
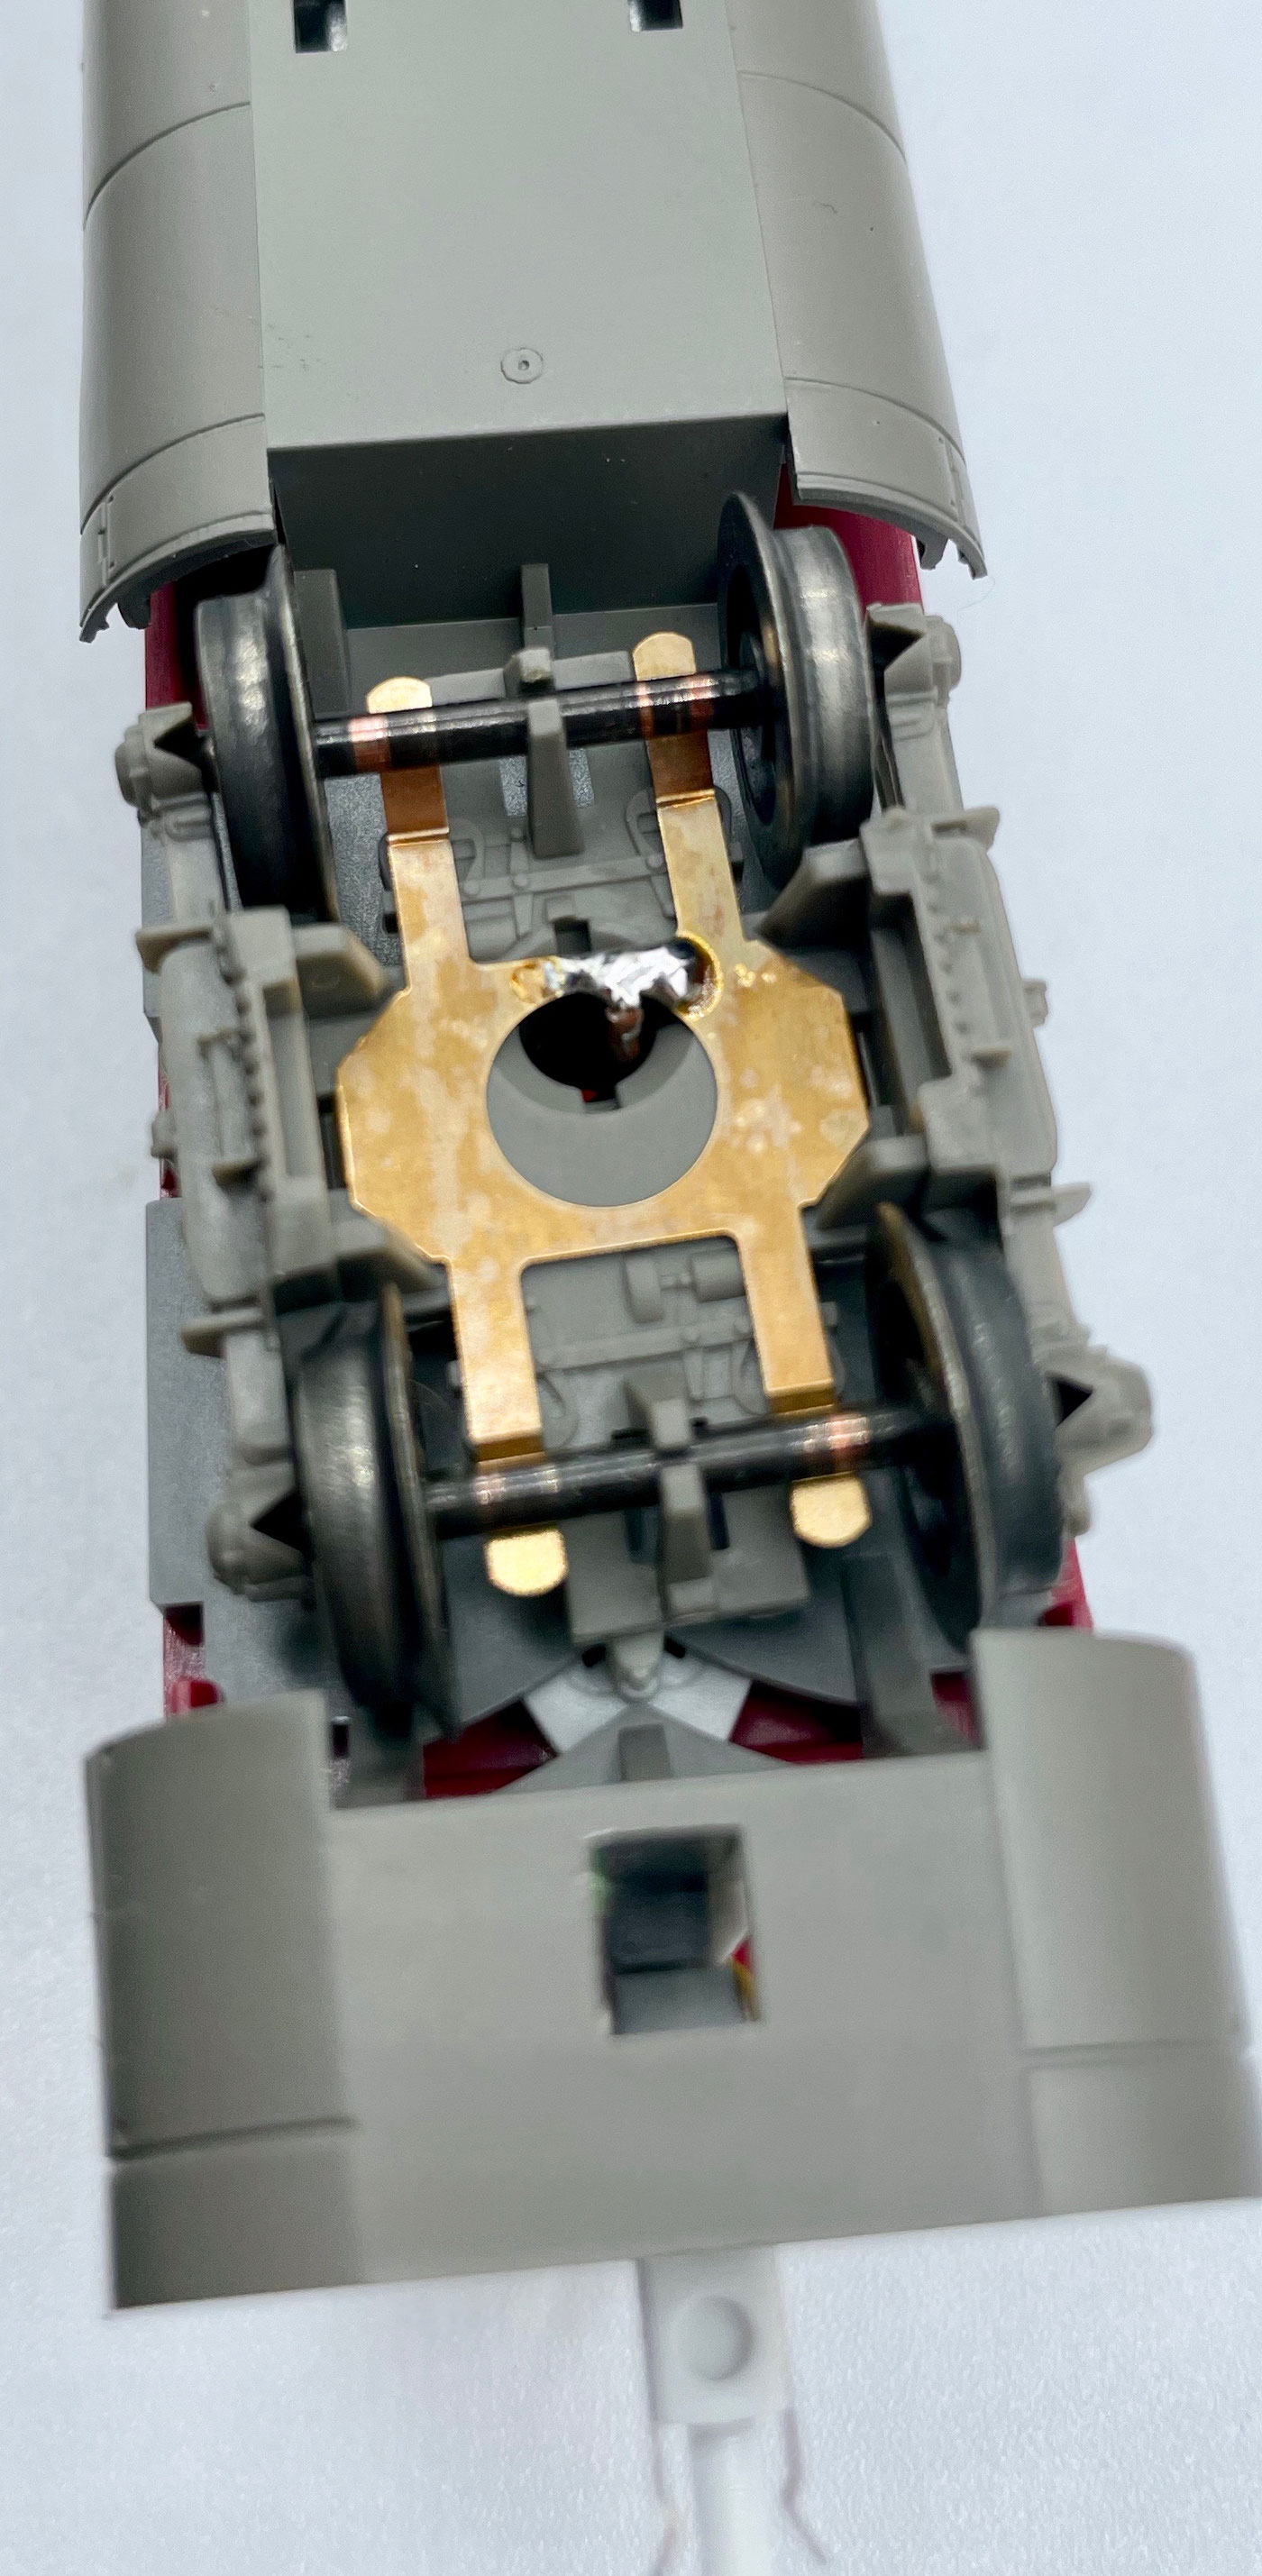
Simply remove the ground spring from the lower bogie and unsolder it at the top of the LoDi-WiB ICE-M. No further conversion has to be made; the LoDi-WiB ICE-M switches over by itself and is now connected only by the yellow and the red wire of the coupling.
2. Installing the LoDi-Motor WiB ICE-M(-S)
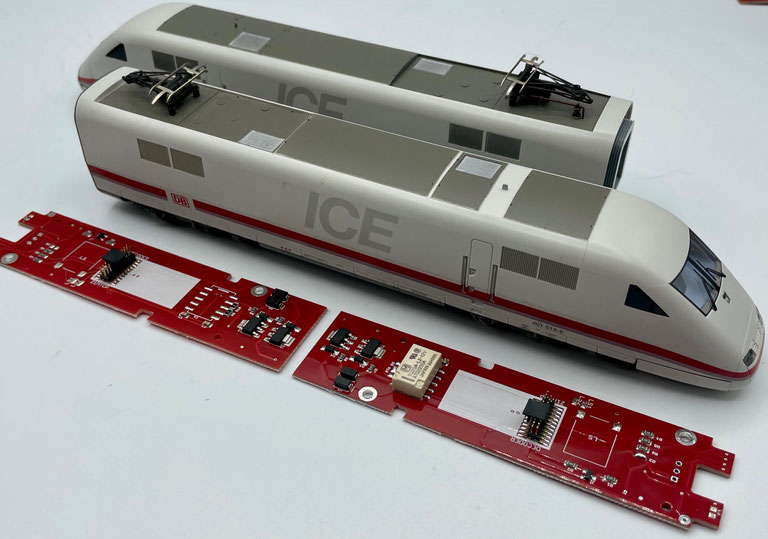
There are several versions of the power cars, with a driving trailer as well as with a dummy power car.
To describe your train precisely here, you have to choose which train you want to convert.
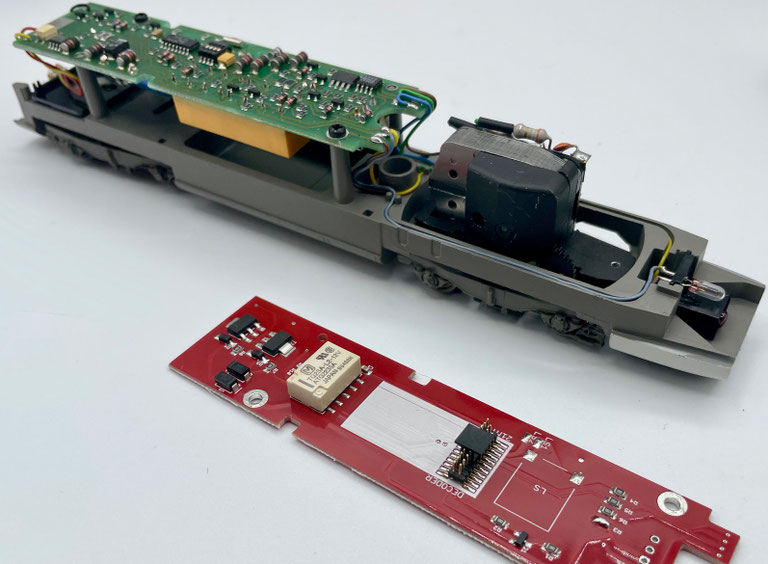
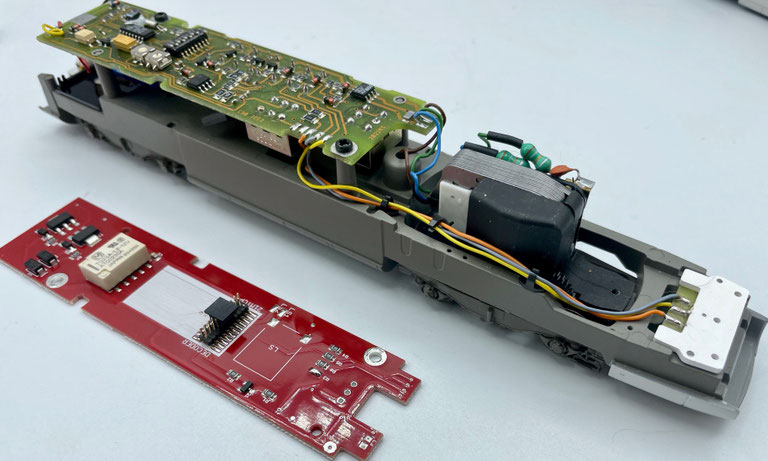
The ICE 1 generation still has front lighting made of bulbs; the ICE 2 version mostly has LEDs already.
Click on the picture showing your train.
ICE 1
ICE 2
3. Technical data
Dimensions of the LoDi-WiB ICE-M, 2025 version: length 242 mm, width 18 mm, thickness 1.55 mm. Weight: 16 grams. Dimensions of the LoDi-WiB ICE-M: length 245 mm, width 22 mm, thickness 1.55 mm. Weight: 20 grams. Dimensions of the LoDi-(Motor) WiB ICE-M-S: length 180 mm, width 29 mm, thickness 1.55 mm. Weight: 18 grams, or 19 grams for the (-S) version.
The LoDi-Motor ICE-M(-S) has a standard 21-pin MTC interface and can be fitted with all common locomotive or function decoders with a 21-pin interface.

Would you like to see the quality of the devices for yourself?
Visit our forum, where experienced users are glad to help.
In this section
- ICE 1 with two power cars
Step by step: converting an ICE 1 with two power cars to the LoDi-Motor WiB ICE-M.
- ICE 2 with power car or cab car
Step by step: converting an ICE 2 — with two power cars or with a cab car — to the LoDi-Motor WiB ICE-M.