
Hardware
MT-43586 V2 double-deck driving trailer
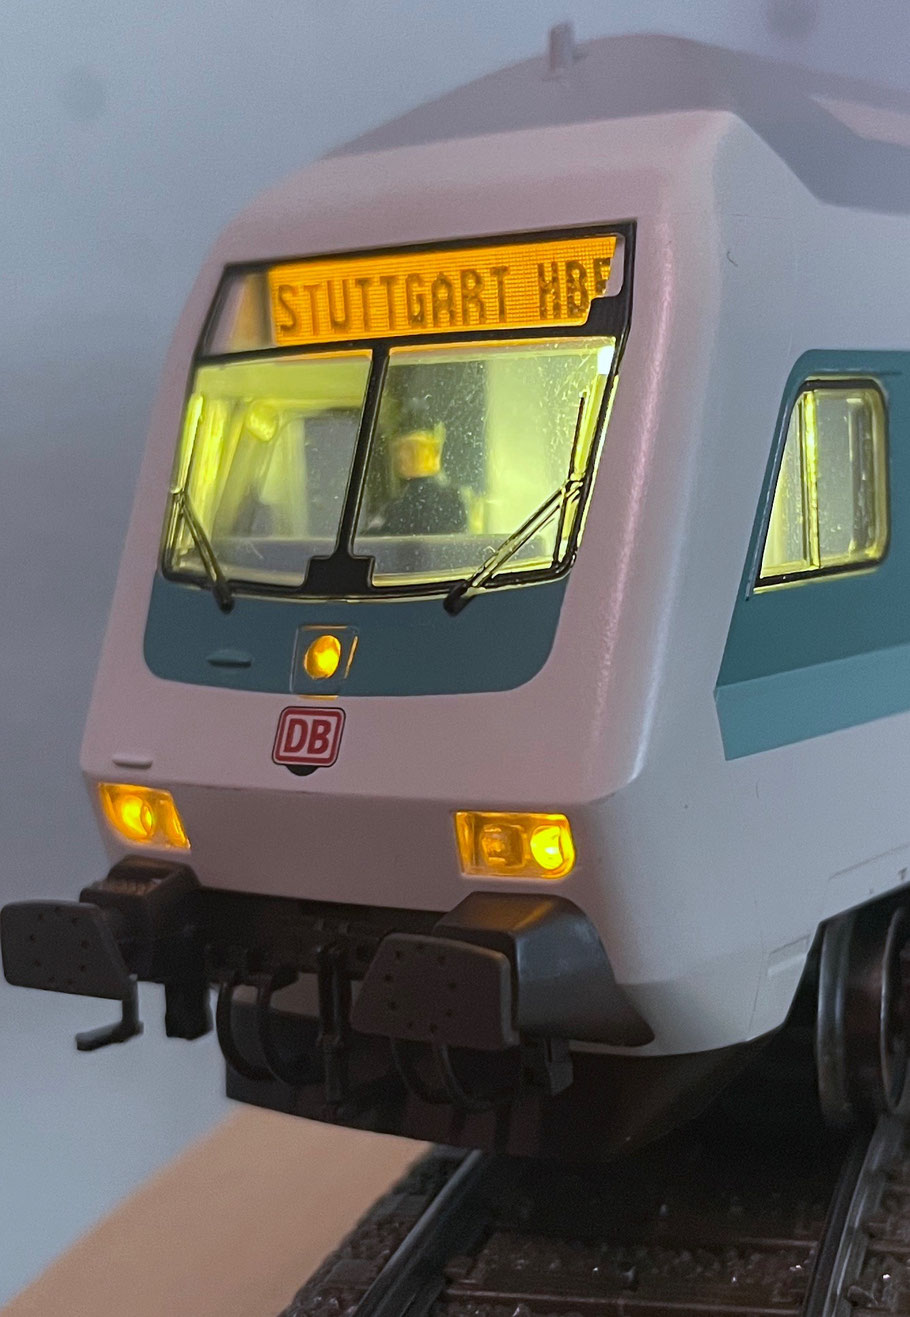
The head lighting of the double-deck coach from Märklin® and Trix® in traffic red as well as in white/blue is normally switched between yellow and red through a pickup changeover.
For the digital solution we have developed a 21-pin adapter board, which we call the MT-43586 V2 Dosto.
You can now decide for yourself which decoder is to be fitted to the board.
With the MT-43586 V2 Dosto adapter board we also offer cab lighting as well as further AUX outputs. The coach's interior lighting can be switched on and off directly through the plugged-in decoder.
Features of the MT-43586 V2 Dosto
- Simple installation, optimised for double-deck coaches
- A precisely fitting design
- Cab lighting and provision for a high beam
- A connection for interior lighting
- The 21-pin MTC standard, for connecting any decoder
1. The LoDi MT-43586 V2 boards
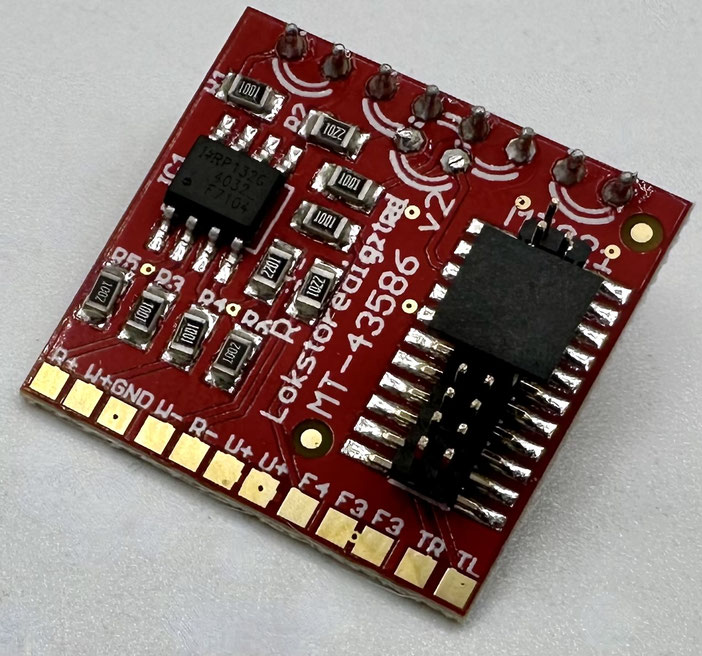
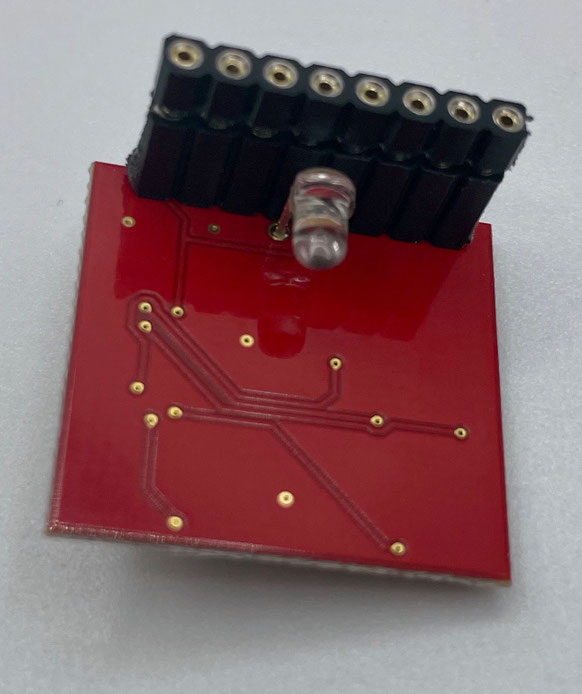
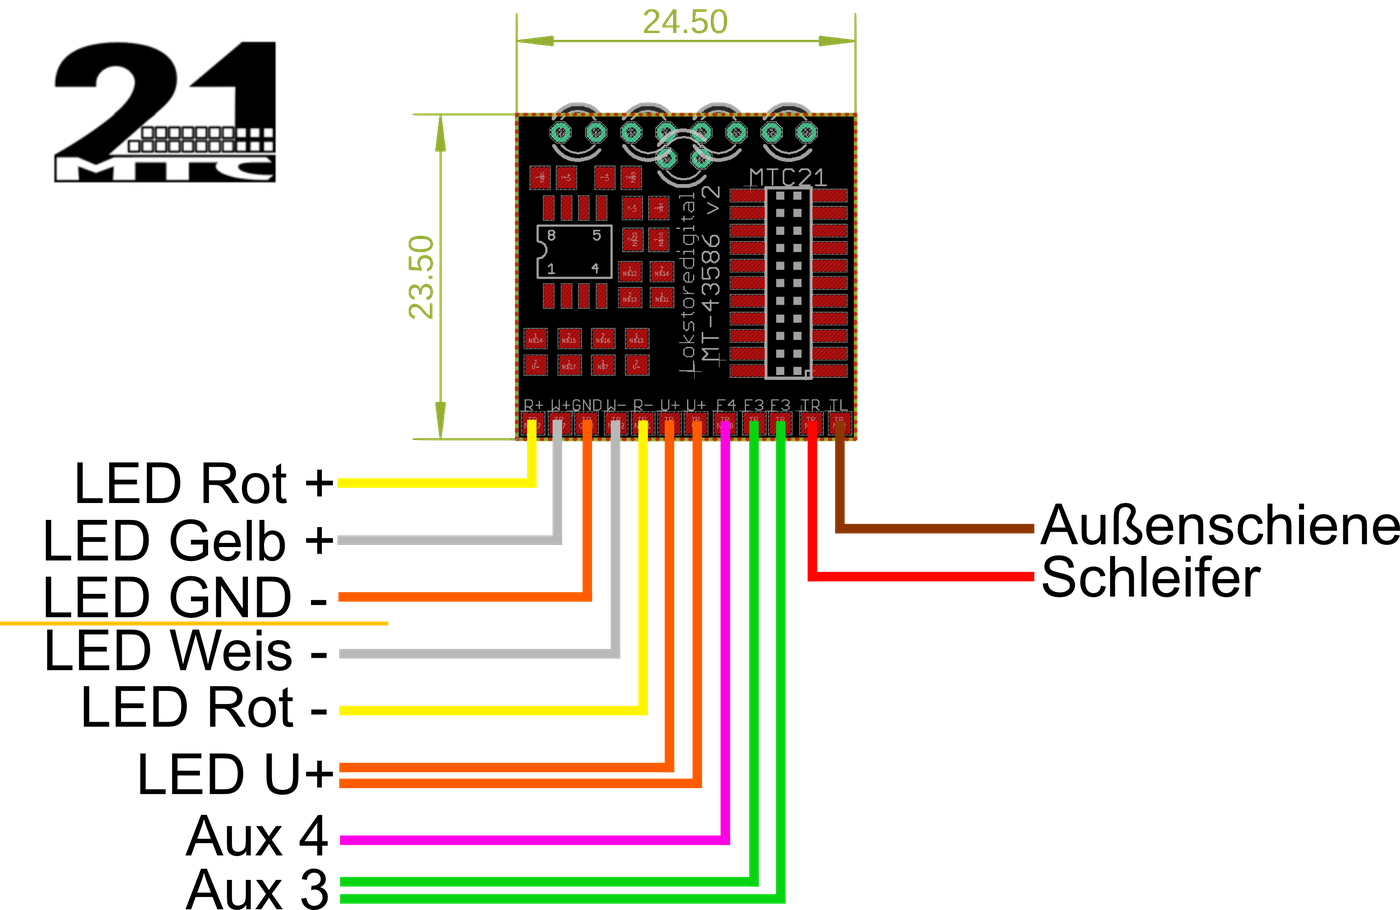
The Lokstoredigital MT-43586 V2 adapter board has several solder pads at which you can connect the existing lighting and the wheel or centre-rail pickups.
In the picture you see the connection order for the MT-43586 adapter board.
(Clicking on the pictures enlarges them.)
No further resistors are needed for the LED lighting; all the necessary series resistors are already on the MT-43586 V2.
The MT-43586 fits the following Märklin® coaches:
- 43586, 43583, 43599, 00763, 43475, 43476, 43570, 43575, 43470, 43576, 43583, 26533, 43573, 78478, 78379.
The MT-43586 fits the following Trix® coaches:
- 24324, 24508, 21246.
If your coach's article number is not listed here, do get in touch with us.
2. Installing the MT-43856 V2 adapter board
If you can solder and have already lit one coach or another, the conversion should come easily to you. If you are a beginner, however, or do not feel up to a conversion, do get in touch with our partners.
They will be glad to make you an individual offer.
You can carry out the conversion yourself?
Then let us begin.
You will need:
- A soldering iron with a fine tip, and solder
- A flat screwdriver
- A small, fine pair of side cutters as well as, if available, a wire stripper for fine cores.
- Superglue, to fix the boards lightly in place.
You can start the pictures as a small slideshow and enlarge them for a detailed view.
We will guide you step by step through a successful coach conversion with this description. If you notice while converting that steps or information are missing, do get in touch with us or visit our forum.
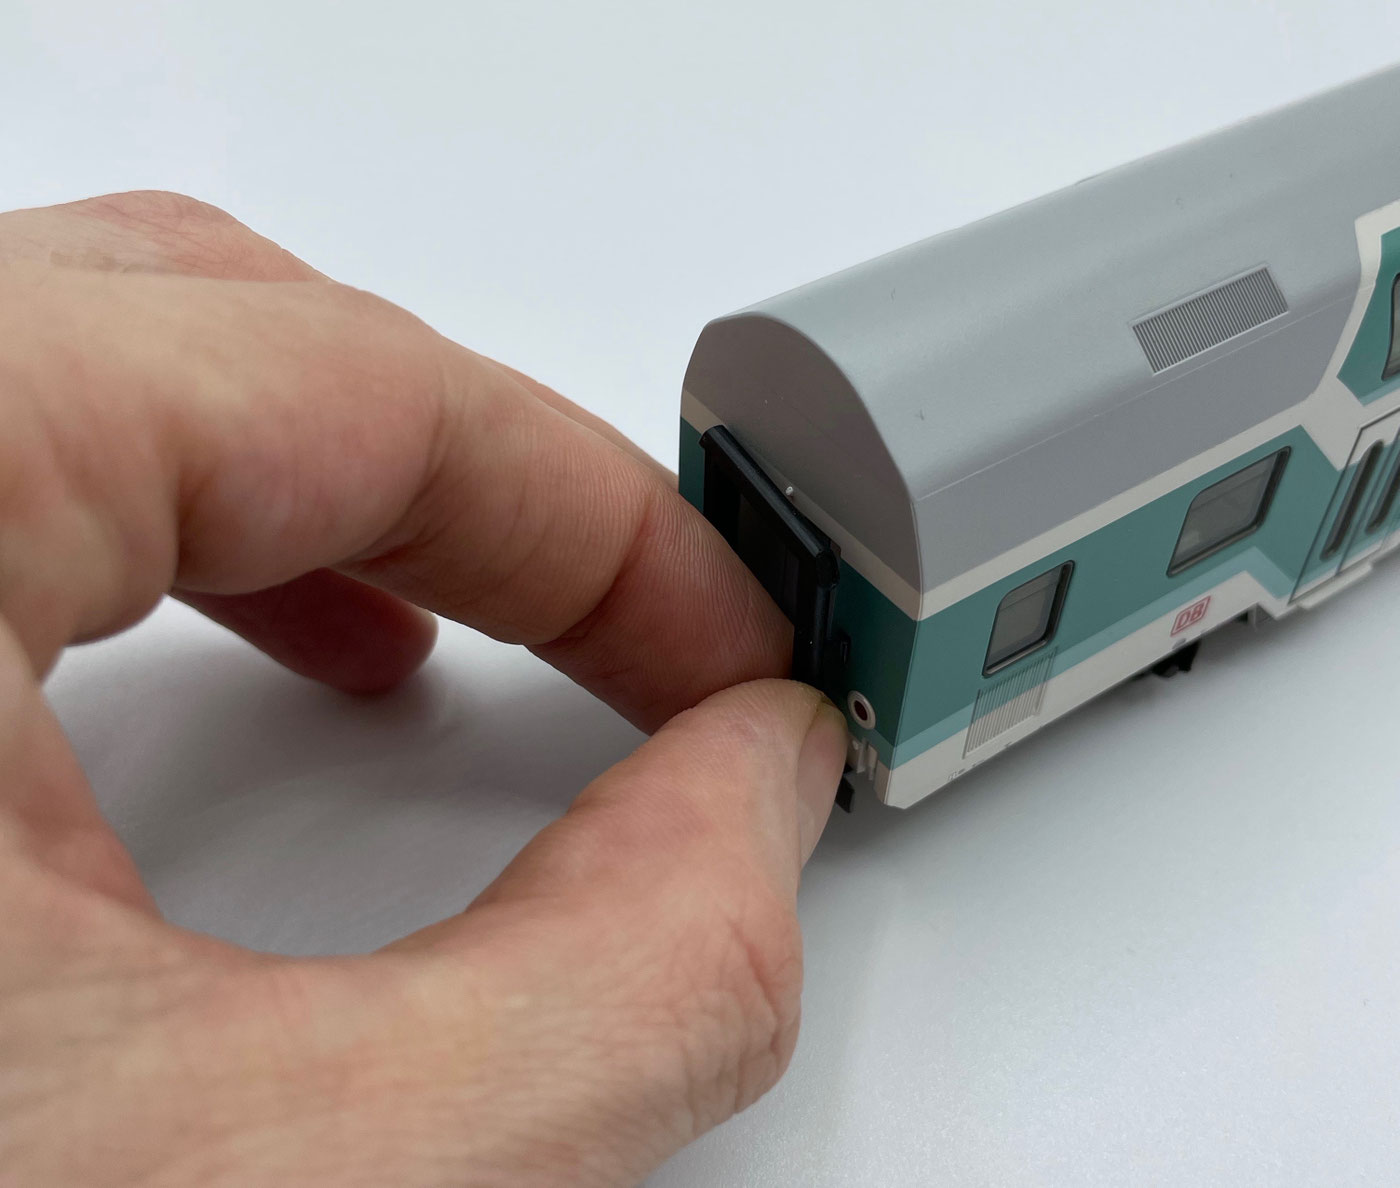
First you have to open the body of the double-deck coach. That is very simple and is explained here in a few steps: please pull off the black rear bellows frame. As a rule it unclips very easily.
After that the front buffers and the whole buffer beam also have to be removed.
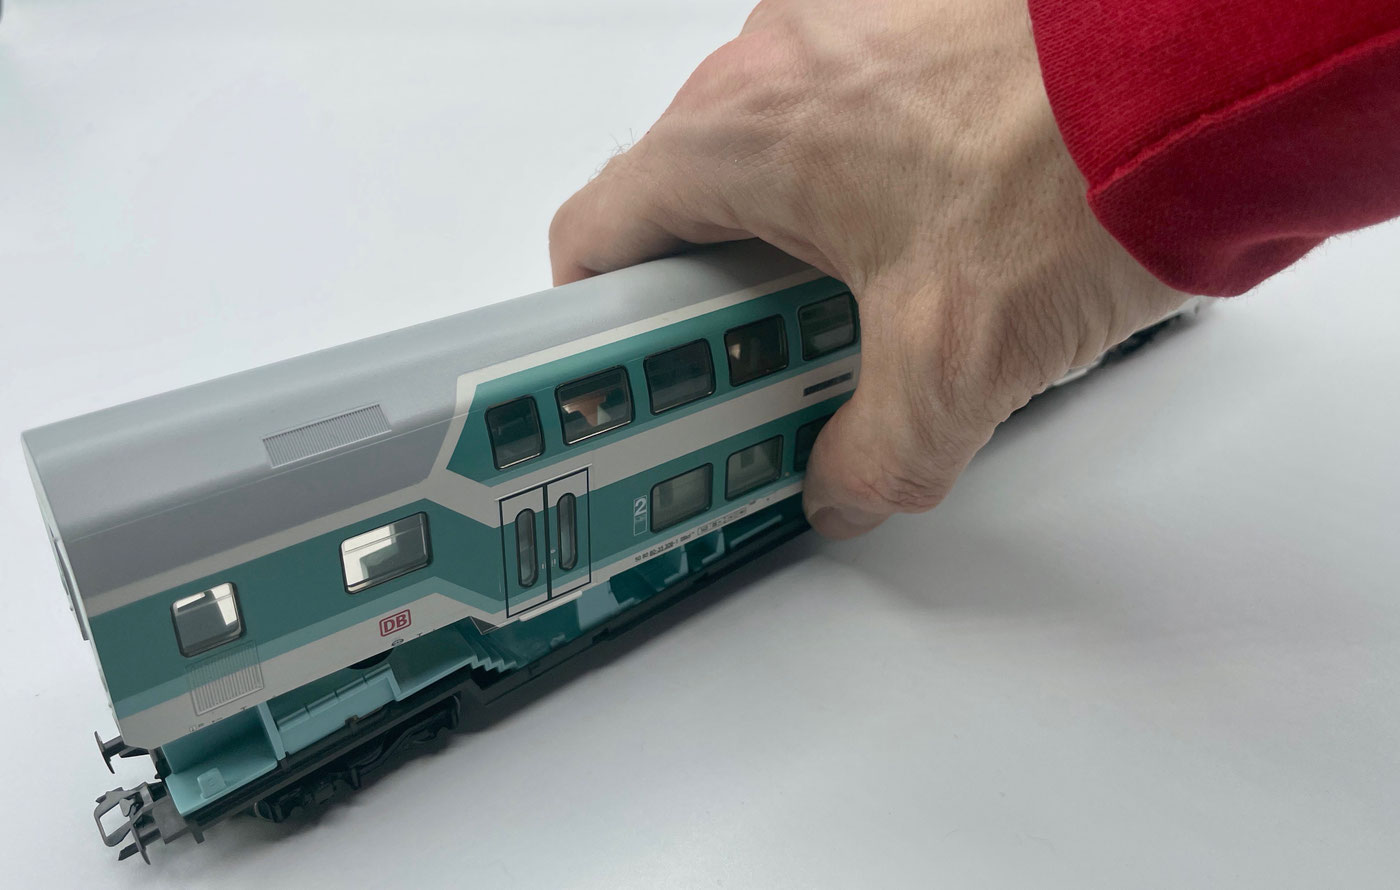
The coach roof can now be lifted off already, but is still held by the side walls. These can simply be eased apart a little and the coach roof taken off.
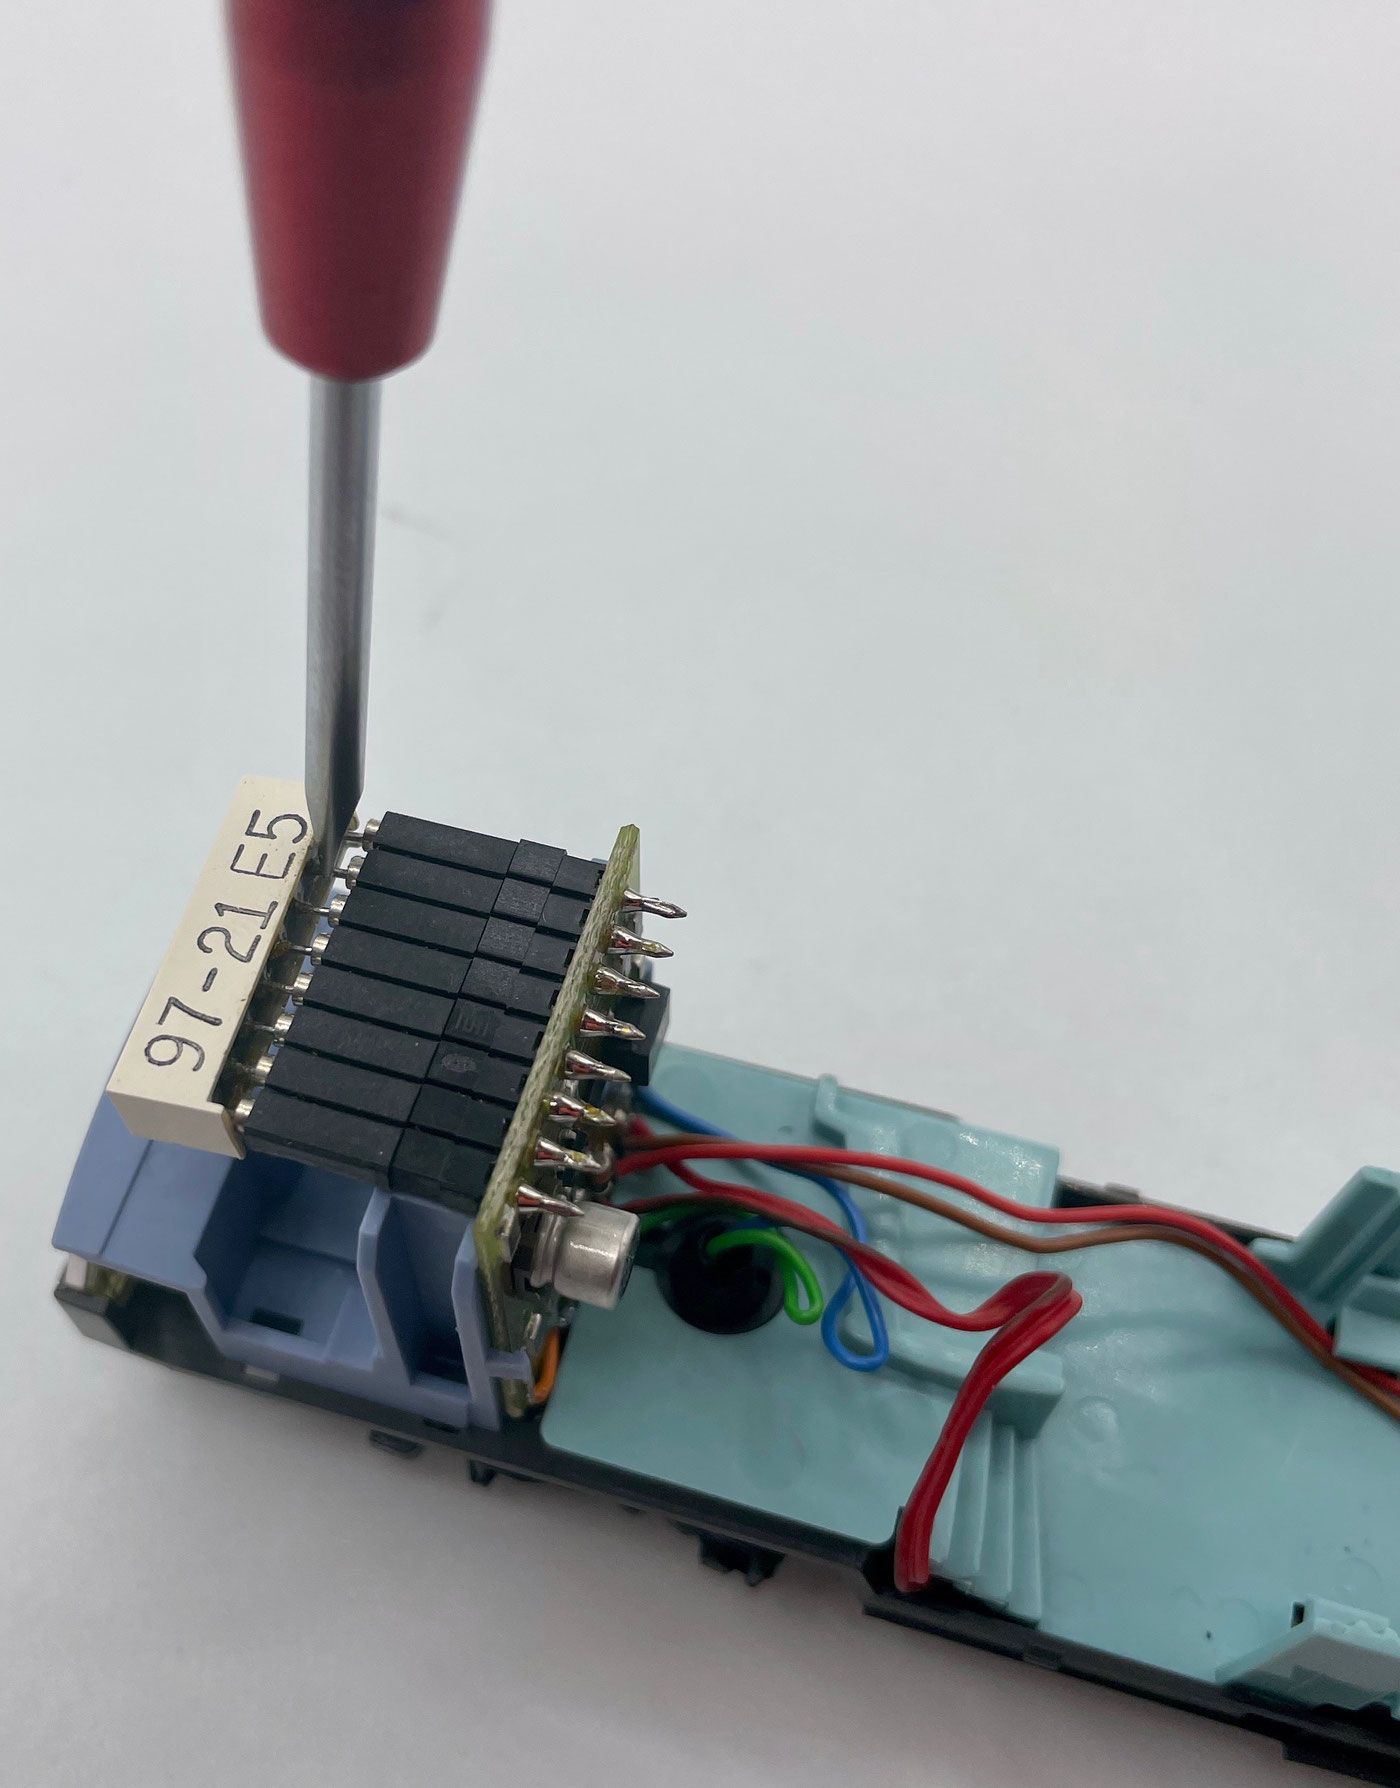
In the next step the train destination display has to be removed from the old board. A small flat screwdriver is well suited to that.
You can start on one side of the display and then work on the other. That should have loosened the display enough for you to simply pull it off.
Now remove the old board and unsolder the wires directly at the board.
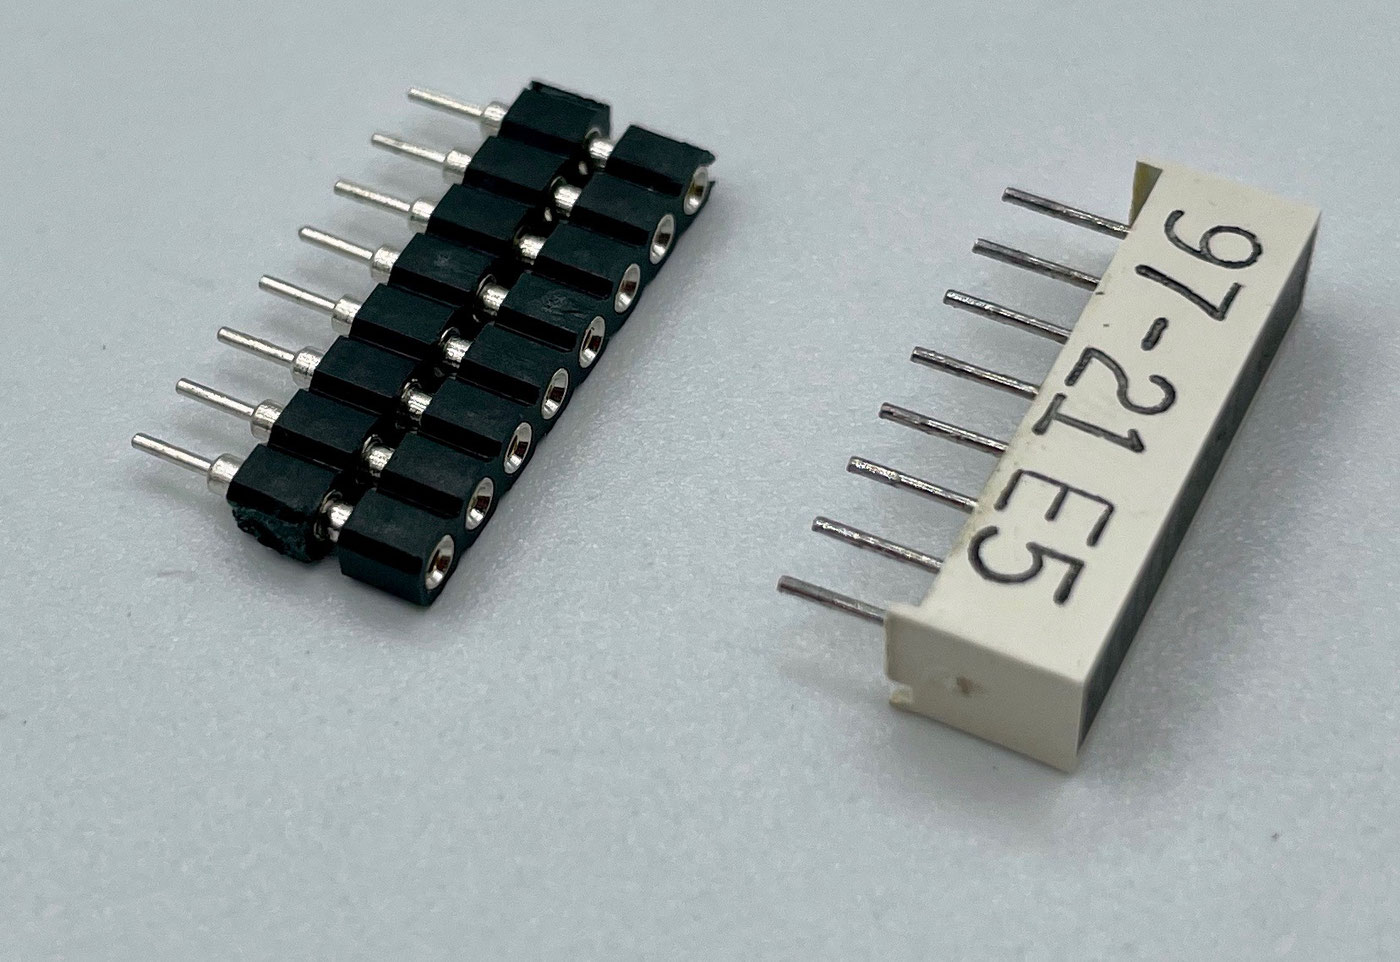
Two extensions for the LED guide are also supplied with the MT-43856 board.
These now have to be plugged into the LED display you took out.
After that you can plug the display into the MT-43856.
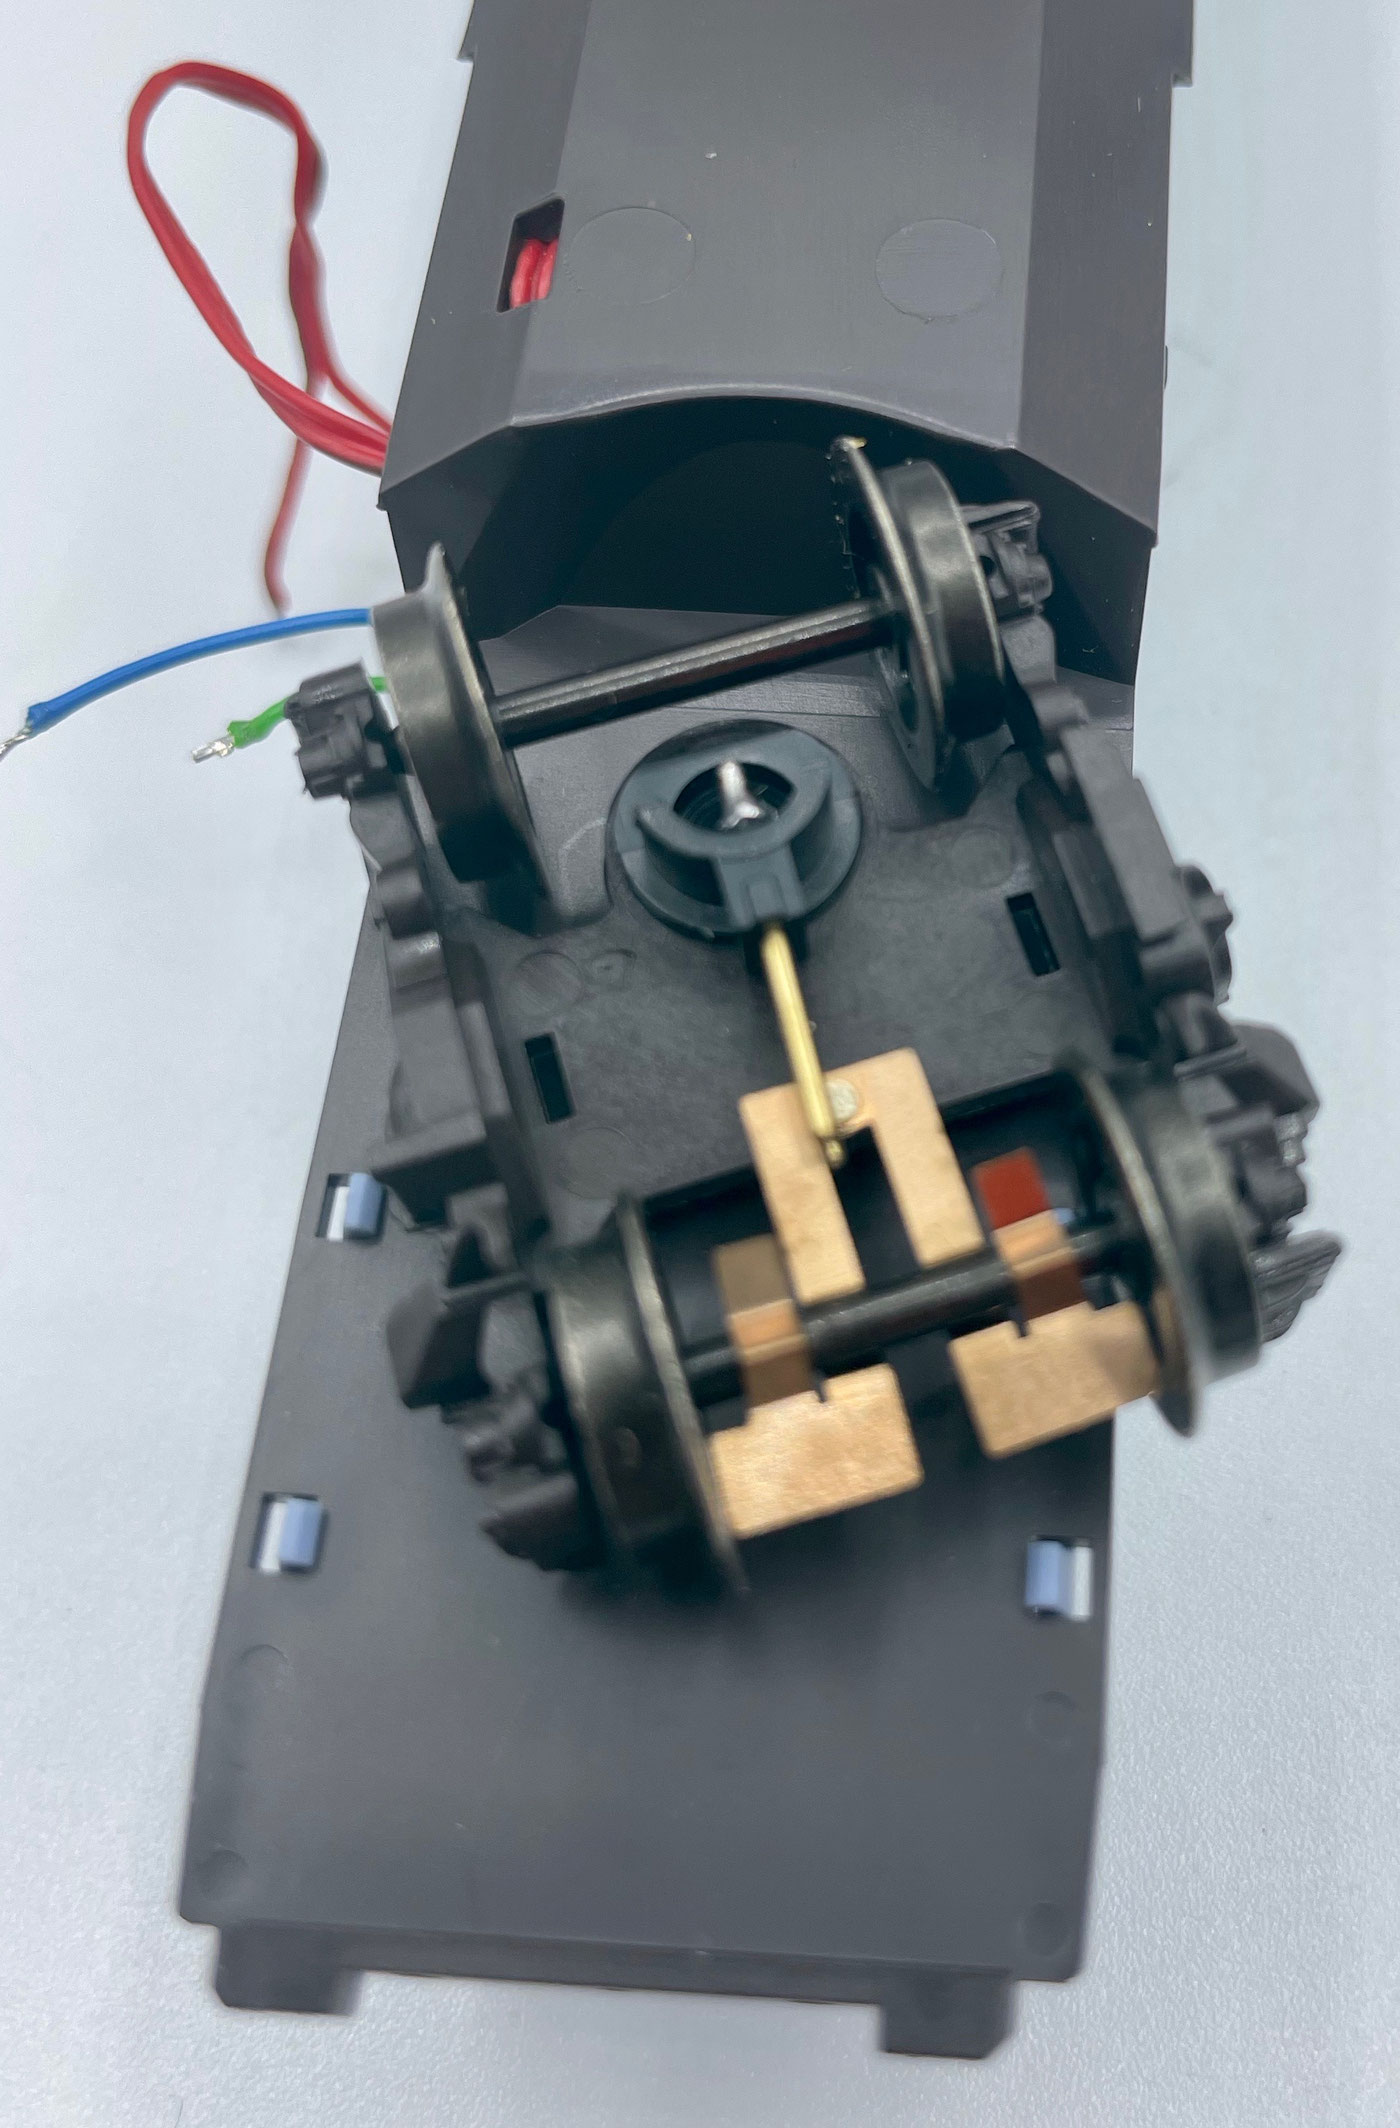
As delivered, the coach has a pickup changeover on the rear bogie.
That is no longer needed and can be removed, which also reduces the rolling resistance.
Remove the changeover from the bogie entirely.
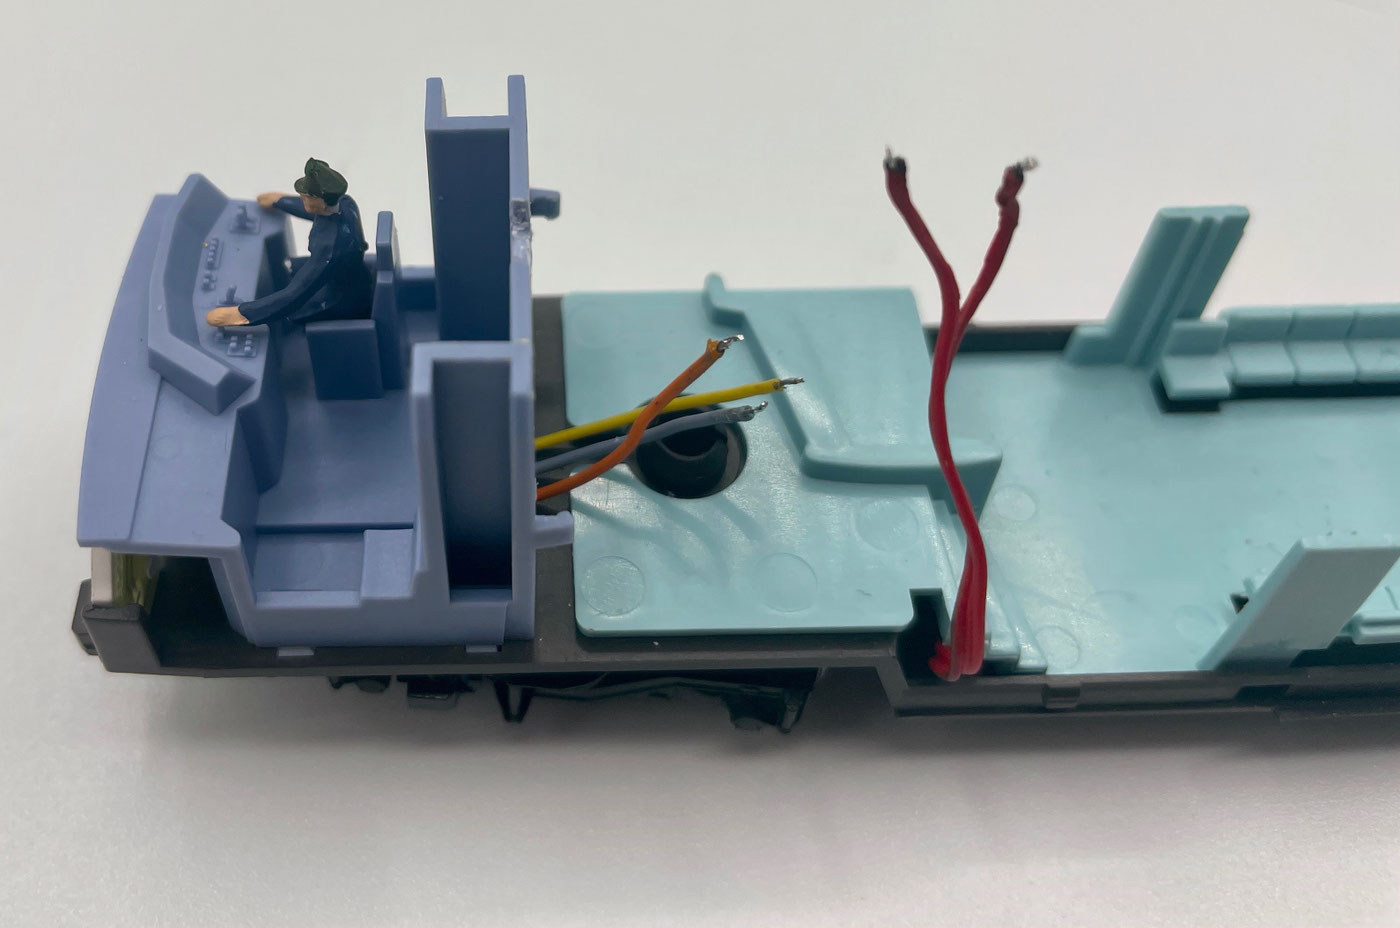
Now check whether the disconnected wires are still usable. If they can no longer be used because of the heat, you should snip them back a little, strip them again and re-tin them.
The MT-43856 board has built-in cab lighting. You have to cut the opening for it out of the coach wall with a small cutter or fine side cutters; a small piece in the middle is enough.
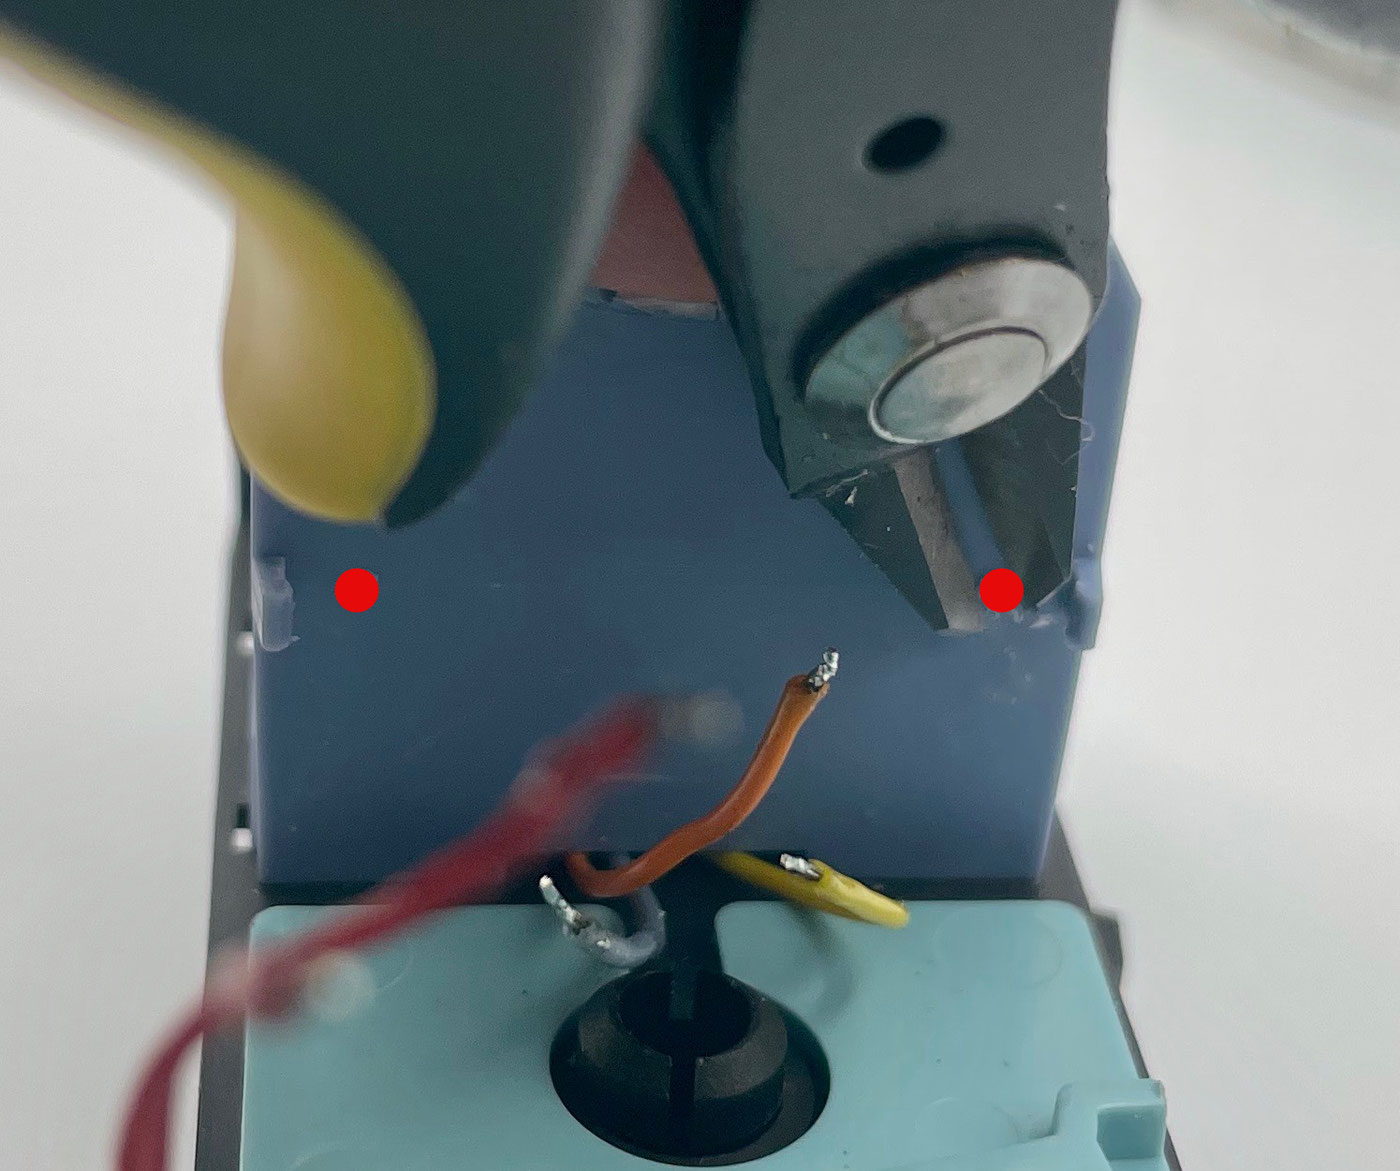
On the coach wall against which the decoder sits there are 2 guide pins, which we have marked in red in the picture here.
These are not provided for on the MT-43856.
You can simply snip them off with small side cutters or mill them away with a small cutter.
CAREFUL!
Please do not snip off the retaining jaws, as they are still needed to hold the MT-43856 against the coach wall. You can use a drop of superglue or double-sided adhesive tape to fix the board.
Take care to let the superglue outgas for a few hours before you fit the coach roof.
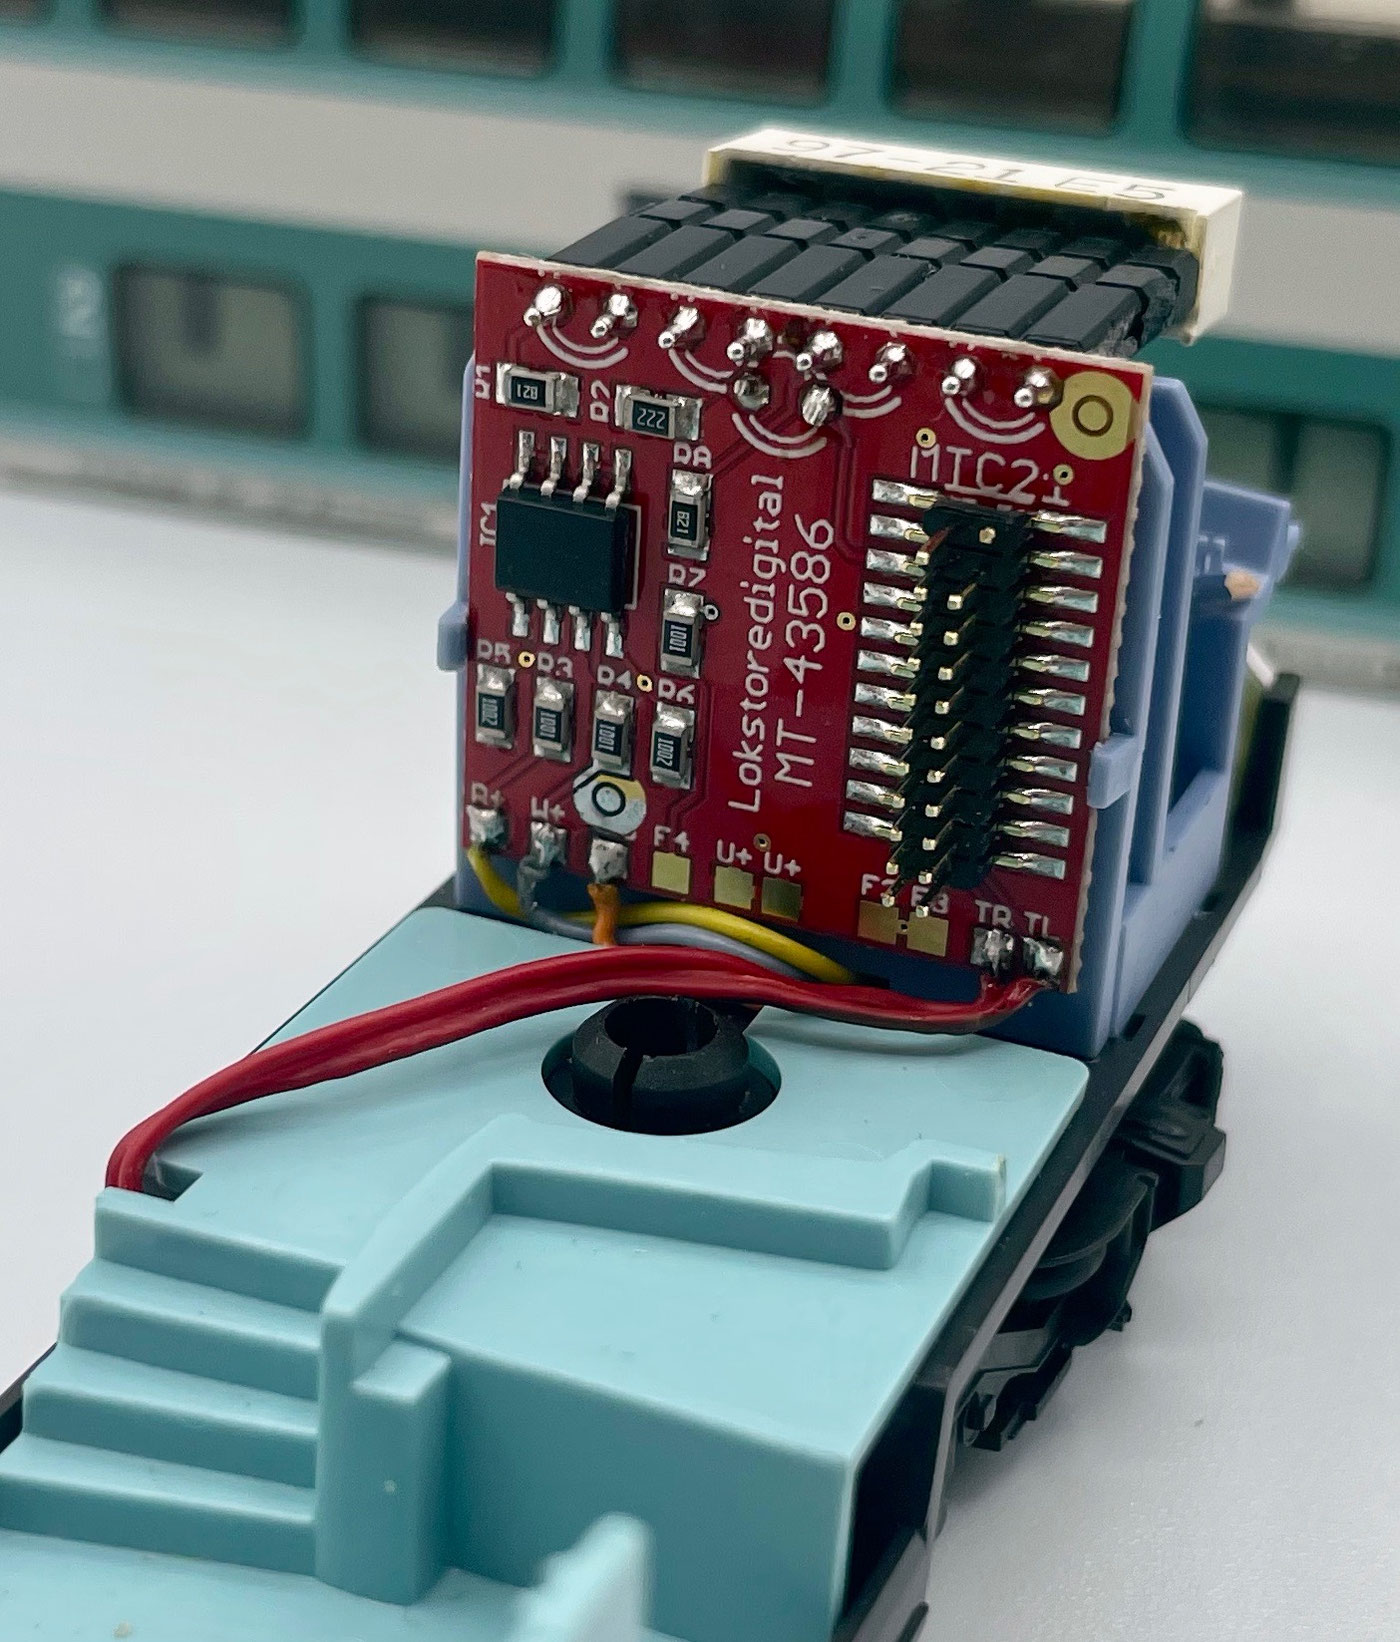
You can now solder the wires to the board. It is advisable to do this with the board unclipped, since otherwise you would have to solder very close to the coach floor.
After soldering, the board can be clipped into the coach or, as explained above, briefly fixed with superglue.
Now plug a decoder of your choice onto the 21-pin MTC connector and reassemble the coach in the reverse order to the way you took it apart.
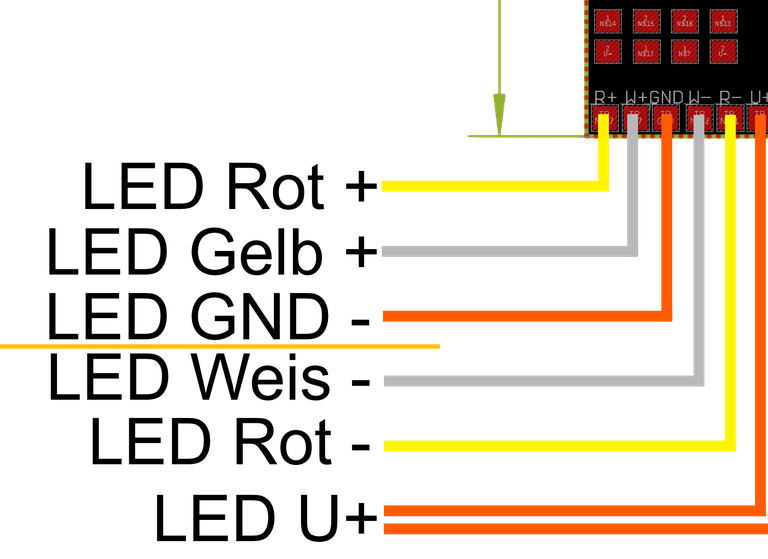
Märklin make several versions of the front lighting. If you have yellow/red lighting fitted, it is switched through "+". In that case the wires have to be connected as follows: orange = GND
Grey = W+ (yellow LED)
Yellow = R+ (red LED)
If the original LED board is white/red, they have to be switched through −, and the wires then have to be connected to the following pads: orange = U+
Grey = W− (white LED)
Yellow = R− (red LED)
3. Configuring the outputs
With an unprogrammed function decoder such as an ESU, the outputs are configured as follows: F0 = yellow/red light, F1 = destination display lighting, F2 = cab lighting, F3 = the decoder's output for interior lighting, F4 = provision for a separate high beam (a resistor needed here is already on the board)
The function mapping can of course be assigned freely. For how to configure your decoder, please refer to your decoder manufacturer's description.
4. Connecting interior lighting
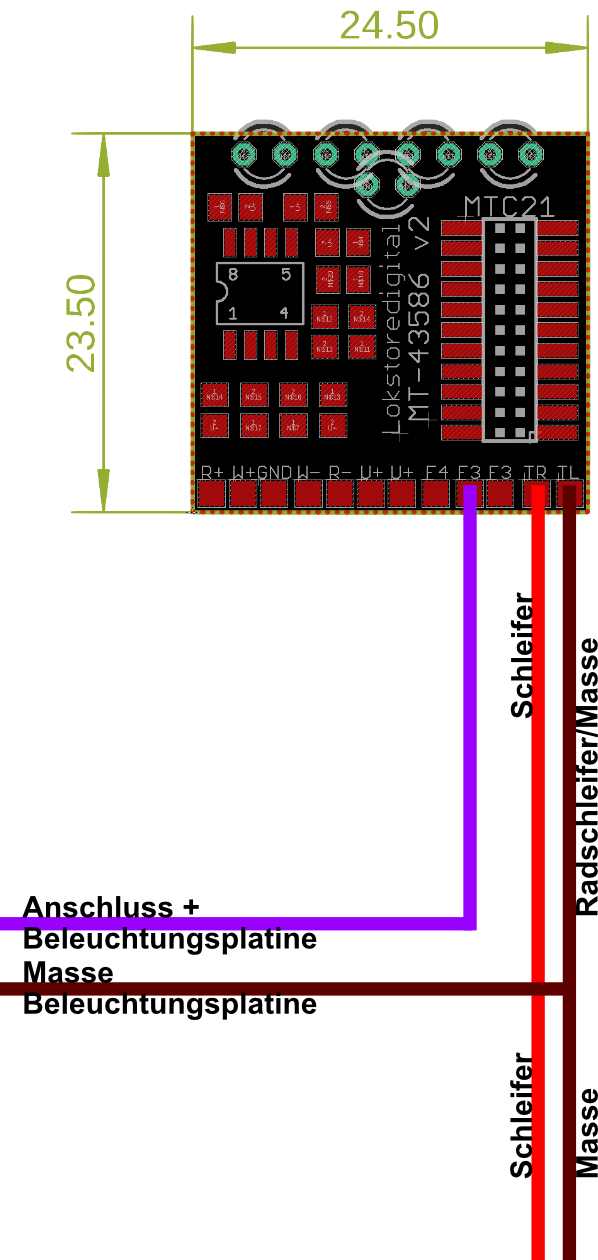
If you still have interior lighting fitted in the double-deck coach, you can connect it to the F3 connection of the
MT-43586 V2 board.
That output runs straight from the decoder's function output to the F3 pad. It is not amplified further, so if you want to switch the whole train with it, you should check in your decoder's manual how much load it can switch.
With a current-carrying coupling it is possible to loop the purple and brown poles through to further coaches.
Do watch your decoder's maximum output when doing so.
5. Technical data
Dimensions: length 24.5 mm, height 23.5 mm, thickness 24 mm with the LED display. Weight: 11 grams. The MT-43586 V2 has a standard 21-pin MTC interface and can be fitted with all common locomotive or function decoders with a 21-pin interface.

Would you like to see the quality of the devices for yourself?
Visit our forum, where experienced users are glad to help.