
Hardware
LoDi-TrainSpeed
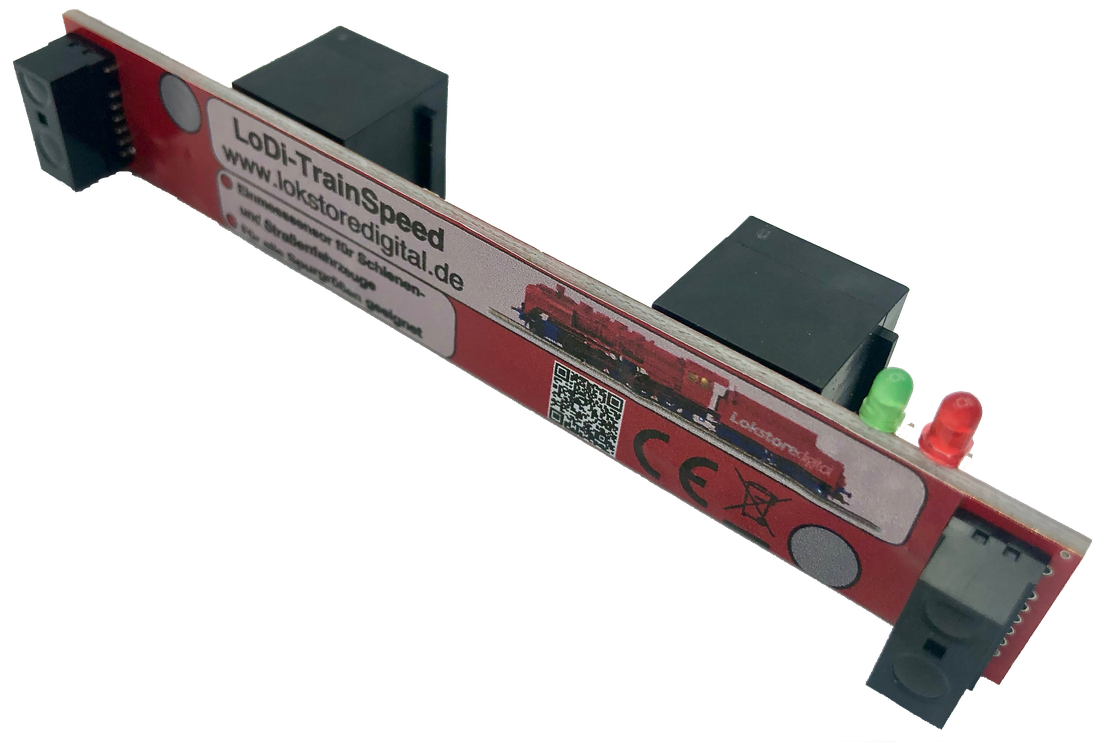
Introducing:
The LoDi-TrainSpeed.
Life is too short to measure vehicles in the traditional way over detectors . . .
Our efficient measuring device for vehicles of every kind and scale.
Completely reworked, faster and more accurate in its measurements, the LoDi-TrainSpeed delivers results at speed and sends them over the µCon bus to the LoDi-Rektor.
Features of the LoDi-TrainSpeed
- Measuring device for trains, locomotives, cars . . .
- suitable for every scale
- Tolerance measurement with deviation detection during the run.
- Length measurement of locomotives and of whole trains.
- µCon bus compatible and backwards compatible with the µCon-Manager.
- No difficult installation — plug the cable in and set it beside the measuring section.
- Can also be fitted under the track.
- Up to three TrainSpeeds can be run one after another.
- Connections for external LEDs provided.
Videos of the device
Videos from partners
Measuring in with the LoDi-TrainSpeed in iTrain.
Measuring in with the LoDi-TrainSpeed in Win-Digipet
Measuring in with the LoDi-TrainSpeed in TrainController
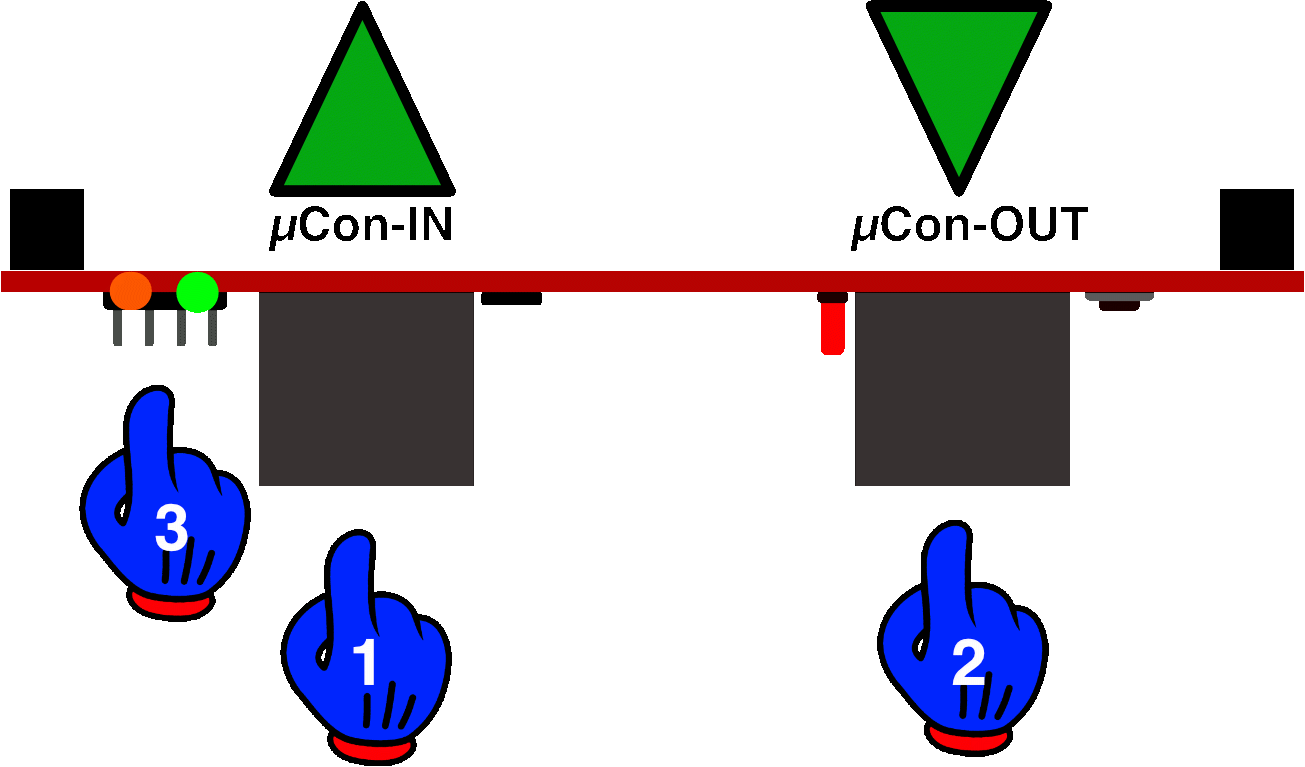
1. The LoDi-TrainSpeed and its connections
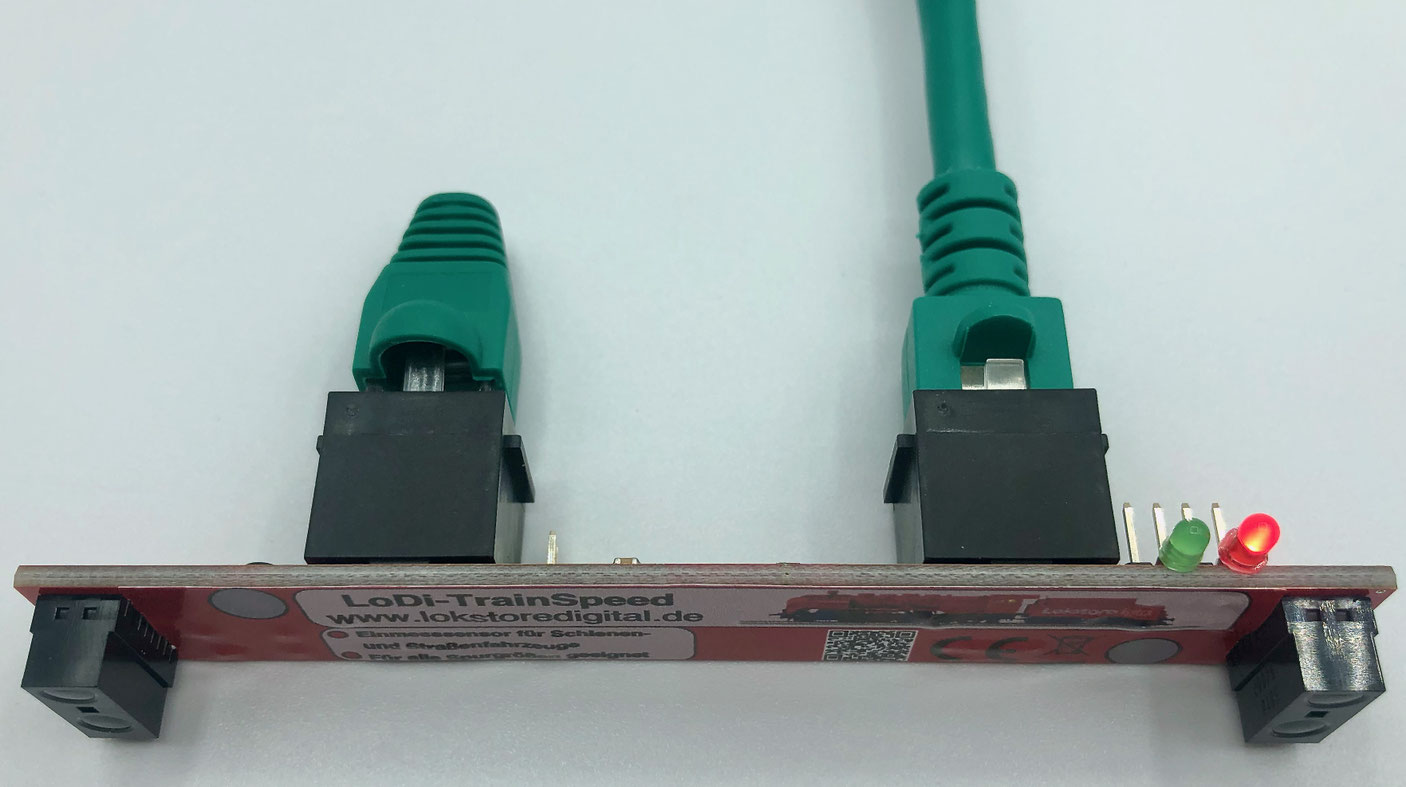
The LoDi-TrainSpeed is a bus device and simply hooks into the existing µCon bus.
- µCon bus IN, the connection to the TrainSpeed
- µCon bus OUT carries the signal on to further devices on the µCon bus
- Connection for external LEDs
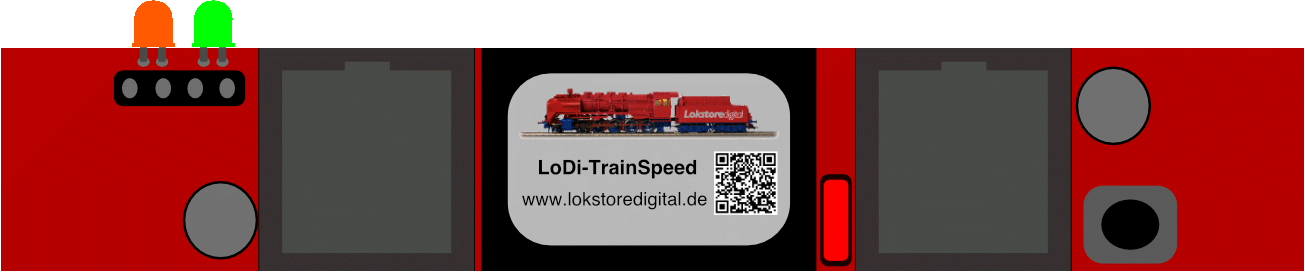
2. LEDs and button on the LoDi-TrainSpeed
The LoDi-TrainSpeed has two LEDs that show you whether the sensor is measuring or ready.
- When the red LED flashes, a measurement is under way. The green LED is lit whenever the device is ready for use.
- Address button: every µCon bus device gets its own address, through which it reports back on the bus.
- Jumper: this jumper has to be fitted if you want to install a second LoDi-TrainSpeed directly after the first.
3. Connecting to the µCon bus
Connecting to the µCon bus could hardly be simpler.
Here are a few wiring examples.
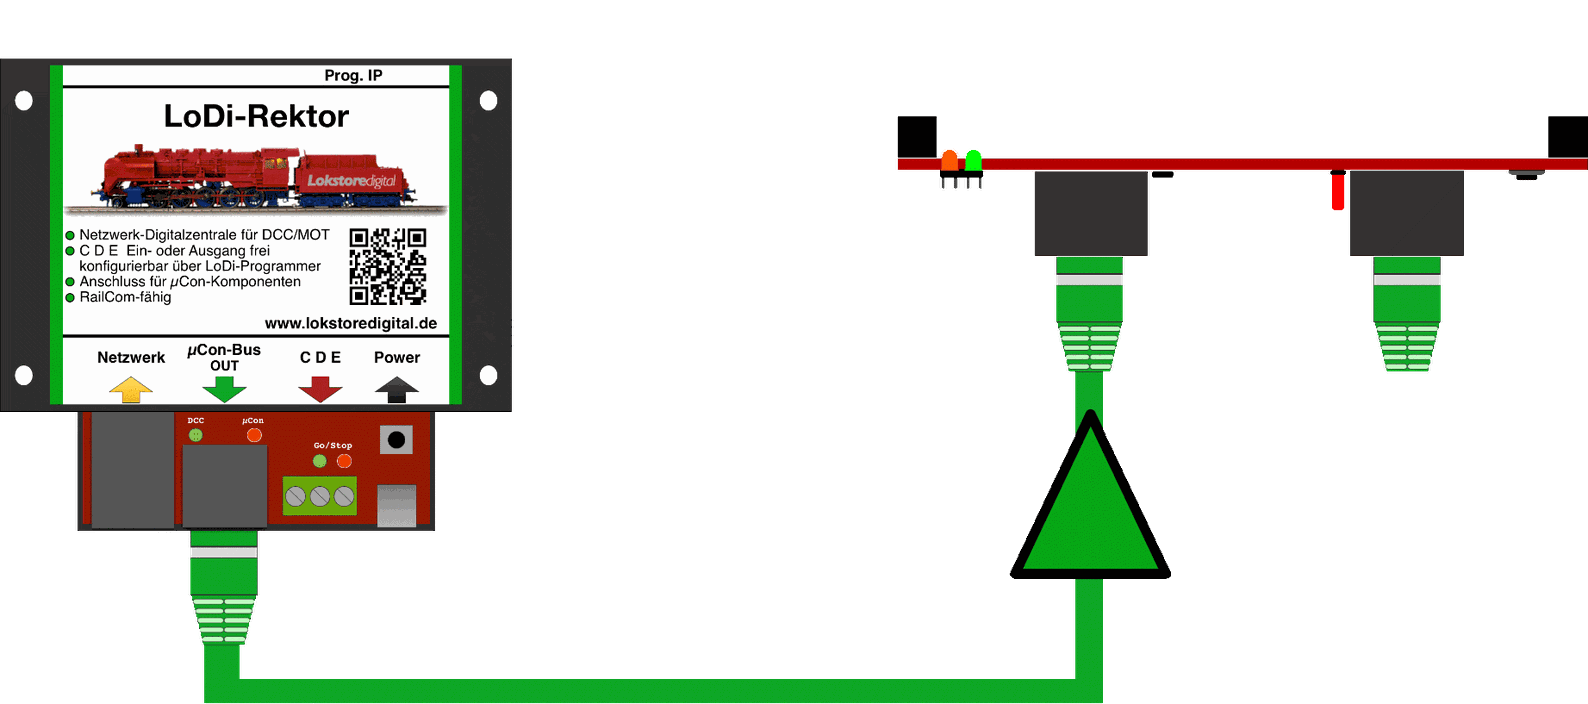
Here is the configuration with a single TrainSpeed.
One LoDi-Rektor with one LoDi-TrainSpeed.
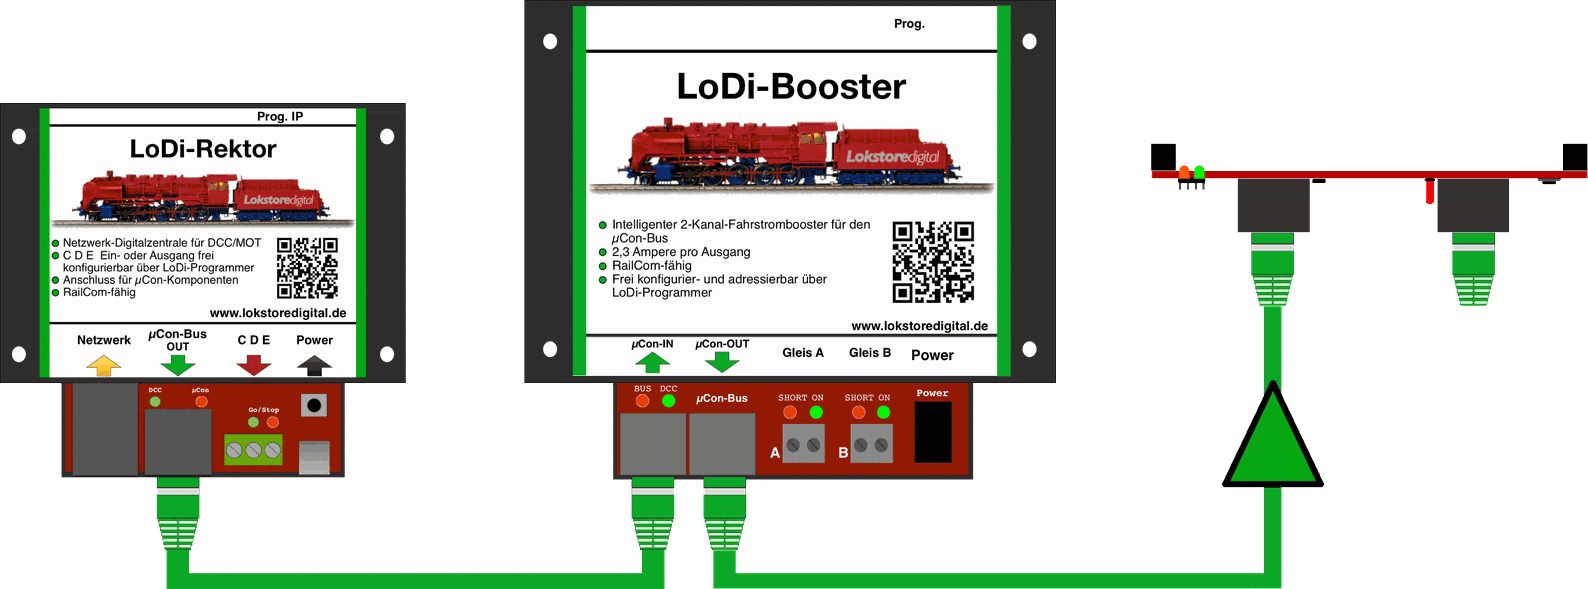
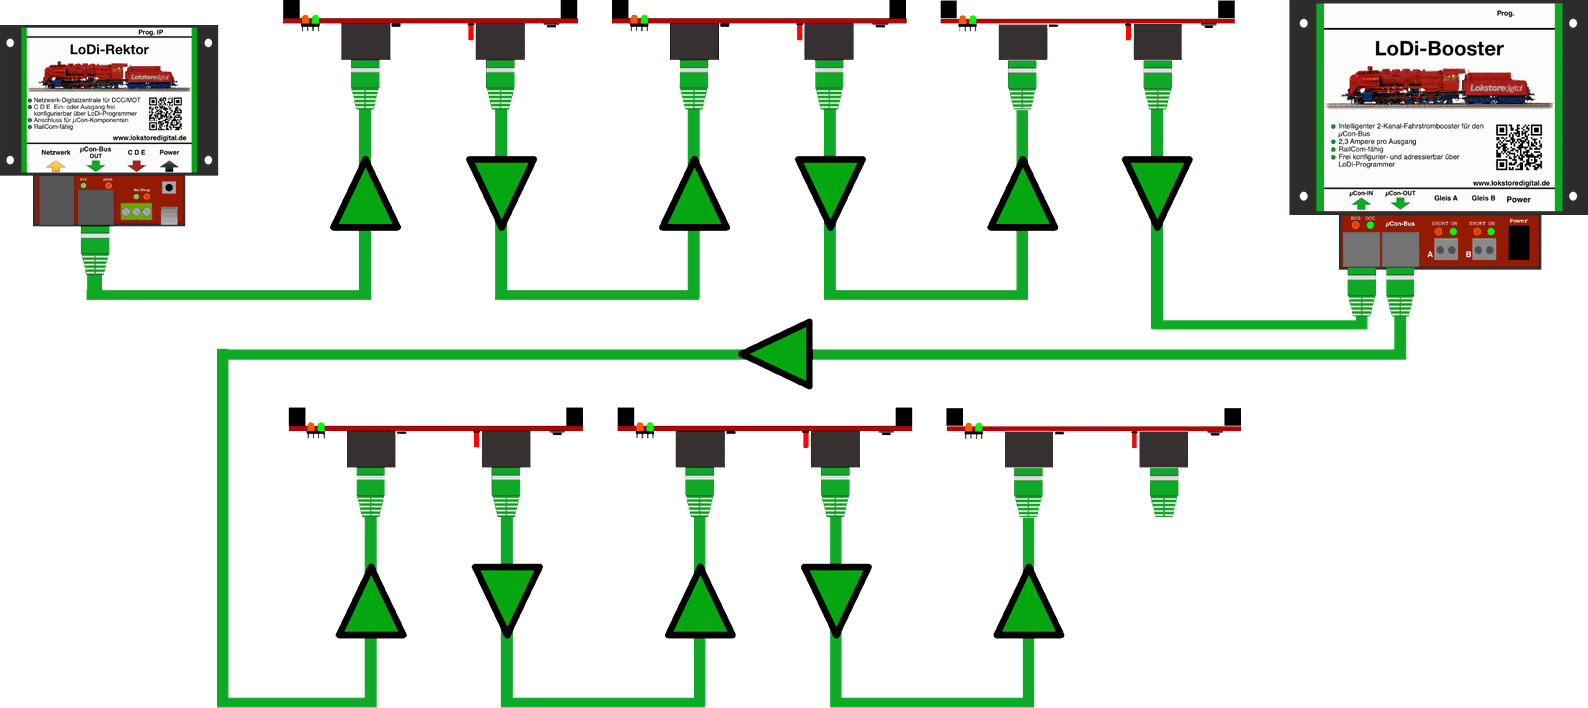
This diagram shows how the LoDi-TrainSpeed connects to a LoDi-Booster.
Careful: only the right-hand socket on the LoDi-Booster supplies the current the LoDi-TrainSpeed needs.
For that reason, always watch the arrows.
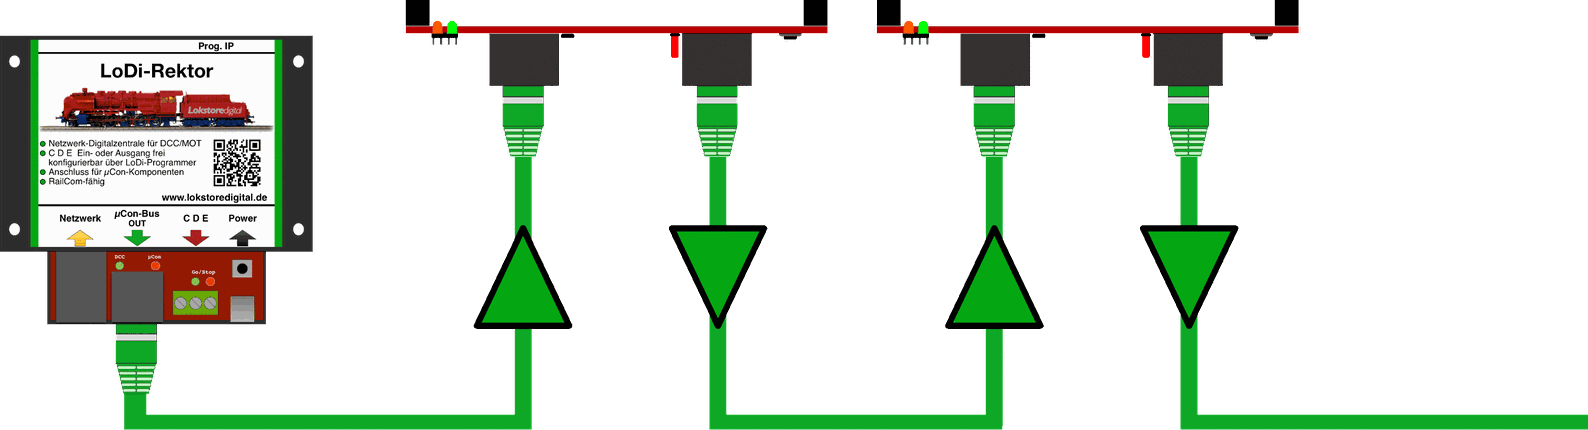
This diagram shows the LoDi-Rektor supplying two LoDi-TrainSpeeds with power and bus. In this configuration the jumper mentioned in section 2 has to be fitted.
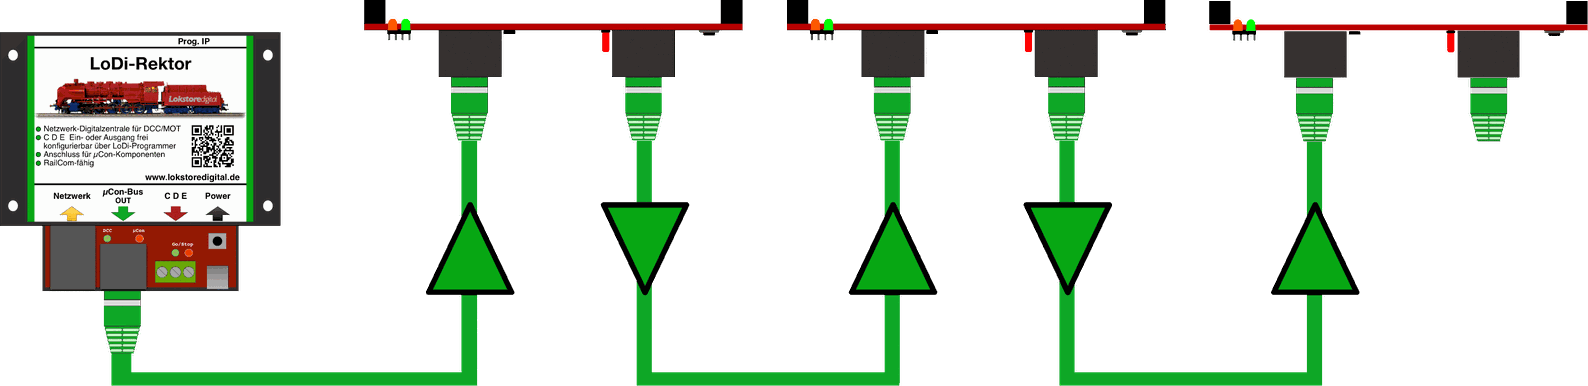
Here you see the maximum number of LoDi-TrainSpeeds that can be chained one after another.
The bus itself can hold 63 devices in total, but only three TrainSpeeds may be chained in a row.
If you need more TrainSpeeds, you can add another three after inserting a booster.
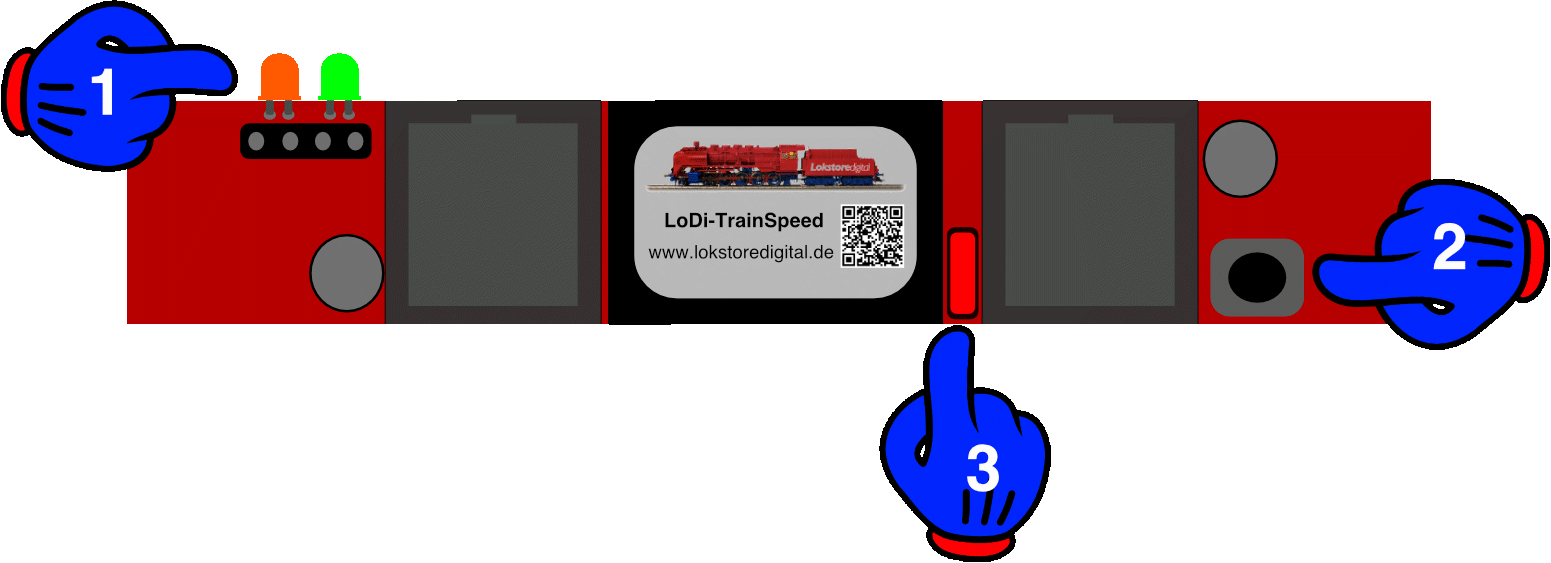
4. The LoDi-TrainSpeed and its sensors
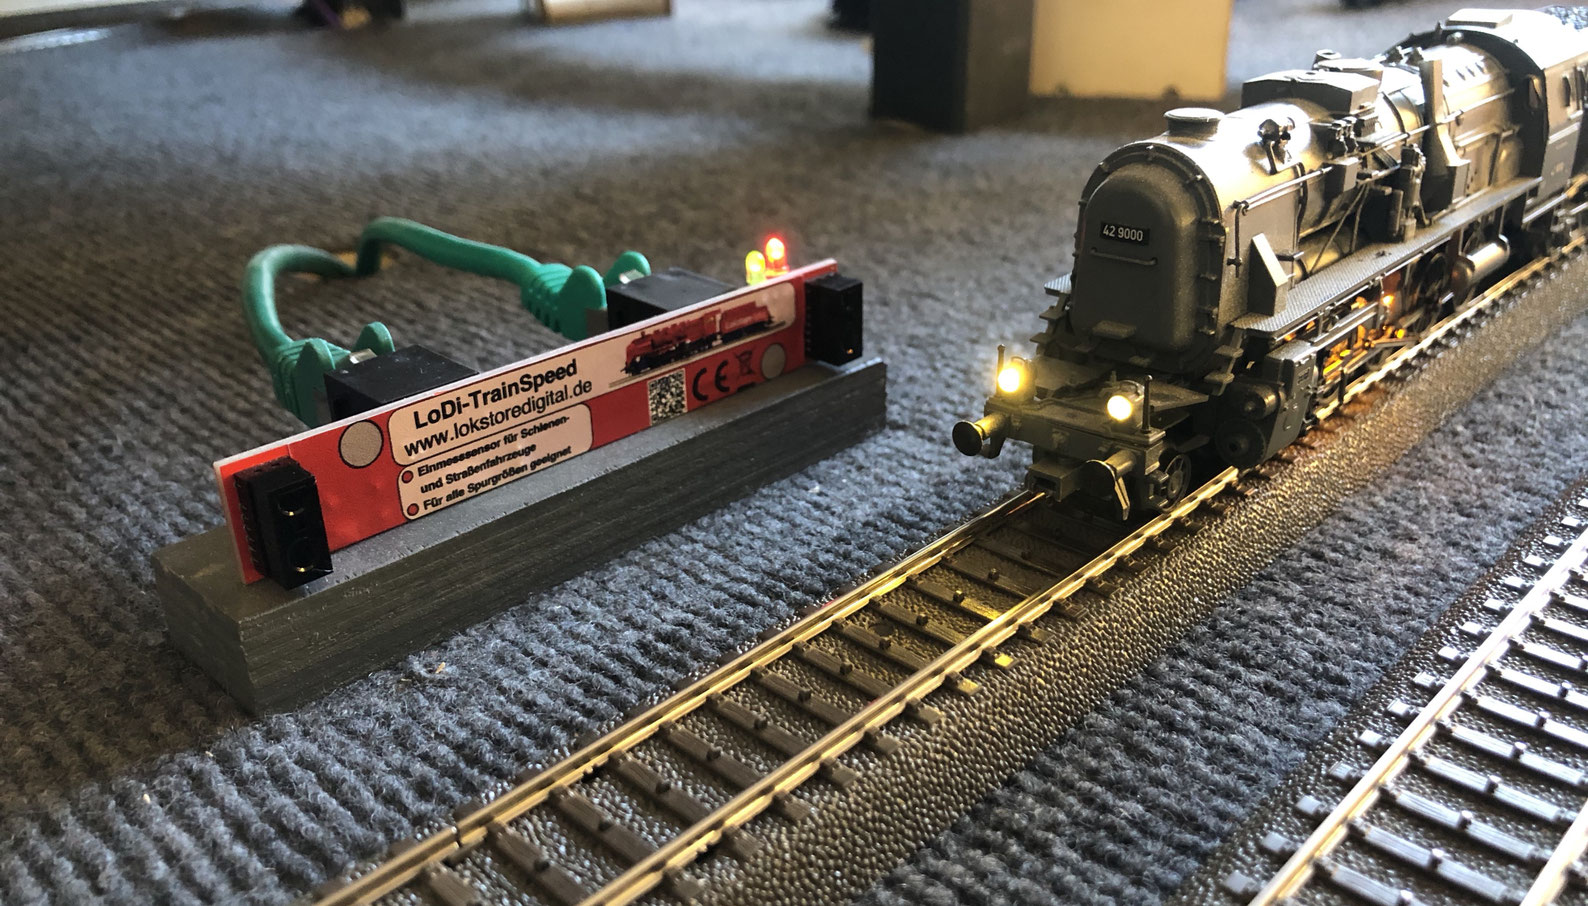
There are two sensors on the LoDi-TrainSpeed, marked 1 in the picture . . .

These sensors pick up your vehicles as they pass and hand the data on to the control software or the LoDi-Programmer.
5. Positioning the LoDi-TrainSpeed for measuring
The LoDi-TrainSpeed can be connected straight to the µCon bus and laid beside the track.
It is then ready for use immediately.
Make sure the sensors are triggered at the height of the locomotive wheels or of the car.
Ideally — and necessarily for length measurement — the LoDi-TrainSpeed should be mounted at buffer height.
Getting the LoDi-TrainSpeed to see the vehicles well is easy, because its straight network sockets let it simply be laid beside the track. It can be fixed with a small blob of hot glue, with a cable tie on the lead, a little insulating tape, or run entirely unfixed. The height should be adjusted a little in any case.
If need be, raise the LoDi-TrainSpeed on a small plate.
In most cases that is no problem with ordinary track without ballast.
With ballasted track the height of the LoDi-TrainSpeed has to be matched to the buffer height.
6. Connecting external LEDs
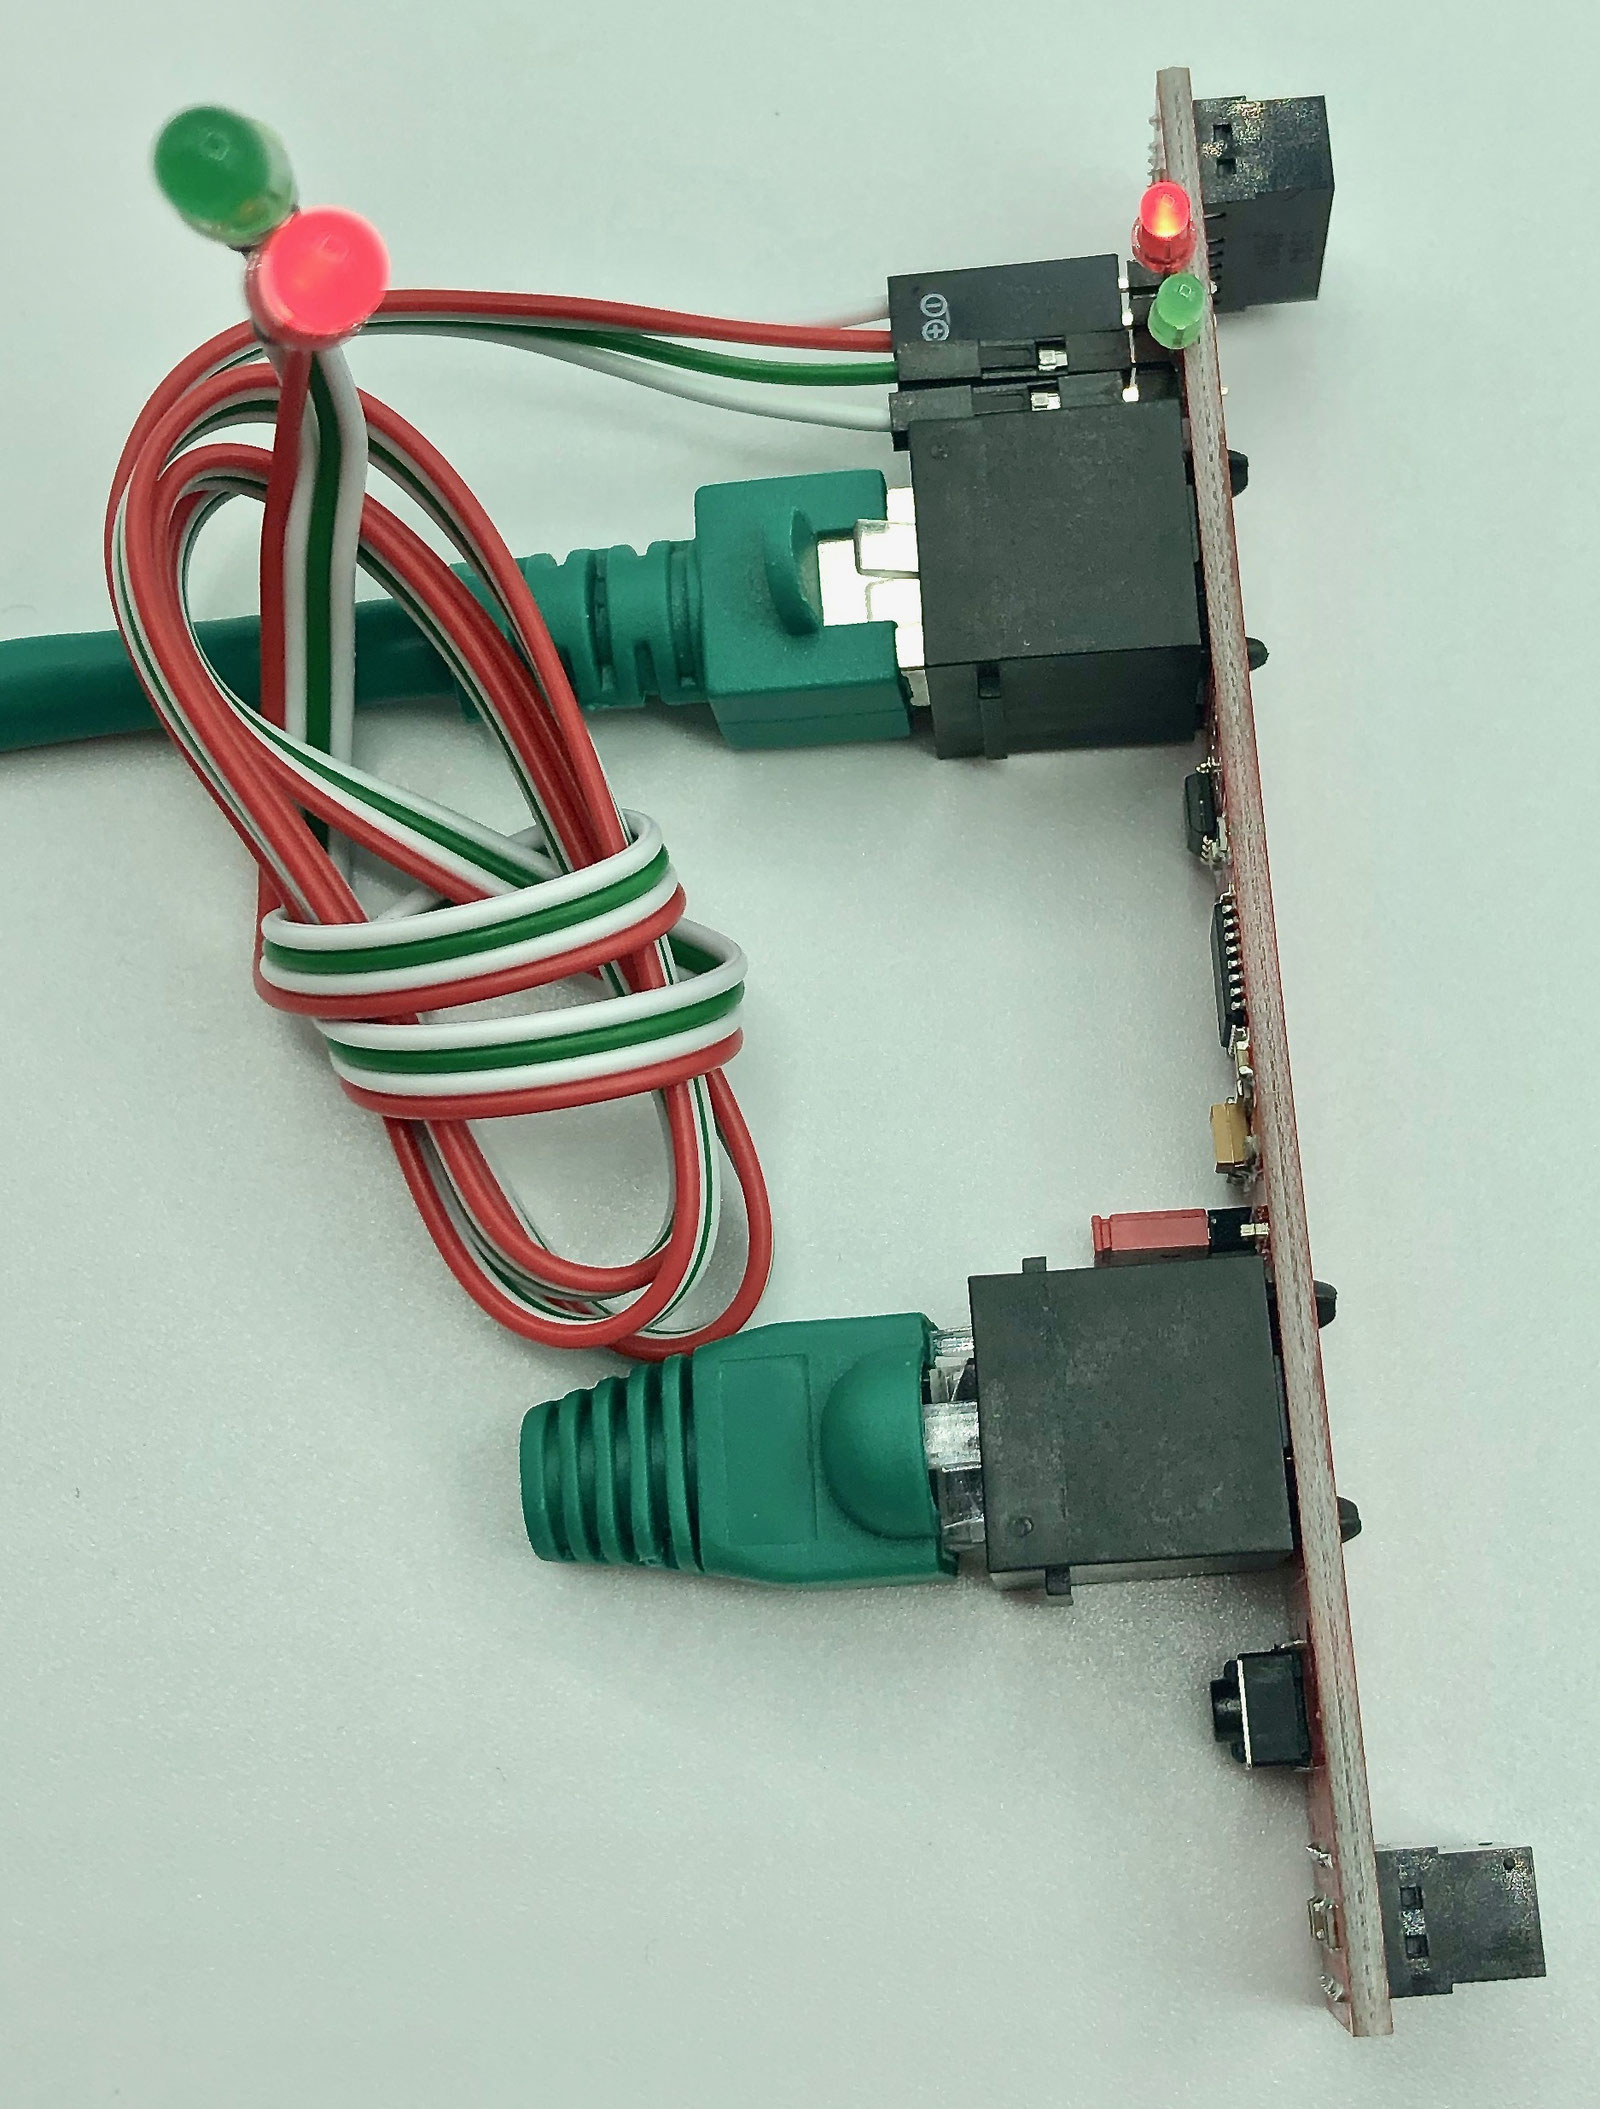
Note: this option is gone in the 2021 version. The 2025 version has SMD LEDs.
If you have installed your LoDi-TrainSpeed under the baseboard, inside a building or similar, and can no longer see the LEDs, we give you the option of fitting two additional LEDs (green / red) to the TrainSpeed.
We offer ready-made LEDs for this in our shop. You can also connect your own LEDs to the two outputs — no series resistor is needed.
7. Technical data
| Property | Value |
|---|---|
| Dimensions | Length 11 cm |
| Width | 3 cm at its widest point, 5 cm with the patch cable |
| Height | 2 cm |
| Weight | 17 grams |
Power comes from the LoDi bus, which runs at a maximum of 5 volts.
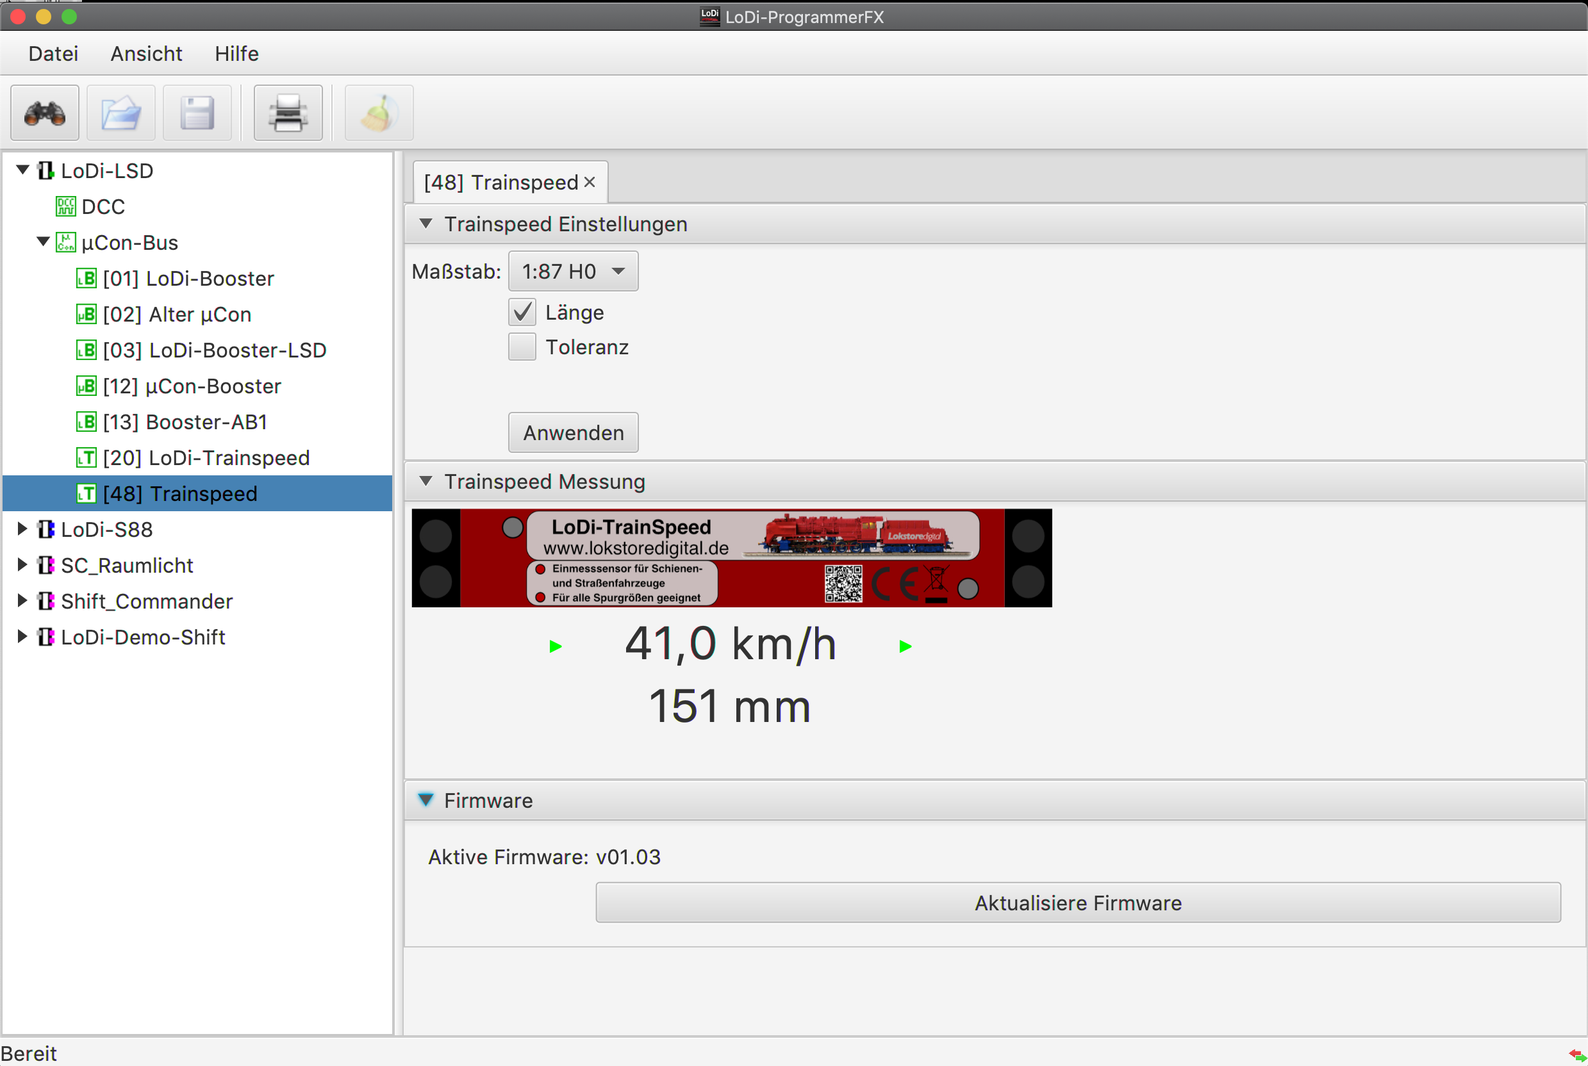
8. Setting up and updating the firmware of the LoDi-TrainSpeed in the LoDi-ProgrammerFX
Here is how to commission the LoDi-TrainSpeed
9. LoDi-TrainSpeed PDF download
Here you can download a summary of the LoDi-TrainSpeed as a PDF.