
LoDi-Con manual
Turnouts and accessories
Before you can throw a turnout, you have to create an object on the LoDi-Con, just as you did for locomotives.
(These steps are unnecessary if you use the LoDi-Shift-Commander: it transfers every object into the LoDi-Con automatically, and nothing further is needed.
For more see "Setting the LoDi-Shift-Commander up in the LoDi-Con".)

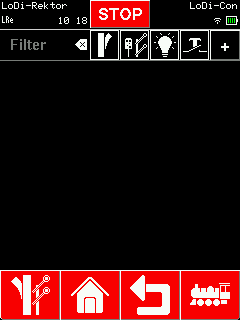
To set a turnout up, tap the turnout symbol at the bottom left.
You are now in the turnout overview.
Tap the "+" at the top right to create a new object.
You are now in the selection menu.
This list already holds a number of objects, among them:
- Turnouts
- Colour light and semaphore signals
- Lighting
The filter, which is available when choosing objects as well, lets you narrow the list down.
Now choose an object to create; in this example we take a left-hand turnout.

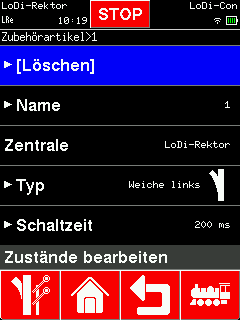
You go straight into the properties of the turnout.
There you can change:
- Delete object (tapping delete removes the object again.)
- Name
- Type
- Switching time
Further down the menu the states of the object can be changed (swapping right/left, for instance).
The states can be tested straight from the properties.
Once you have finished editing the object, you can leave this dialog. Tap the turnout symbol at the bottom left again and you are back in the overview.
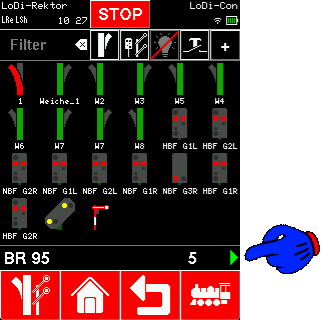
Tapping the newly created turnout switches it between its states.
If an object has more than two states, tapping it shows them as a list to choose from.

The last active locomotive can also be driven straight from the accessory overview.
The most recently active locomotive is always shown, so you can keep it under control while working with turnouts.

Would you like to see the quality of the devices for yourself?
Get in touch with us HERE!
Visit our forum, where experienced users are happy to help you.