
Software
LoDi operators
LoDi operators drive actuators such as turnouts, signals, lamps or LEDs. Depending on the design, they have 8 to 32 outputs. In the LoDi-ProgrammerFX all normal LoDi operators are operated through the same interface. Special operators such as the LoDi-Light-Operator 4-C-LED are an exception.
Normal LoDi operators are, for instance:
- the LoDi-Operator 4-WD-AC (8 outputs)
- the LoDi-Operator 4-WD-DC (8 outputs)
- the LoDi-Operator 16-SD-FL (16 outputs)
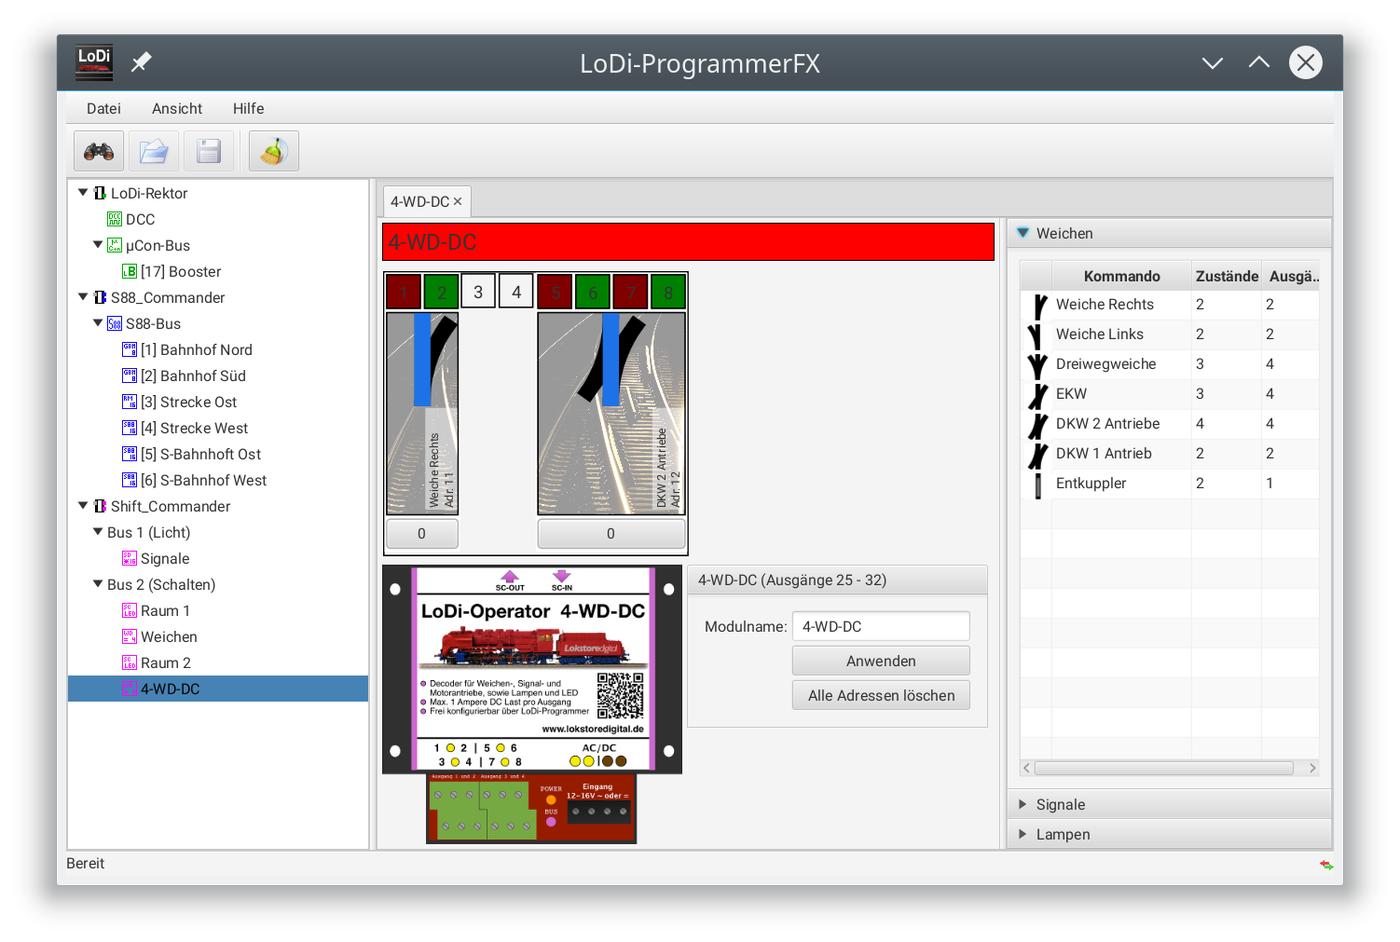
The LoDi operator dialogue consists of the following parts:
- the schematic view of the module with all its outputs and the commands (top left)
- the settings for the module or the command (bottom left)
- the selection area for commands (right)
The view of the module
The outputs are numbered identically to the printing on the LoDi operator module. What the output is used for, as well as its activity, is shown by colour. On turnout commands, red is always straight and green diverging. On signals and lighting effects the lamp's corresponding colour is shown. A dark colour means the output is off, a light one that the output is on. Unused outputs are shown in light grey.
Below the output you see the command placed on it. A command can occupy several consecutive outputs. The address shown in the command matters to the model railway control software: it is what the command is driven through.
The command's current state is shown below that as a button. Every command can have several possible states. The command's state can be changed by the model railway control software or directly by clicking the button. Another way of changing the state is the command's context menu.
Module settings
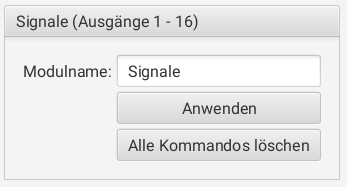
The settings for a LoDi operator module are activated by clicking the name box above the module's outputs.
- Module name: the module name can be 8 characters long. It can also be edited from the device tree.
The module name setting is applied by clicking the "Anwenden" button.
Clicking the "Alle Kommandos löschen" button deletes all the commands on the module.
The selection area for commands
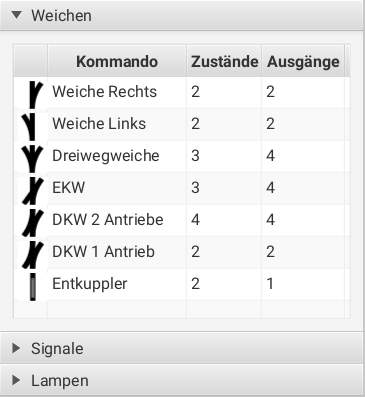
The command selection area lists all the available commands. The commands are divided into the categories turnouts, signals and lamps.
Every command is listed with its name, the number of states and the number of outputs it occupies.
For even more information about a command, you can leave the mouse over a command for a while. A tooltip appears with all the command's states.
To add a command to the module, it can be dragged and dropped onto a free area in the module.
Creating commands
Commands can be created on a LoDi operator module in two ways:
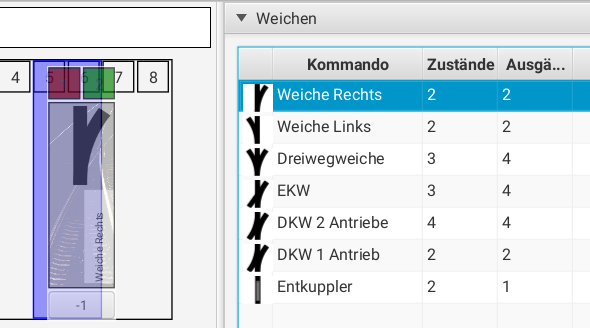
- Drag and drop: take the command from the selection area on the right and drag it onto a free area in the module. When the mouse is over a suitable slot in the module, that slot is highlighted. Drop the command by releasing the mouse button. The command is now placed on the module and is active immediately.
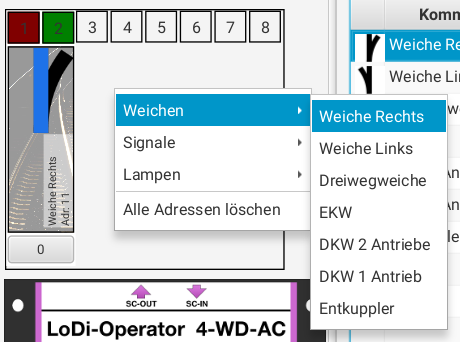
- Context menu: open the context menu over a free area of the LoDi operator module. Then select the command from the corresponding category in the context menu. The command is created automatically and is active immediately.
Moving commands
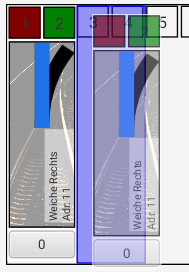
Commands can be moved around within a LoDi operator module. That is done by drag and drop.
To do that, click an existing command and move the mouse. A free slot is highlighted automatically as the mouse passes over it. Now release the mouse button. The command is moved to the new position if possible.
Deleting commands
Commands can be deleted in two ways:
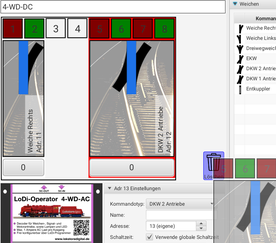
- Drag and drop: take the command to be deleted with the mouse and drop it over the wastebasket symbol at the bottom right. The command is deleted from the module. The outputs it previously occupied are inactive.
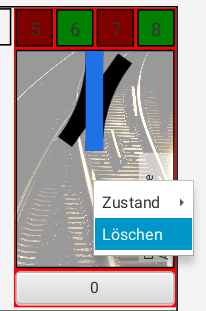
- Context menu: open a command's context menu and select the menu item "Löschen". The command is deleted from the module. The outputs it previously occupied are inactive.
Command settings
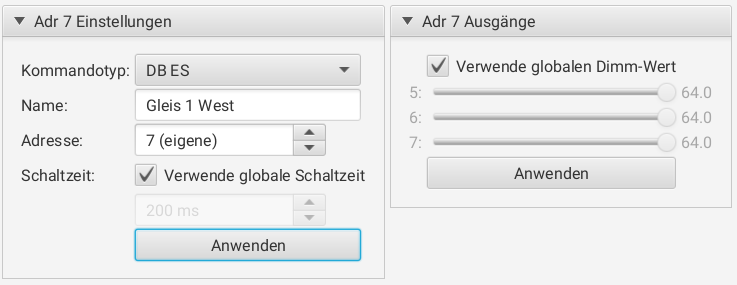
There are further settings for every command. They are activated by clicking the command in the LoDi operator module.
The settings area is present for every command. There are the following settings:
- Command type: the kind of command can be changed here. Only commands for which enough free outputs are available are shown. That lets you turn a DB departure signal into an entry signal, for instance.
- Name: every command can be given a name of its own, which may also be shown in the model railway control software. The name may be 16 characters long.
- Address: the command's address can be changed here. Only free addresses are offered. The address is assigned automatically when the command is created.
- Switching time: here either the global switching time set in the LoDi-Shift-Commander or a time of your own can be used. On many commands the switching time affects how long the sequence takes.
All settings are applied and become active immediately by pressing the "Anwenden" button.
The outputs area is only shown for the light bus.
- Use the global dimming value: selects between the global dimming value setting made in the LoDi-Shift-Commander and the individual, per-channel setting.
- Every output can have its own maximum dimming value. That lets differences in brightness between lamps be evened out, or created deliberately.

Any questions still open?
Would you simply like to ask us in person?
Or go to our forum, where experienced users are glad to help you further.